
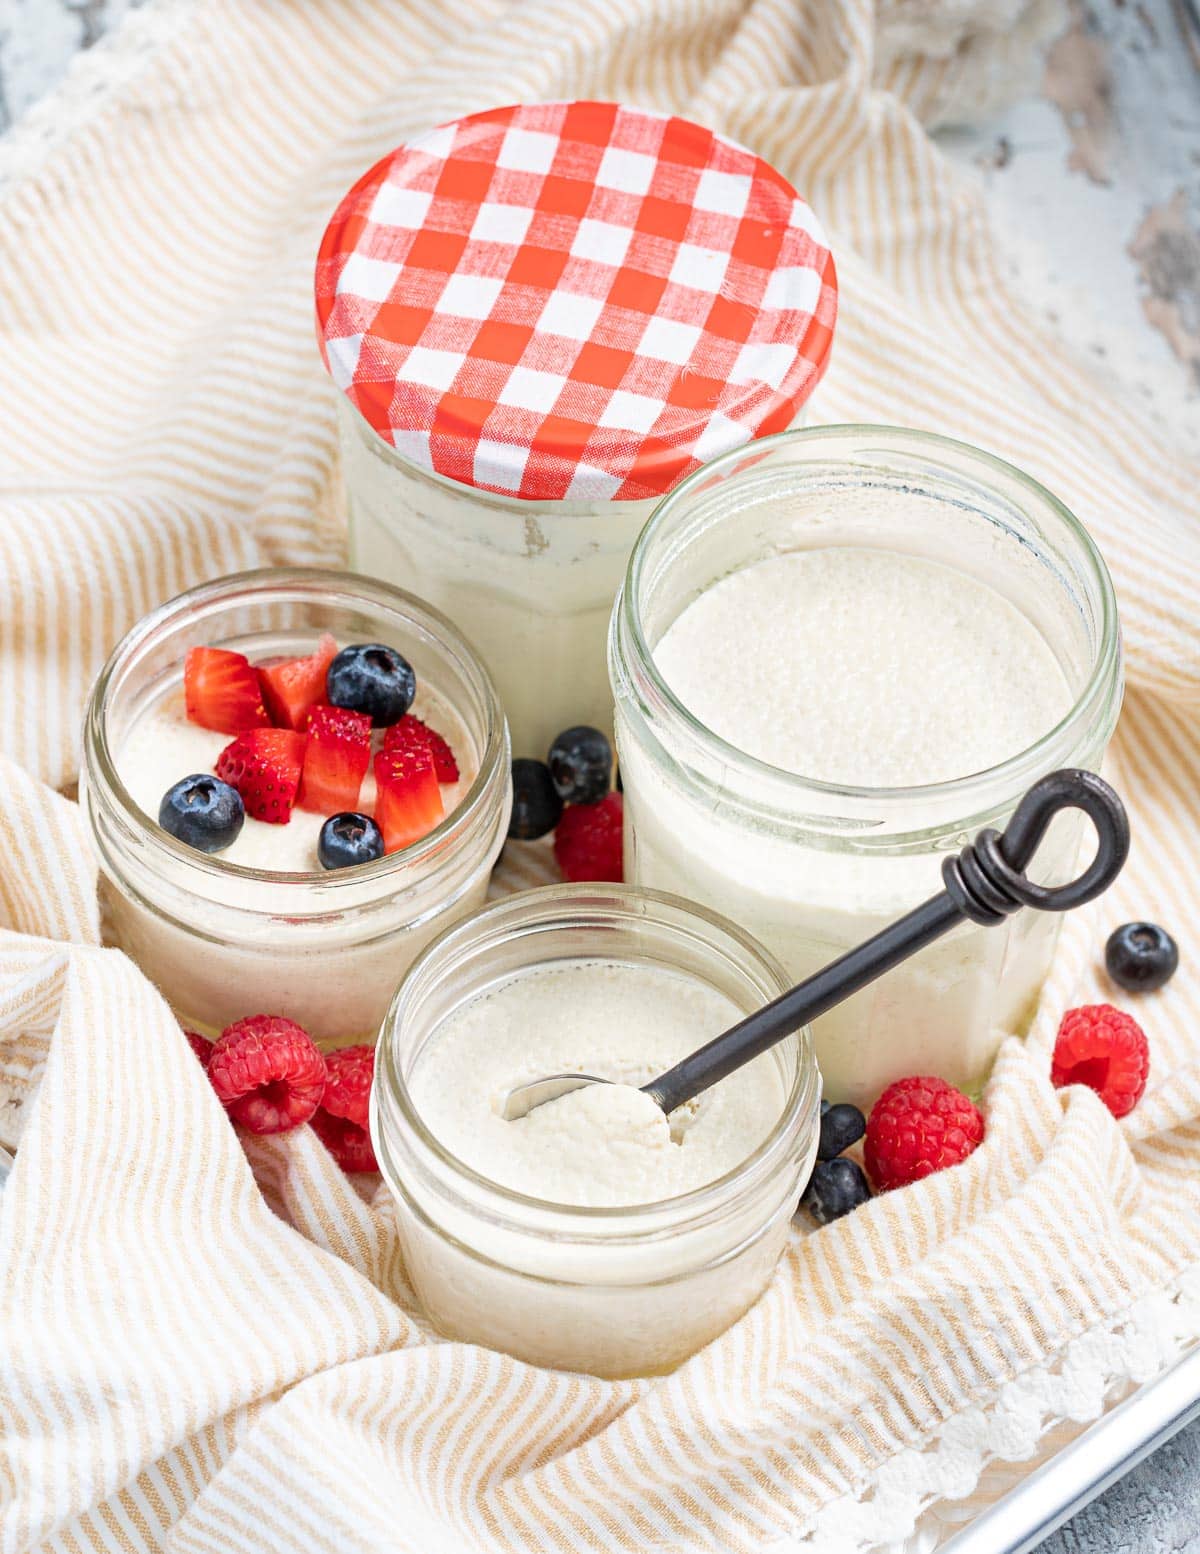
An easy cultured vegan yogurt recipe that's smooth, tangy, exceptionally thick & creamy, and perfect for dolloping on anything and everything! Easy to make with or without an Instant Pot.

💌 SAVE THIS RECIPE!
Watch out for more tasty treats coming your way! Unsubscribe at any time.
We're jumping back on the fermentation train for this vegan yogurt recipe. And it's a whole lot quicker and easier than making a sourdough starter or sourdough bread so you're A-Ok!
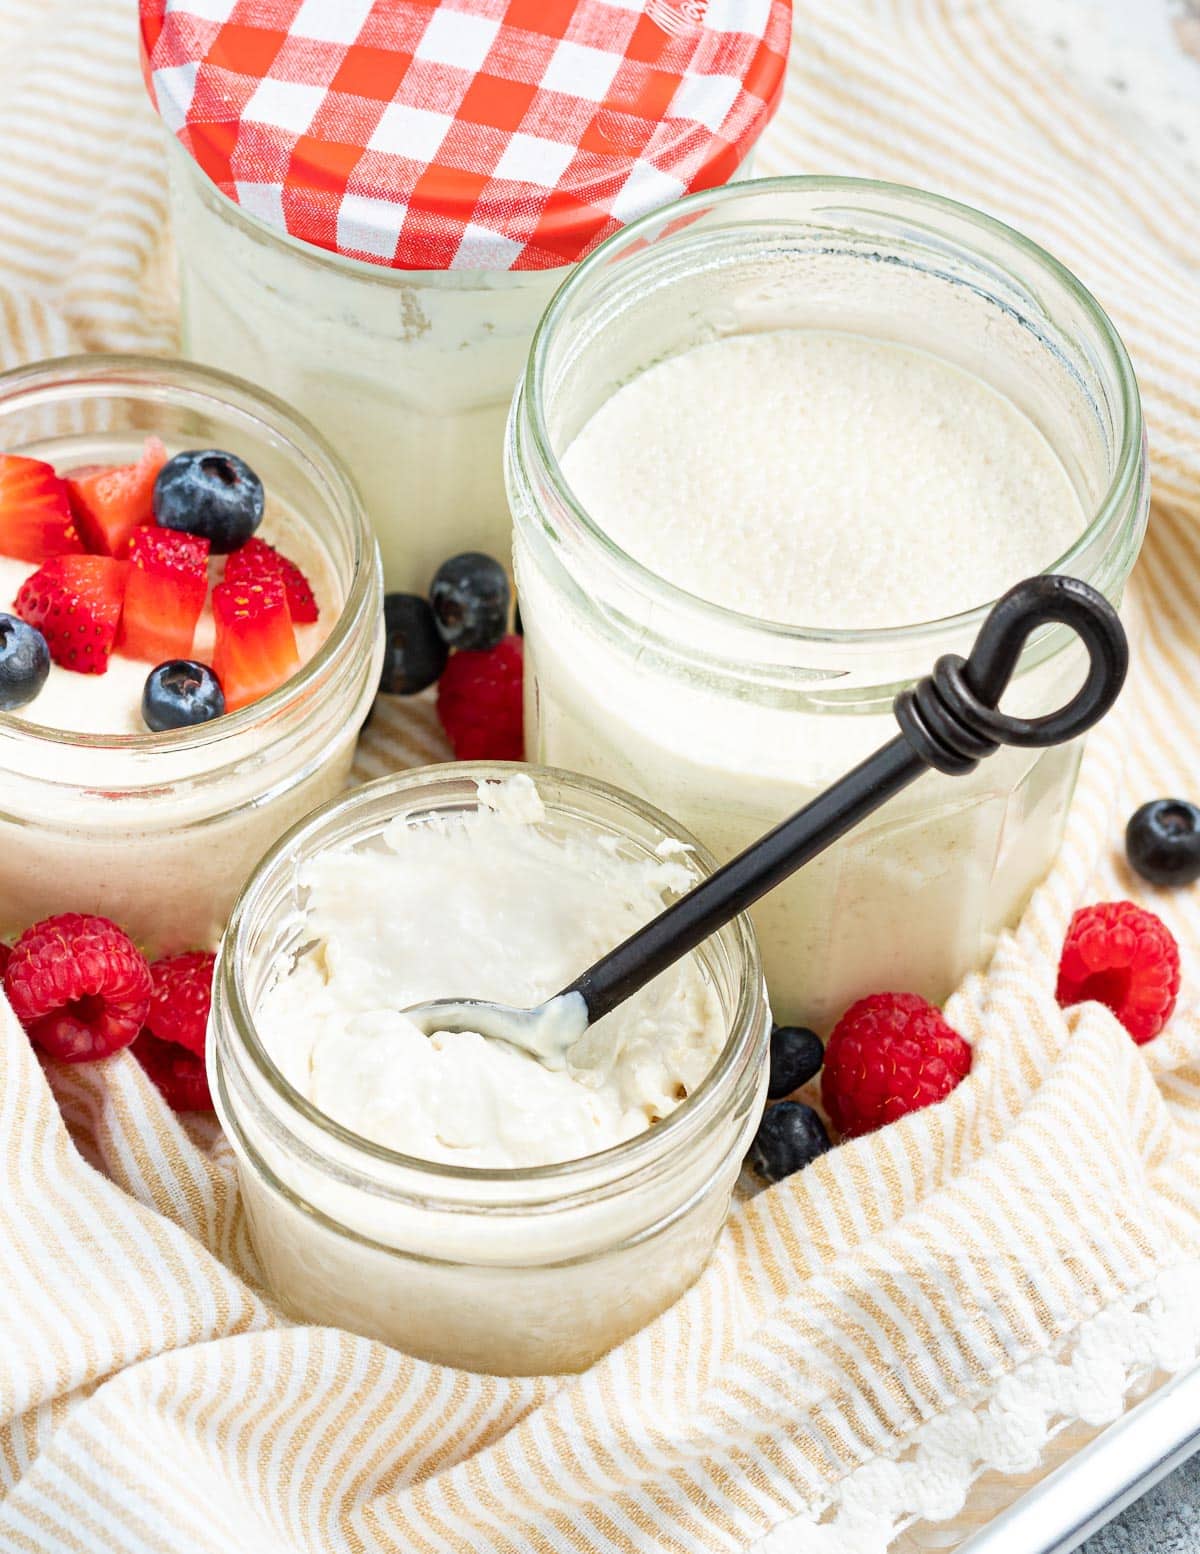
And this vegan yogurt is so good! We're talking sheer yogurt decadence. It's smooth and tangy, and unlike many other homemade vegan yogurt recipes, it is exceptionally thick and creamy.
Yep, this cultured vegan yogurt recipe is THICK. And it continues to thicken as it sits in the fridge. If you leave it there for a few days it becomes almost Greek yogurt-like. And you won't need any expensive probiotics, powdered starters, or thickeners like agar, tapioca, or xanthan gum to make it either!
Mel x
Jump to:

Ingredients
Are you wondering how you can possibly make vegan yogurt without probiotics or special yogurt starters? I'll let you in on my secrets.
These are the ingredients you need to make my vegan yogurt recipe and a little about why you need them:
- Light canned coconut milk - Light canned coconut milk gives consistent results and makes the yogurt rich, decadent, thick, and creamy without an obvious coconut taste. I do not recommend you use any other milk.
- Raw cashew nuts - These add a lovely cashew flavour and also work to make this yogurt extra thick and creamy.
- A tiny bit of store-bought vegan yogurt - This acts as the starter. It contains the live cultures that will ferment your yogurt. You only need this the first time you make it. For subsequent batches, you can use a little of your homemade vegan yogurt instead.
- Maple syrup - Maple syrup is always my first choice because it is so natural and unprocessed, but agave or white/cane sugar will work too. Sugar in some form is necessary for the bacteria to feed on. It won't make your yogurt sweet because by the time it is cultured the bacteria will have consumed it.
You will also need some glass jars with lids. I use cleaned up empty jam jars. I don't recommend making this recipe directly in the inner pot of an Instant Pot.
Do I Need An Instant Pot To Make Vegan Yogurt?
An Instant Pot with a designated yogurt button provides the perfect environment for making this vegan yogurt recipe and it is the quickest method too. You don't have to use one though. You can make it without an Instant Pot and instructions are included.
How To Make Vegan Yogurt
Want to know how to make the best vegan yogurt? It's much easier than you might think and you can make it with an Instant Pot or without one.
Here's exactly how it's done with step-by-step pictures:
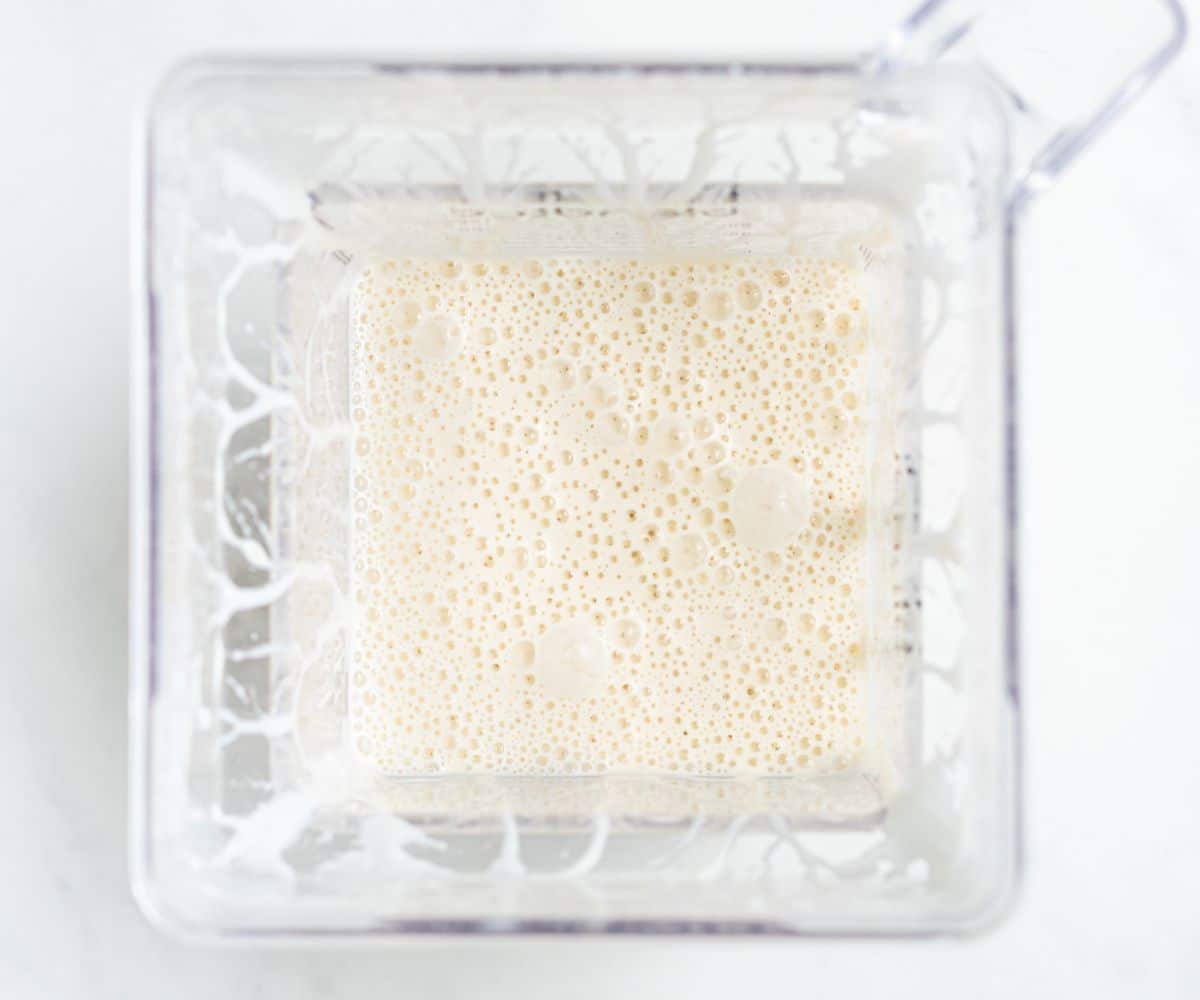
1 - Soak the cashews then add them to a blender with the other ingredients. Blend until completely smooth.
2 - Decant into jars then place in an Instant Pot on the yogurt setting or leave in a warm place to ferment.

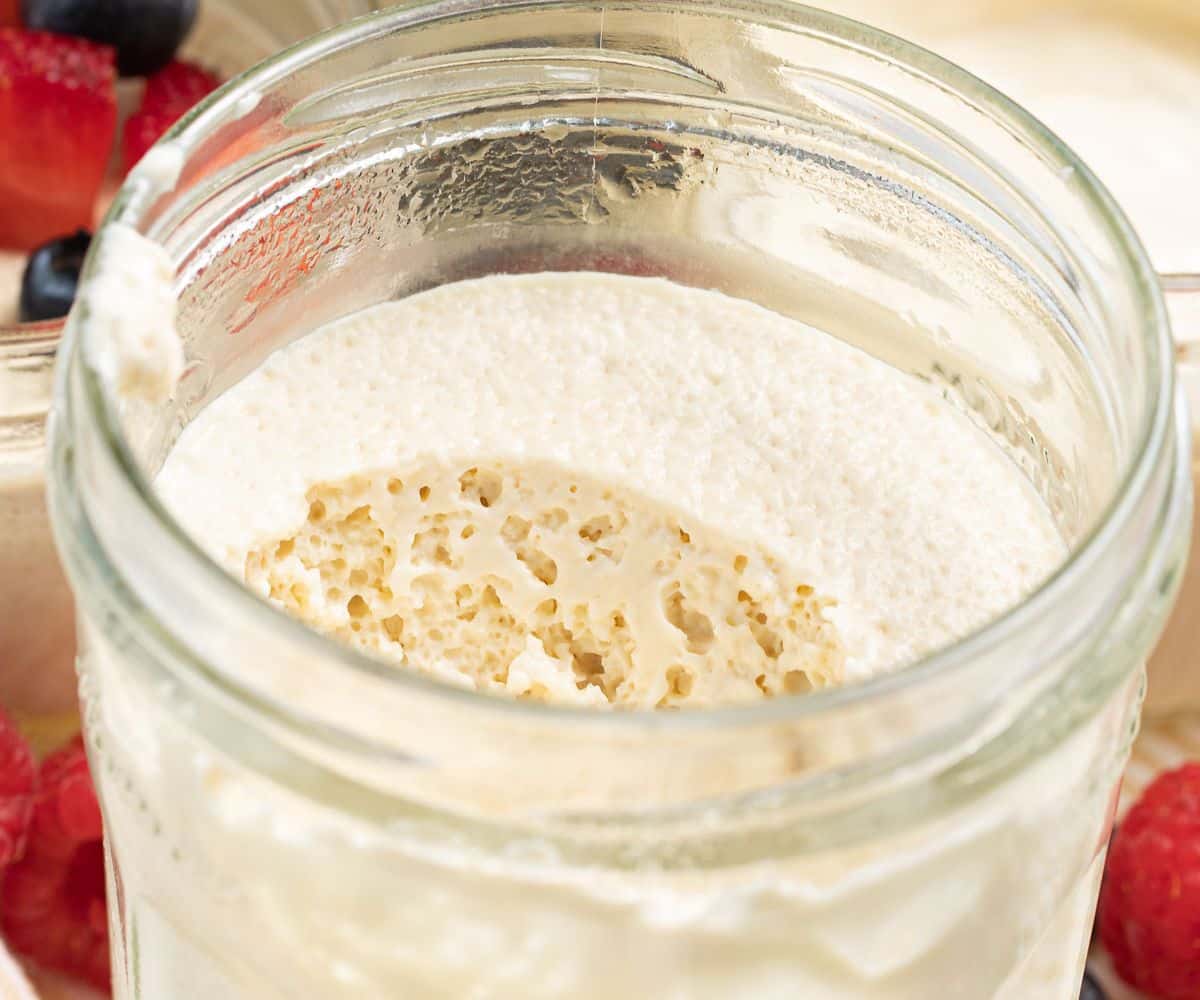
3 - Chill thoroughly before serving. When you remove it from the fridge it will be very thick. The longer you leave it there the thicker it will get. Here's what it will look like when you first spoon some out:
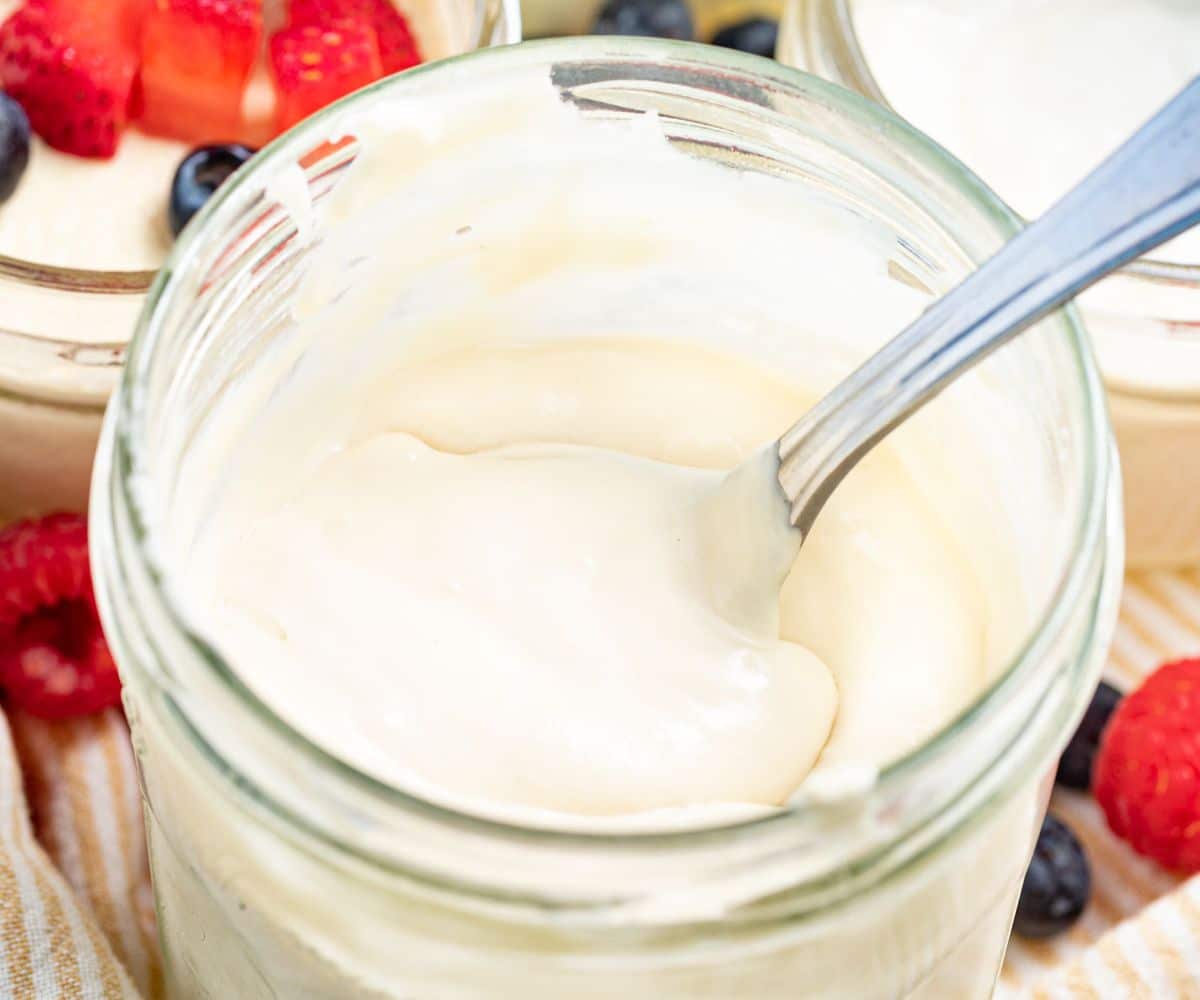
4 - Stir it and it will become super, silky smooth like this:
IMPORTANT! Before you eat it all remember to save a few tablespoons of yogurt to culture your next batch!
How To Culture Yogurt Without An Instant Pot
The easiest way to incubate and culture your homemade vegan yogurt is with an Instant Pot that has a yogurt setting. That will keep it at a consistent temperature with no effort from you. And it's no secret that I love my Instant Pot. I use it for something nearly every single day, including recipes like my Instant Pot Black Beans, Instant Pot Portobello Pot Roast and Instant Pot Tomato Soup and also for cooking rice, grains, and oatmeal, etc.
A yogurt maker will work well too and if you don't have either of those then you will need to keep your yogurt at a temperature of between 29 ° C (85 ° F) and 46 ° C (115 ° F). Anything below 29 ° C (85 ° F) and you'll have trouble getting it to culture.
It is also really important that the yogurt doesn't get close to or above 49°C (120 °F) because at that temperature the yogurt cultures will start to be killed off and the recipe won't work. Because of this I highly suggest you check the temperature of the yogurt's location with a thermometre before you start incubating it if you aren't using the controlled environment of an Instant Pot or yogurt maker.
Here are some suggestions for ways to keep your yogurt warm so it cultures successfully:
- Warm house? - If your house is around 29 °C (85 °F) or more you can leave the covered jars on your countertop away from direct sunlight and in a spot where they won't be disturbed.
- In your oven - Preheat your oven to 200 ° C (400 °F) for 1 minute then turn it off. Sit your jars on a baking tray and place them in the oven on the top shelf with the oven light on. Do not open the door for at least 10 hours or the heat will escape.
- Use your home heating - Place your jars of yogurt near (but not too near) the furnace, radiator, fireplace, and stove.
- On top of your fridge/fridge freezer - This is usually a nice warm spot and works well if you don't have built-in appliances.
- In the airing cupboard - If you are in the UK in an older house you might well have one of these.
- A warm closet - I have forced air heating in my house and the closets have vents inside that keep them warm. A spot like that would be ideal.
Yogurt Success Tips
- Follow the recipe exactly. Vegan yogurt is finicky. If you make any changes at all it might not work.
- Be sure to soak the cashews even if you have a high-powered blender. We want this yogurt super-duper smooth.
- Do not omit the sweetener. It is necessary for the bacteria to feed on.
- Canned light coconut milk should be used to make this vegan yogurt recipe. I don't recommend using full-fat coconut milk as it will make the yogurt too firm and it also tends to cause separation. Don't be tempted to buy full-fat canned coconut milk and dilute it yourself to make "light" coconut milk. That will not work in this recipe.
- Ensure the yogurt you use to "seed" your yogurt is a cultured/live one. Most are but double-check. If you don't like the results using a particular brand of yogurt try another one next time. Better quality yogurts will give better results.
- Makes sure everything is very, very clean.
- For this recipe, I recommend incubating the yogurt in glass jars. I do not recommend you make it in one big pot, like the Instant Pot's inner pot. This is because this yogurt gets the very best texture when it is completely undisturbed while it incubates and chills. If you stir it or disturb it you will lose the lovely thick, creamy texture.
- If using an Instant Pot do not set your jars on the trivet. They need to be directly in contact with the inner pot. Don't use the trivet at all.
- Don't use metal utensils, pots or bowls as there's a small chance prolonged contact with them could harm the bacteria in the yogurt.
- Try not to disturb the yogurt in the jars. It gets much thicker if you leave it well alone.
- I like to make my yogurt just before I go to bed. That way the incubation time happens while you sleep.
How To Flavour Homemade Yogurt
I don't recommend adding anything before culturing your vegan yogurt because it might hinder the process, but after it has cultured and chilled and you are happy with the tanginess feel free to stir through:
- vanilla or other extracts and liquid sweeteners such as maple syrup
- roasted strawberries, fruit jam, conserves, or fresh fruit
- vegan lemon curd, blueberry lavender sauce, or frozen berry compote
- defrosted frozen berries
- date caramel
- stewed or canned fruit, applesauce, or apple butter (I have recipes for Instant Pot Apple Butter, Stovetop Apple Butter, and Slow Cooker Apple Butter).
Serving Suggestions
Uses for vegan yogurt are wide and varied. I suggest keeping a jar in the fridge at all times so that you can eat it on repeat for breakfast, snack, and dessert!
My favourite ways to enjoy yogurt include:
- With spicy curries like my Chickpea Lentil Curry or Red Lentil Dal.
- In my Emergency Strawberry Cheesecake Bowl and Cheat's Banoffee Pie Bowl.
- In Bircher Muesli or my Emergency Strawberry Cheesecake Bowl
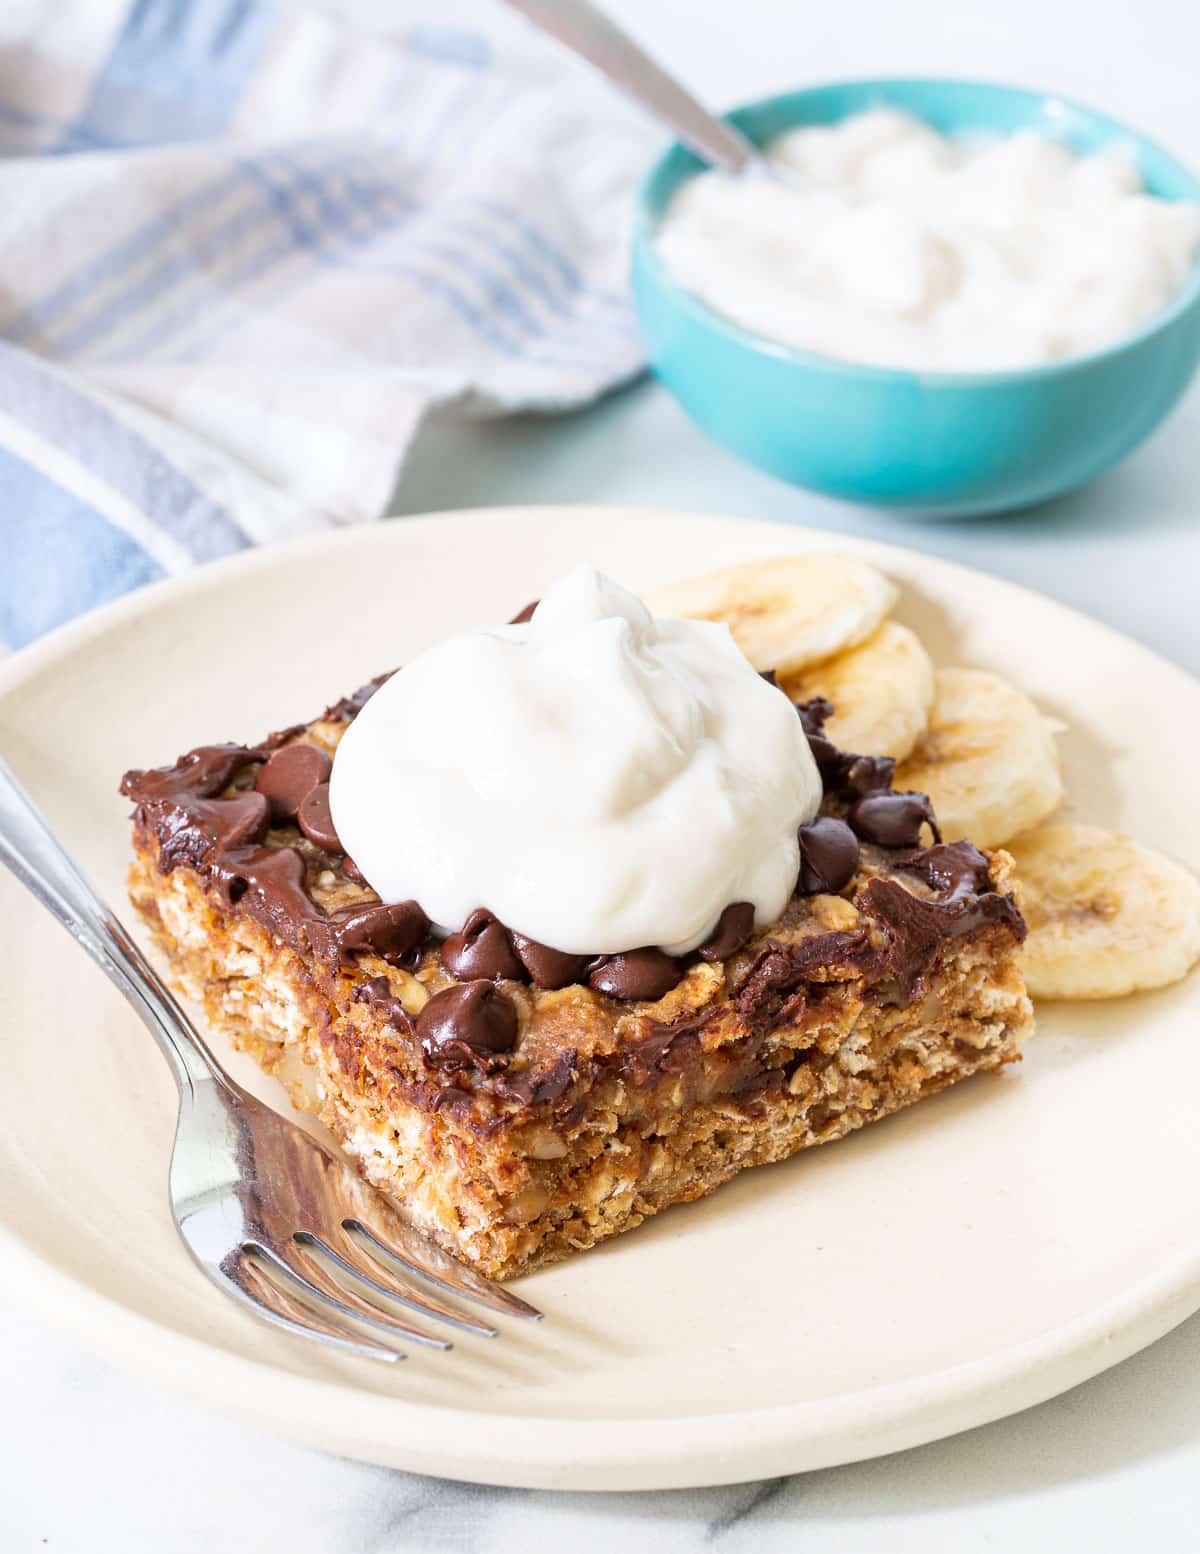
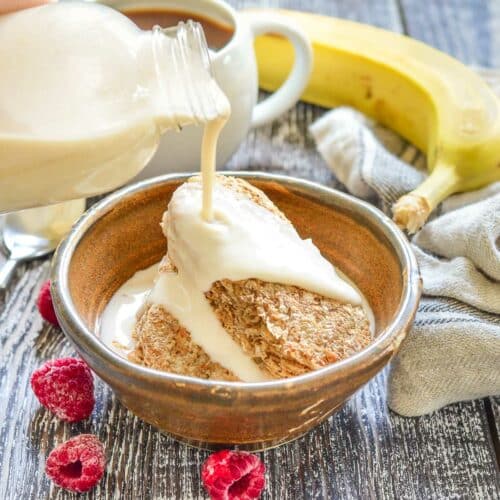
- On pancakes or waffles or healthy breakfast bars (pictured above).
- In smoothies
- With vegan granola or chocolate coconut granola and fresh fruit
- As an ingredient in sauces, dips, and baked goods like my Vegan Apple Cake recipe.
What Makes This Yogurt So Thick & Creamy?
If you've made vegan yogurt in the past you've probably found that it usually turns out quite thin and you might be wondering what you can do to thicken your homemade vegan yogurt.
It's hard to make thick vegan yogurt without adding a thickener of some kind. Store-bought vegan yogurts all contain them. The most common thickeners are agar, tapioca flour, or xanthan gum.
In this recipe though we blend soaked cashew nuts into the light coconut milk to naturally thicken the yogurt. The combination of the creamy canned coconut milk, the cashews, and the fermentation process makes it a really thick and creamy vegan yogurt.
Recipe FAQs
Most vegan yogurt contains the same gut-friendly probiotics that non-vegan yogurts do, including this recipe, which when made the first time is "seeded" with probiotics from a store-bought yogurt and then cultured.
Not at this time. I have only tested this yogurt with cashew nuts. If you use anything other than cashew nuts I cannot guarantee that the recipe will work. I think it should work if you omit the cashews but the yogurt will be much thinner. Please note that I have not tested it that way though so if you try it you do so at your own risk.
A lot of plant-based milk will not make successful yogurt. This recipe works well and consistently when using light canned coconut milk. I do not recommend using any other milk as there is a good chance it will not work well or even at all.
There is a chance that despite your best efforts you might get some separation occurring. Just stir it in and pop the jar back in the fridge. Often that's enough to get it to stay nicely homogenized.
If there's a lot of separation you have 2 options:
Scoop off the creamy top, put it in a clean jar and discard the watery part.
Strain it. Line a sieve with cheesecloth and sit it over a bowl. Pour in the yogurt and cover the top with a clean, fluff-free cloth or more cheesecloth. Place the whole thing in the fridge for 24 hours. The liquid will slowly drip out into the bowl leaving you thick and creamy yogurt in the sieve. Once 24 hours have passed, scoop the creamy yogurt into a lidded jar.
Use it in place of milk, sour milk, sour cream, buttermilk, evaporated milk or yogurt in any recipe. Add it to smoothies. Use it as the liquid in pancakes, waffles, cakes or muffins.
If it smells funky (cheesy or foul) or if there is any mould in it then it is important you don't eat it. Discard or compost it.
This is likely either temperature related (it was too warm or too cold), the yogurt you used to "seed" it wasn't a live one with probiotics in it, or the yogurt you used to "seed" it wasn't stored correctly either before or after you got it and the bacteria were no longer active.
Sugar is necessary for the bacteria to feed on so you need to add it in some form. Agave or white or cane sugar will work. Don't use dark-coloured sugar because it will affect the appearance of the yogurt.
Did you omit the maple syrup? This is necessary for fermentation. Without it the bacteria will start dying off before the fermentation process has completed. When this happens an "eggy" sulphur smell can occur. Not sterilizing things properly can also cause issues.
Recipe

Vegan Yogurt Recipe
Author:Ingredients
- 1 cup (140 grams) raw cashew nuts
- 1 standard can (400ml / 13.5 oz) light canned coconut milk (this recipe won't work well with any other milk)
- 2 tablespoons vegan yogurt , It must contain live probiotic cultures. Note that you only need store-bought yogurt the first time you make this recipe. For subsequent batches, you can use your homemade yogurt.
- 2 tablespoons maple syrup , or agave or the same amount of white or cane sugar (do not omit)
RECOMMENDED EQUIPMENT
INSTRUCTIONS
- Make sure everything you will be using is scrupulously clean. I run my glass jars, and lids through the dishwasher on the hottest setting. You can also wash them in hot soapy water and put them on a baking tray in an oven at 135 °C (275°F) for 15 to 20 minutes or clean the jars in hot soapy water, rinse them, then put them still drippy and wet into the microwave. Microwave on high for 45 seconds (do not put metal lids in the microwave - Soak them in boiling water). I also wash my blender jar in hot soapy water, then rinse and fill it with boiling water, let it sit for a few minutes then pour it out.
- Put the cashews in a small bowl and cover them completely with boiling water. Leave them to soak for 20 to 30 minutes. Don't skip this step.
- Run boiling water through your sieve then drain the cashews and add to a blender. Add the light coconut milk, yogurt, and maple syrup. Blend until completely smooth.
- Decant the mixture into clean and dry glass jars. You cannot make this in the metal Instant Pot insert. Any combination of jar sizes that will hold a total of about 600ml (just under 3 cups). Make sure the jars you choose fit easily together inside the metal inner bowl of the Instant Pot before you start filling them.
- If using an Instant Pot - Place the uncovered yogurt filled jars into the metal inner pot of the Instant Pot. Do not use the trivet and do not add any water to the pot. The jars should be in direct contact with the bottom of the pot and have no lids or other covering on them. Place the lid of the Instant Pot on and close it, then close the steam vent. Press the yogurt button (check that the display says "normal" and not "boil", then adjust the time depending on how long you would like your yogurt to ferment. I suggest a minimum of 10 hours. That will give you a nice thickness and a slight tang. 11.5 hours will give you a more pronounced tang. Do not disturb the Instant Pot/yogurt during this time. You can check it after 10 or 11 hours though. Use a spoon to take a little bit from one jar (without stirring it up first)and taste it. Put the Instant Pot back on again for another hour or two if it's not quite tangy enough.
- If you don't have an Instant Pot - Cover the filled jars with cheesecloth, clean fluff-free dish towels/cloths, any clean breathable fabric, or paper towels and elastic bands or string to hold it in place. To culture successfully you need to keep the yogurt at a consistent temperature of anywhere between 29 ° C (85 ° F) and 46 ° C (115 ° F). If your house is 29 °C (85 °F) or more you can leave the covered jars on your countertop away from direct sunlight.If your house is cooler than that, turn your oven to 200 ° C (400 °F) for just 1 minute and no longer. Then turn it off and turn the oven light on. Place the covered jars on a baking tray (for stability) in the oven on the top shelf, with just the oven light on. Do not open the door while it is culturing or you will let the heat out. Also make sure that no-one turns the oven on. A note stuck to the door is a good idea. Do not disturb the yogurt while it is culturing. At 38 ° C (100 °F) the yogurt will take between 10 to 12 hours to culture, thicken nicely and get a good tang. If the temperature is cooler than that it will take longer and if it's warmer then it will happen more quickly. I suggest testing it by scooping a tiny bit out and tasting it after about 10 hours, then add on more time if you want it to be tangier. If you don't use an Instant Pot or yogurt maker which will control the temperature and keep it consistent, I would highly suggest you check the temperature of your chosen location with a thermometer. It is really important that the yogurt stays consistently between 29 ° C (85 ° F) and 46 ° C (115 ° F). If it doesn't the recipe will not work.
- Once the yogurt has incubated and has reached the right amount of tanginess for you, cover securely with a lid and refrigerate thoroughly. Do not stir it. For best results it needs to be undisturbed until completely chilled. It will thicken more as it chills and will continue to thicken the longer you leave it before eating.
- Remember to save a few tablespoons of your yogurt so that you can use it to culture your next batch of homemade vegan yogurt.
- If you prefer a sweet yogurt, add more sweetener after the yogurt has fermented and chilled and not before.
NOTES
💌 SAVE THIS RECIPE!
Watch out for more tasty treats coming your way! Unsubscribe at any time.
Carin says
I have been searching for a coconut yogurt that actually works and this one is it! I did strain mine since I prefer a thicker yogurt. The recipe was super simple with fantastic results. This is a keeper!
Dee says
How long is a new batch of starter good for? Does it go bad?
Melanie McDonald says
You don't need starter for this recipe.
GinnyB says
I doubled the recipe and cultured in two 1-liter Weck jars. I used regular granulated sugar as I didn't have any maple syrup. After twelve hours, the yogurt was beautifully thick and creamy but tasted quite sweet. I let it culture another six hours, at which point it was nicely tangy but still kind of sweet. After chilling overnight, my DH and I both tasted it. We liked it very much but decided it would only work for sweet applications. I'll have to continue using my homemade soy yogurt for things like raita and other savory sauces, etc. Do you think using one large jar for each batch had anything to do with the final sweetness, despite the long culturing time? Also, I weighed the cashews to be sure and used Thai Kitchen lite coconut milk.
Melanie McDonald says
I think probably doubling the recipe and using big jars might be the reason. The bigger the jar the longer the heat will take to permeate the yogurt so the longer it will take to ferment properly.
Also during fermentation, the bacteria eat the sugar. Maybe yours just didn't ferment long enough.
Did you use a measuring spoon to measure the sugar? If not there could have been a tiny bit too much.
Having said that, maple syrup isn't as sweet as sugar which is why it's my preferred choice for this recipe. So even if the bacteria haven't eaten all of the sugar during fermentation it won't be as sweet as it would with sugar. When I make it I can't detect any sugar sweetness, just natural very slight cashew/coconut milk sweetness.
Hope that helps!
Lois Davies says
Hi there!
Thank you so much for this recipe. I recently got a yoghurt maker and have been excited to try it. I followed the recipe exactly, sterilised everything, did it in small batches in glass jars and left it for 11 hours, but it didn't solidify (still liquidy, albeit sour). Any thoughts on what I've done wrong? Perhaps I should use more of the vegan yoghurt (?) but did add the recommended two tablespoons. I hope you can help - I'm keen to get it right! Thank you! From London, UK
Melanie McDonald says
The fact it's sour is a good sign. Maybe it just needed longer? Check your manual and see how long it says to culture the yogurt for. It could run at a different temperature to an Instant Pot's yogurt setting. I'd try again and leave for an extra couple of hours. You could also up the cashews a bit and reduce the light coconut milk to make it thicker. Just keep the total quantity roughly the same.
JR says
HI! Thank you for this recipe! If we do not do this perfectly the first time (I.e. Temperatures are slightly off) is there a danger or risk if we still consume the yogurt? Or is it just a taste/consistency issue? New to yogurt making and don't want the store brands! Thank you!!
Melanie McDonald says
It should be fine as long as you store it in the fridge once it's ready. You can tell if yogurt is off by smelling it. As long as it smells fresh and yogurty, and not funky, and there is no mold present then it should be fine.
Leanne says
Would you please try this using almonds or sunflower seeds? Allergic to cashews. Thanks.
BatSheva says
I have an excalibur food dehydrator. What tempurature is the best to make the yogurt on so that it will stay thick? It goes from 95 and up F.
Melanie McDonald says
The best temperature to ferment yogurt is between 29 ° C (85 ° F) and 46 ° C (115 ° F). I believe the Instant Pot yogurt setting is about 43°C (110 °F). I've never used a dehydrator though so I have no idea how well it will work for yogurt.
SJTK says
I have an instant pot but it doesn't have a yogurt button. Is there another way I can make it in the instant pot?
Melanie McDonald says
I don't know but I doubt there is a setting on the Instant Pot that's cool enough without the yogurt button. They would all be way too warm and kill the good bacteria that are necessary to ferment it.
Carol Bradstreet says
I have a question. I have some live vegan yogurt culture in my refrigerator. If I use that, will I need to adjust anything else? It's less than 2 tablespoons, so the volume would be different. It's also in a powder form. Thanks in advance! I've made other recipes for vegan yogurt, and they were just too runny for my taste. I'm looking forward to trying this recipe.
Melanie McDonald says
I've never used powdered yogurt culture so I can't advise on the amount that would be needed. I would suggest using the amount it suggests on the packet/box. This recipe makes roughly 3 cups or 720 ml. I'd use that amount to calculate it. It is important to get it right amount. Not enough and it won't ferment properly, too much and there won't be enough food for the excess bacteria. Hope that helps!
Kathleen Joan Taylor says
Hello,
Before attempting this recipe, I 'd like to know what light means in terms of fat content. Also, I note you say canned while light coconut milk is only available in cartons where I live, namely Suzi Wang, Kara and Ayam. The cans all contain the full fat version. Does that make a difference?
Idem if the mild is sterilised at high temperatures or guar gum added?
Thanks in anticipation of your kind reply.
Regards,
Melanie McDonald says
It does make a difference if you use full fat coconut milk. It doesn't work as well in this recipe.
I'm sorry but I am not familiar with coconut milk in cartons or any of those brands so I have no idea how it will compare and whether it will work in this recipe. Here, full fat and light canned coconut milk is very easy to come by. The only coconut milk we get in cartons is the very diluted kind for drinking that's comparable to soy milk and cashew milk etc.
If your carton coconut milk is the equivalent to what's in our cans then it should be fine to use, but I can't guarantee as the recipe hasn't been tested with it.
I don't have a can of light coconut milk handy to check the fat content but I just checked online and it varies by brand but it roughly between about 15 grams per cup (240 ml) to 21 grams per cup.
It doesn't matter if it has guar gum added or not for this recipe. It was thoroughly tested with coconut milks that contained it and didn't contain it and it was fine with either, hence the reason it's not mentioned in the recipe.
I have no idea if canned coconut milk is sterilized at high temperatures.
Hope that helps!
Sarah says
When making it in jars, can you just use 1 big jar? Or do you need to do it in signs serve jars?
Thank you.
Melanie McDonald says
Any combination of jar sizes that will hold a total of about 600ml (just under 3 cups) is fine. I will say though that the bigger and deeper your jar is, the longer the yogurt will take to ferment and get nice and tangy because the warmth will take longer to permeate through it all and get it going. With smaller jars it will be quicker.
Meena says
Any substitute for cashews? We’ve allergies to cashews in the family.
Melanie McDonald says
I have only tested this yogurt with cashew nuts. I think it should work if you omit the cashews but the yogurt will probably be runny. Please note that I have not tested it that way though so if you try it you do so at your own risk and I can't guarantee it will work.
Kelly says
Excellent and easy! I am not vegan, but have been on a quest for decent tasting non dairy yogurt. I've read the reviews and tried the best rated ones, but they simply can't compare to dairy yogurt. This one is by far the best I have tried. The instructions are fabulously detailed and it was very easy to make. I used the instapot for 11 hours and would have let it go longer to get a big more tangy. But the consistency was good. Overall, it is a keeper especially because you don't need odd ingredients or probiotics.
Gwynne says
Can you make the yogurt directly in the stainless pot? Or does it absolutely need glass jars?
Thank you
Melanie McDonald says
Copied and pasted from the post:
"For this recipe I recommend incubating the yogurt in glass jars. I do not recommend you make it in one big pot, like the Instant Pot's inner pot. This is because this yogurt gets the very best texture when it is completely undisturbed while it incubates and chills. If you stir it or disturb it you will lose the lovely thick, creamy texture."
Sophie says
I made two batches of this recipe over the last couple of days. The first was ok but the second was way better. I used ground almonds in the first one because I was feeling lazy. Big mistake. Don’t do that. It tasted nice but had a gritty texture, not surprisingly. Saying that, I totally forgot to soak the cashews for the second lot! I blended the mix for a good few minutes however and it came out beautifully smooth. Apart from the texture of the first lot, both were beautifully thick although a skin formed on the top in each case. Not that I minded, just thought I’d mention it. I used Alpro Soya Yogurt for the live cultures and fermented for 11.5 hours in individual glass jars (about 110ml each) using the yogurt setting on my bread machine and the “tangy-ness” was spot on. When the time was up I put them straight in the fridge and they came out silky smooth and deliciously thick. The only down side, if I were pressed to give one, would be the calories (thanks to the cashews) weighing in at 240 each. This isn’t a problem if you just want a dollop on top of some berries but for a stand-alone pot of yogurt I think 110ml is a decent portion size so these do score high on that front. They will be an occasional treat. Yum ?
Jody says
Does the maple syrup leave an obvious maple syrup flavour in the yogurt? If yes, can you think of anything that be substituted for it? honey, agave syrup, etc.
A Virtual Vegan says
You can't taste it. It's just there as food for the bacteria and dissipates as the yogurt ferments. It's explained in the post and alternatives to maple syrup are given in the recipe. I don't recommend honey as it's not vegan.
JoAnne says
Is it possible to make yogurt with dried coconut? I have loads of dried coconut flakes and would love to find a recipe, but all I can find are ones with canned coconut milk. Thanks for any help you can offer.
A Virtual Vegan says
This recipe won't work with dried coconut. You absolutely need the canned coconut milk.
JoAnne says
You are such a dear to respond so quickly. Thank you for that information.
Venus28 says
made this for my dairy free baby. super easyand he loved it
A Virtual Vegan says
That's awesome. I'm really pleased he enjoyed it!
Giorgia says
Hi!
I'm really eager to try this recipe, it looks really well thought out and the amount of information makes it really clear to understand.
I don't have an instant pot, but I was wondering if you think it would work in a slow cooker, and if so, if you would recommend to put the jars directly into the pot as you recommend we should with the instant pot.
Thanks!
Giorgia
A Virtual Vegan says
I don't have a slow cooker so have never tried it, but they definitely run a lot hotter than an Instant Pot with yogurt mode. You might be able to modify things a bit, maybe by having the jars sit on thick folded up cloth and leaving the lid off? If you sit them directly on the bottom there is no question that it will be too hot and kill the bacteria. The only way to get it absolutely right though is to get a thermometer and measure the temperature in there. It needs to stay at a consistent 29 ° C (85 ° F) to 46 ° C (115 ° F) to work.
The oven with just the light on should work ok too. I hope that helps!
Giorgia says
Thank you! It does help!
Candela says
Has anyone tried making it with homemade coconut milk? I cant find canned coconut milk where i live