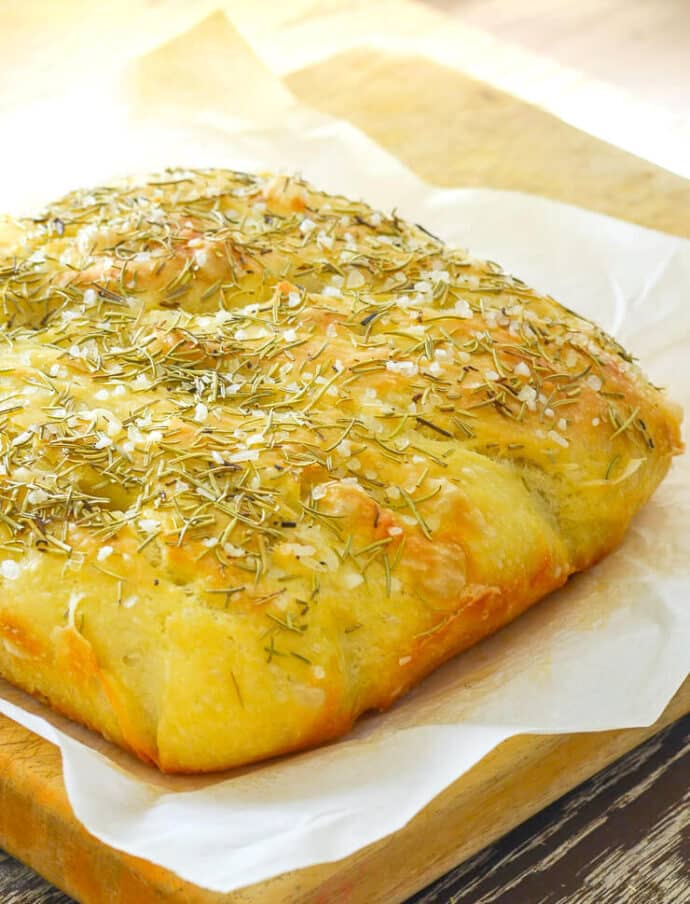
Completely foolproof No Knead Focaccia bread. It is so easy! Mix everything up in a bowl with a spoon, leave for a few hours, then bake!
💌 SAVE THIS RECIPE!
Watch out for more tasty treats coming your way too! Unsubscribe at any time.
FEATURED COMMENT
"Well, now you are making me feel like a REAL BAKER!!! I tried making foccacia a few months ago using someone else's recipe and it was a BIG FAIL. This recipe of yours, as are all your other recipes is perfect! Thank you, Mel! I've never made such delicious "fancy-feeling" bread and the rosemary and flaked salt on top are ideal! " - Mandy ⭐️⭐️⭐️⭐️⭐️ More reviews →
Good bread is one of my favourite foods, especially fresh from the oven and slathered in my Easy Vegan Butter or dipped in good olive oil and balsamic vinegar.
I realize that when it comes to yeast and bread baking a lot of people are wary because they think it's not easy. And that can be right. Some breads are difficult to make. But, this easy focaccia is different. It is virtually foolproof. If you can put some ingredients in a bowl and stir them all together then you've got this!
The only hands-on time needed is a couple of minutes to mix the flour, yeast, salt, and water with a spoon, and later, a couple of minutes to scrape the dough into a pan and drizzle with olive oil then sprinkle with rosemary and salt. No kneading. No shaping.
You can mix it up before you go to bed at night and then bake it in the morning, or you can mix it up in the morning, head off to work, then bake it when you get home. Either way, you are this close to fresh Rosemary and Sea Salt Crusted Focaccia perfection!
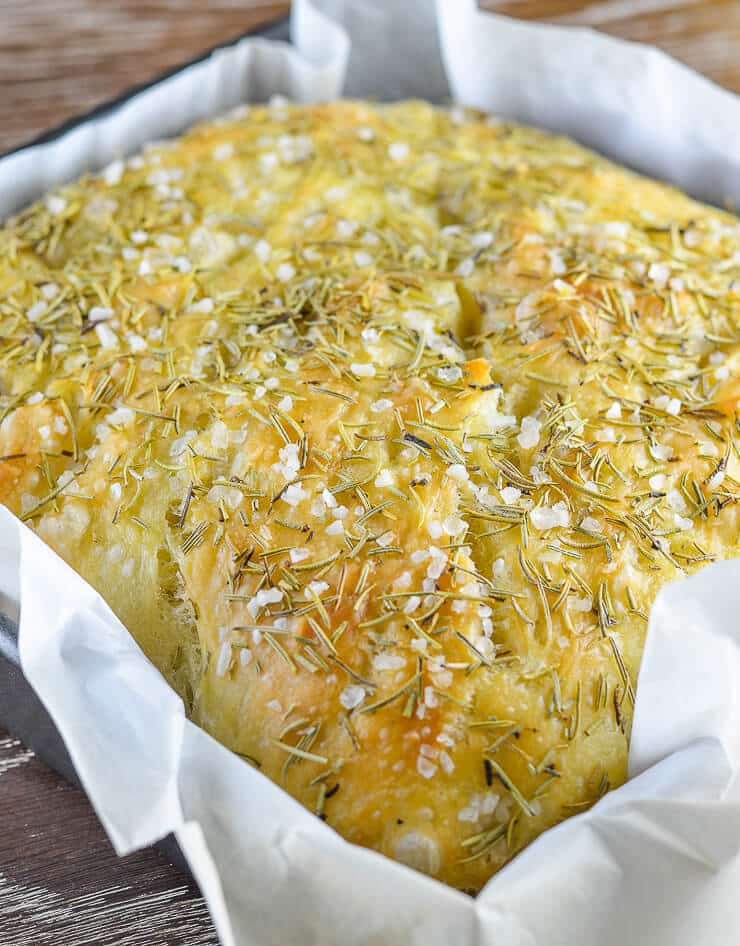
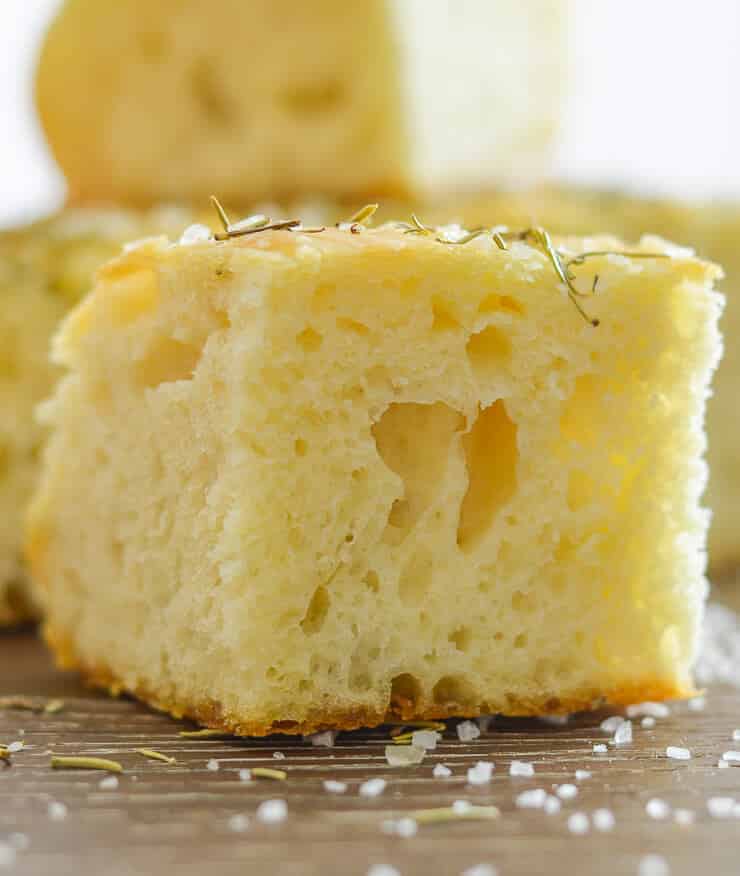
The rosemary-infused focaccia bread smell that permeates your house while this little miracle bakes is the stuff of dreams. It smells amazing! When you break into that salt and rosemary scattered crust you will find a soft and fluffy interior that is just begging you to eat it. All of it. Now!
If you love no-knead bread recipes check out my Easy No-Knead Vegan Dinner Rolls. They are so good and ridiculously easy too!
Mel x
Ingredients
Here is what you need at a glance, along with some important ingredient notes & substitution ideas:
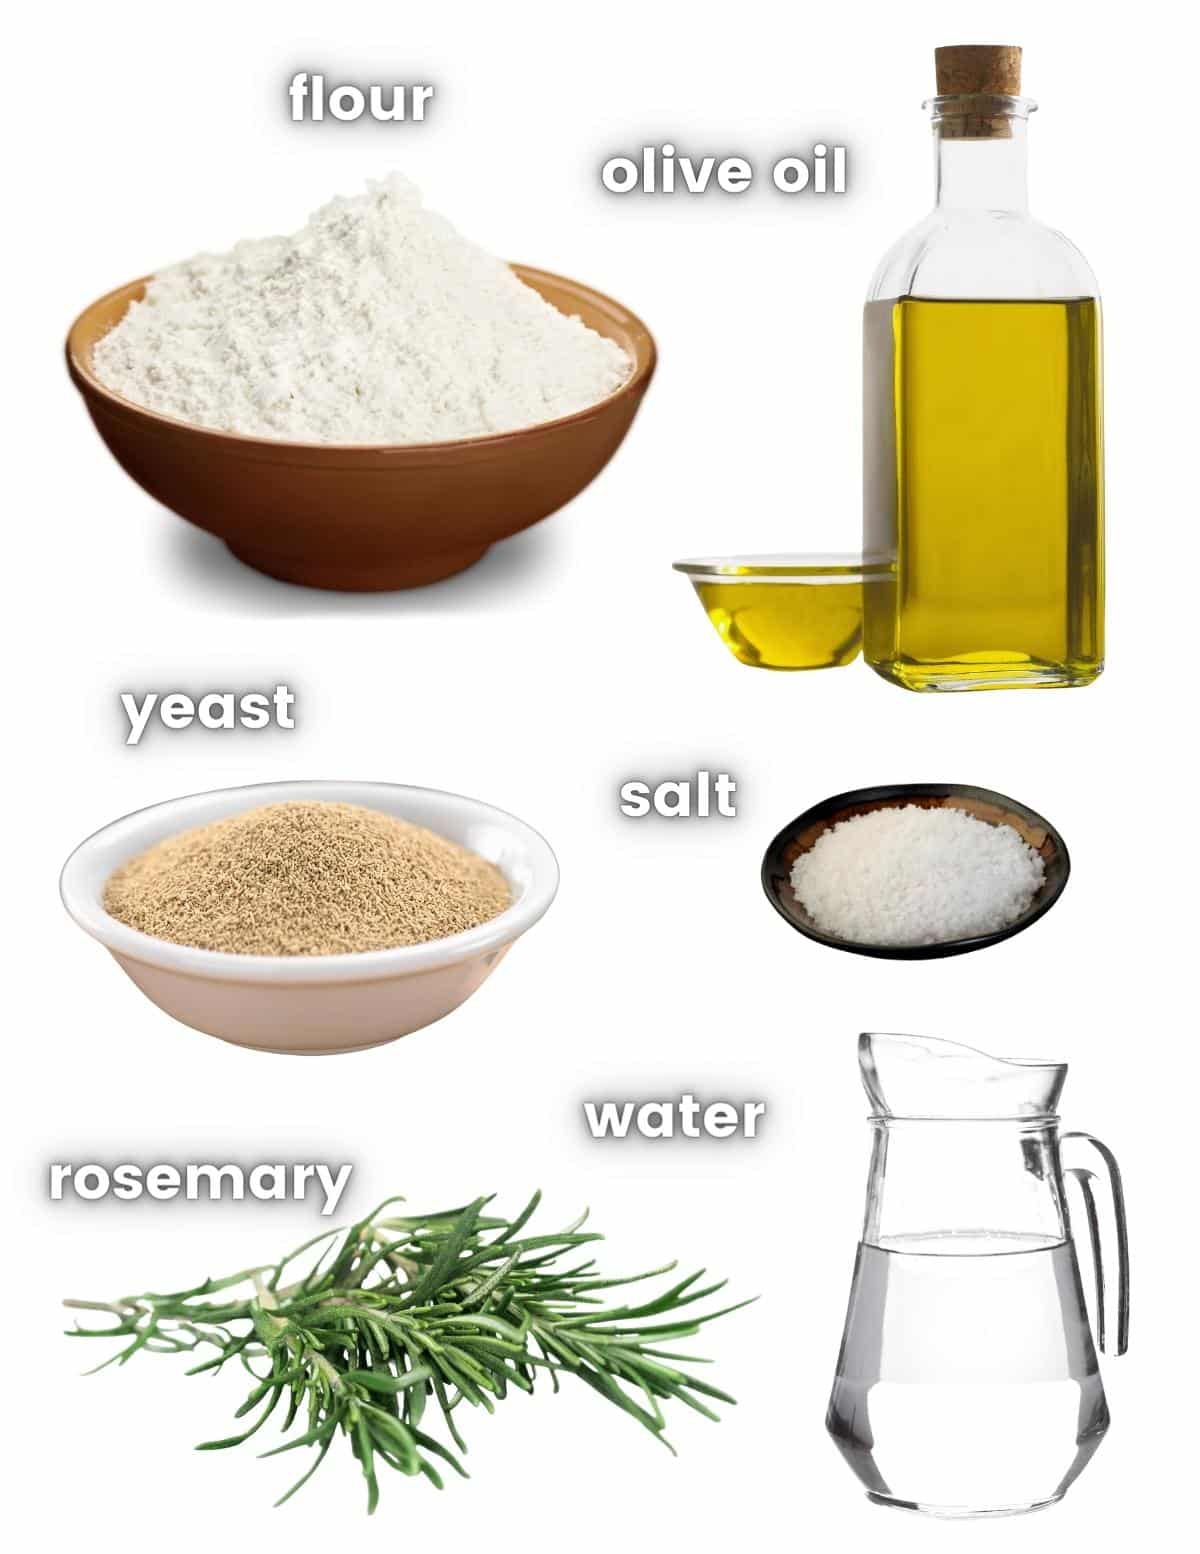
- Flour - You can use all-purpose flour or bread flour in this recipe. If you are in the UK you need to use strong flour. I have only tested this recipe with white flour. It might not work the same with wholewheat or spelt flour.
- Olive oil - I recommend using a good quality extra virgin olive oil for the best possible flavour.
- Yeast - You can use quick/fast action yeast or active dry yeast.
- Salt - I use fine sea salt in my recipes. If you use a salt that is not fine you will need to weigh it rather than use teaspoon measures as the volume is different. It's important to use the correct amount of salt in bread recipes because it can affect how the yeast works. I also like to sprinkle this focaccia with some good quality flaky salt for extra texture and flavour. Maldon Salt is my favourite for finishing bread/dishes.
- Rosemary - You can use fresh or dried. Fresh gives the best flavour though.
Let's Make No Knead Focaccia!
All you need to make Easy No Knead Focaccia Bread is a large bowl, a spoon, a metal pan (like an 8 x 8-inch square, or an 8 x 12 inch, or a round 8 or 9-inch cake pan), and some patience.
Here's how it's done in a few easy steps:
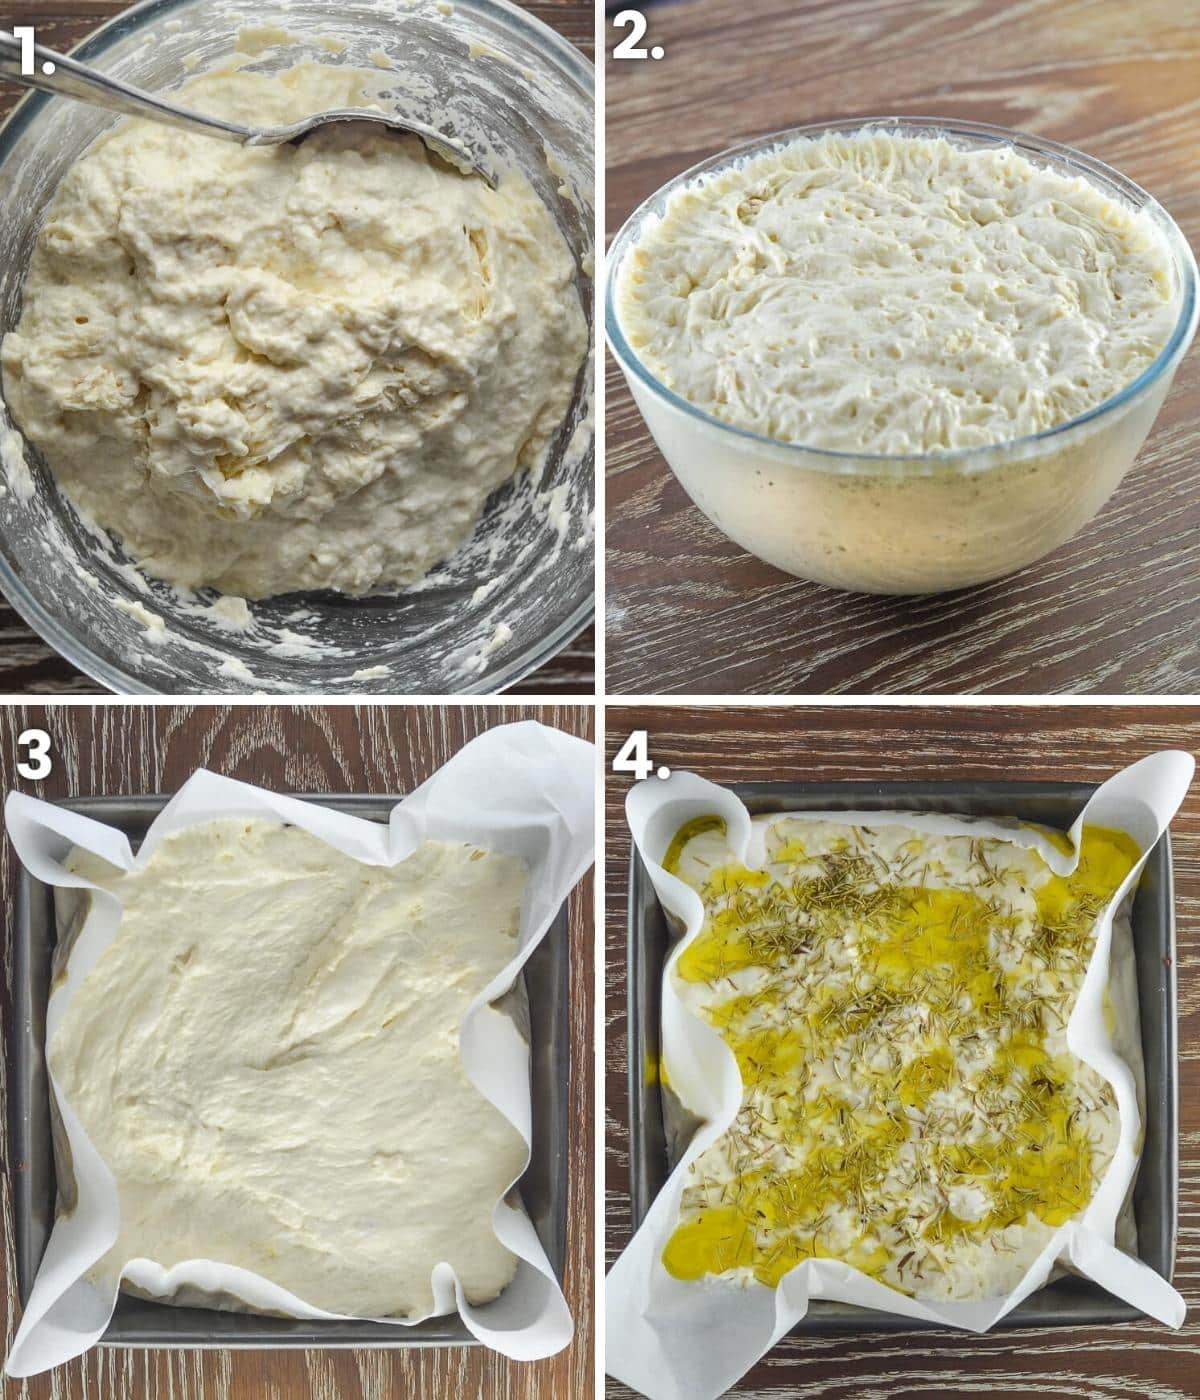
- Add everything to a bowl, starting with the dry ingredients and ending with the water. Mix it all up with a big spoon (I like to use a wooden spoon) to make a sticky, wet, slightly lumpy dough.
- Cover and leave at room temperature for about 8 hours. It will have risen and be full of air bubbles.
- Transfer the dough into the prepared pan. Just scrape/spoon it out with a silicone spatula or spoon.
- Dimple it with your fingers then pour over olive oil, sprinkle flaky sea salt and herbs and bake.
It really is that easy!
No Knead Bread Rising Tips
Because you aren't kneading the bread, time is needed to develop the gluten. The sweet spot is about 8 hours in a 20 °C (68 °F) kitchen but it's pretty flexible. You still get a good result if you bake it a little earlier or later.
If it is hotter where you are you can get away with less time. Use my progress pictures for a guide as to how it should look at each stage and judge accordingly when it's ready to bake.
You can extend the resting time if you need to by putting the bowl of dough in the fridge. You could probably get away with leaving it there for up to 24 to 48 hours dependent on your fridge's temperature. The lower temperatures slow down the activity of the yeast which helps to delay things.
If you try this though I advise keeping an eye on it the first time you do it, and baking it once it has just about doubled in size. Once you've done it once you'll have a good idea of how long you can get away with leaving it.
Flavour Variations
Go with the rosemary and sea salt option or switch things up. Some ideas include:
- Whole cherry tomatoes (poke them whole into the top of the dough) or large tomato slices & fresh basil.
- Roasted garlic cloves with rosemary or thyme.
- Pitted olives.
- Caramelized onions and fresh thyme.
- Melty vegan cheese.
- Roasted red pepper, swirls of pesto and vegan parmesan.
Serving Suggestions
This No Knead Rosemary Focaccia is wonderful served warm or cool and is great to serve at family dinners and holiday meals. It's also wonderful served as an appetizer with some good extra virgin olive oil and balsamic vinegar for dipping.
It makes the perfect accompaniment to pasta dishes like spaghetti and Vegan Marinara Sauce, my Vegan Vodka Sauce Pasta, soups like Vegan Potato Soup, Easy Tomato Basil Soup, or Red Lentil Soup with Lemon. Or stews and casseroles.
It is also great used to make sandwiches (try it with my White Bean & Artichoke Sandwich Filling or Spicy Chickpea Smash) and makes the most wonderful paninis.
Recipe
No Knead Focaccia
Author:WATCH HOW TO MAKE IT
Ingredients
- 4 cups (500 grams) all purpose flour or bread flour cups measured by spooning the flour into the cups and levelling off with the back of a knife - do not scoop and do not compact the flour down by pressing on it as you fill the cup (in the UK use strong bread flour)
- 1 tablespoon (10 grams) instant yeast or quick rise yeast , (if you only have active yeast see recipe notes)
- 2 teaspoons (10 grams) fine sea salt
- 5 tablespoons extra virgin olive oil , divided
- 1¾ cup plus 2 tablespoons (450 mls) water , (cold straight from the tap/faucet. Don't warm it up).
- 2 tablespoons rosemary , fresh or dried
- flaky sea salt for scattering
INSTRUCTIONS
- In a large mixing bowl combine the flour, yeast, and salt then add 1 tablespoon of olive oil and the water. Mix well until you can no longer see any dry flour and you have a wet, slightly lumpy-looking messy dough. Make sure to scrape right into the bottom of the bowl. (See my picture in the post above for reference).
- Cover with cling wrap, a clean shower cap or a wet dish towel and leave on the kitchen counter for a minimum of 6 hours and a maximum of 9 hours. Do not refrigerate and do not leave anywhere really warm. Just normal room temperature is fine.
- About 20 minutes before the time is up preheat your oven to 400°F (200°C) and line a cake pan or brownie pan with parchment paper. (any pan from 8 x 8 inch to 8 x 12 is fine or an 8 or 9-inch round cake pan - just ensure it's metal. Don't use silicone). You can even spread the dough out on a parchment paper- lined regular baking tray if that's all you have.
- When the oven is at temperature, scrape the dough out of the bowl and into the pan. I use a dough scraper but a silicone spatula or spoon will be fine. It will be clingy and sticky but that is normal.
- Once it's all in the pan, flatten it out so it's as even as you can get it all over, then using fingers dipped in olive oil, make dimples all over the top.
- Drizzle over the olive oil (be as generous as you feel comfortable with) and sprinkle on the rosemary and salt.
- Place in the preheated oven and bake for about 37 to 40 minutes or until golden brown.
- Remove from the oven, lift out using the paper as handles, and place on a wire rack. Leave to cool for at least 15 minutes before cutting.
NOTES
💌 SAVE THIS RECIPE!
Watch out for more tasty treats coming your way too! Unsubscribe at any time.



Morgan Holden-White says
Oh my goodness! Made this for the first time today along with your fabulous Risi e Bisi recipe. Both are completely delicious! I don’t like rosemary so used dried chives on the top instead. I have sent pics of the bread to friends and family recommending the crazily easy recipe and both bread and Risi will be go-tos for me from now on. Thank you 🤩
Sally says
Made this tonight and it disappeared so fast! Next time will make the effort to obtain and use fresh rosemary.
Jackie Newman says
This is my go to recipe if I want fresh hot bread in the morning, so easy to make. I do leave some for a few days as it makes the best croutons. Thanks for sharing, you have so many delicious recipes.
Melanie McDonald says
You're welcome Jackie. I'm really pleased you're enjoying the recipe!
Cheryl says
This "no knead" focaccia was delicious! I traditionally make soup & bread on Halloween (wanting an easy meal so ghouls & ghosts can get going on with their evening) and this recipe fit right into my plan. I used ground rosemary rather than fresh & the flaked salt with olive oil topper was great. Thank you Mel for this easy/quick recipe...I might just become my 'go to' Halloween bread for years to come :-)
Melanie McDonald says
I'm really pleased you enjoyed it Cheryl!
Gamani says
All your recipes are so easy to follow and do give great results too!
Melanie McDonald says
Thank you!
Cookie says
Excellent recipe exactly as written. Also very simple to put together. Highly recommend!
Susan says
I am very grateful for this recipe - it is so easy to make that I'm making bread more often. At the moment I'm leaving it to rise overnight as my kitchen isn't that warm at this time of year. As I'm coeliac, I have made a gluten-free version with gluten-free flour and some xanthan gum added. I also add extra cold water as I think gluten-free flour needs this. I've just been making it as regular bread in a loaf tin, adding three tablespoons of oil into the mixture and not putting any on top. I don't bother with baking parchment as I have a really good non-stick Circulon tin that the bread just falls out of (I don't work for Circulon!).
Sherry says
I would love to get your gluten free recipe for the bread. I don't usually have good luck with gluten free breads but would like to try this one. Thank you!
Keira says
This recipe is absolutely amazing, thank you so much for it! I made it numerous times and although it takes such little preparation time it always turned out perfect. In Germany we have the tradition to present bread and salt to friends who give a house-warming party. On such an occasion I gave my friends this focaccia with a generous salt sprinkling to combine the two things. Being not vegan they loved it and were utterly surprised when I confessed how little work I had to put in. It is not preaching but recipes like this that interest omnivore people in vegan food! Of course I recommended your fabulous website :)
Lisa says
About to start making this for the um-tenth time ;) So good, and every batch has turned out - including the batch I forgot about overnight.
I read through all the comments - will be baking in the cast iron pan today.
Thank you for the recipe xo
Becky Brumbaugh says
Hello…I plan on making this tomorrow….is it ok to use my kitchen-aid dough hook instead of hand stirring? Also…do I have to use the parchment paper…or can I put olive oil in pan before baking?
Thank you!
Melanie McDonald says
You can use your kitchen aid to combine everything if you want but there's no need (excuse the pun!). It's such a wet mixture that it doesn't take much effort to mix it up with a spoon.
RE the parchment paper. It depends. It's included as a fail safe so no-one has any sticking issues. It's a really wet, sticky, dough and unless you've got a really great pan it will stick to the bottom like glue and be impossible to get out in one piece. The only pans of mine I wouldn't use parchment paper in are my newish USA pan square pans/baking sheets and my very well seasoned cast iron skillet. I know it would stick on anything else. It's much safer to just use the paper because believe me, chiseling out your otherwise perfect bread that took hours to make is heartbreaking
Becky says
Thank you! I made this…and used the parchment paper…which was perfect to lift it out of the pan. I also used my Kitchen-Aid with dough hook attachment…which worked great! The bread turned out GREAT! I love your recipe and it’s now my favorite Focaccia Recipe! Thank you again!
Melanie McDonald says
Love to hear that! So pleased you enjoyed it Becky!
Sandi Wilson says
I am officially a fan of this recipe! The dough was super wet and I was worried but it came out beautifully. Taste, texture - spot on. Thanks for this. I’ll be baking this a lot. Six hour rise, 400 f for 39 minutes. Just perfect.
Kathleen F says
I baked it this morning !!! You are right—easy and very good flavors. I have 3 different focaccia recipes I make right now. They are divided up into the least amount of time and effort they take. They are all good. THIS recipe is both easy and NOT time-consuming. BINGO!
Alan says
Hi Mel, what’s the reason the baking tin needs to be metal and not silicone? Could I use a Pyrex baking dish? I’ve made this recipe numerous times and love it but since I never deviate from your bread recipes, I used a cast iron Lodge skillet to bake in which did give great results! But I’m just curious about the specific need to avoid silicone.
Melanie McDonald says
Silicone is not my material of choice for baking bread, cakes or muffins in. It doesn't radiate or hold heat like metal does so you don't get as good results. Bread (and cakes) cooked in a metal pan will have a better oven spring (rise) which means the texture will, in turn, be better (lighter) and the bread/cake will get a more golden crust.
That instant and radiating heat is so important.
You could use Pyrex. It would be a better choice than silicone but again it doesn't radiate heat like metal does. Cast iron is a great choice though. I often bake my focaccia in a cast-iron skillet because I love the crusty bottom it gives.
You can bake this focaccia on a regular old baking sheet too if you want to. Line it with parchment paper if you aren't sure if it will stick, and pour the dough on and spread it out with oiled fingers. It will end up a bit thinner so won't need quite as long in the oven. Knock off 5 to 7 minutes.
Hope that helps!
Janice says
This looks sooo delicious! Can it be make with gluten-free flours? Besides being allergic to dairy & eggs, I can't have gluten. :-( I get so hungry for "regular" food.
A Virtual Vegan says
It hasn't been tested with gluten-free flour. I doubt very much it would work though. Sorry :O(
I have been working on some gluten-free bread recipes but they aren't going so well right now though. Hopefully one day I'll have something good enough to share!
Janice Spencer says
We use no oil. Can I leave out the oil entirely?
A Virtual Vegan says
You can omit the oil. Obviously it will affect the flavour though, but if you're used to oil-free it will likely be ok for you. Warning though, oil acts as a softener and preservative in bread so the bread will be crustier (not necessarily a bad thing!) and it will stale a lot quicker. Hope that helps!
Hannah says
I can’t believe a bread this delicious came out of my oven! I’ve tried and failed a lot of bread recipes so it was really fun to have this one turn out so well, especially with such little effort on my part. When I woke up to bake it this morning I forgot about the 4 tbsp recommended amount for drizzling and instead just remembered to be as generous as I was comfortable with and I was very comfortable haha. Thanks for the great recipe!
A Virtual Vegan says
I'm so pleased you enjoyed it! The more olive oil the better in my opinion! ;O)
Melissa says
The most delicious and easy bread - we have it almost every week!
Joyce says
Hi Melanie,
I have made this wonderful bread many times. It is always delicious. I have made it with lots of variations - topped with onions, garlic, olives, Parmesan, other cheeses, etc. Always wonderful. You recipe says to let it rise at least seven hours. Mine doubles or triples in size in 2-4 hours. I’m afraid it will fall if I let it continue to rise, so I cook it. Is it supposed to fall? Should I go ahead and let it continue. Thank you for your answer and for the terrific recipe. ( And all your great recipes)
A Virtual Vegan says
I'm really pleased you're enjoying it! If it's working how you're doing it then I'd stick with it. If you live somewhere particularly warm then it could be speeding things up. My kitchen is about 19-20°C for comparison.
Hannah says
Mine doubled really quickly too but I let it set out for the rest of the time anyways because I really wanted it to turn out and mine didn’t fall at all :)
Kim says
This focaccia recipe looks and sounds easy and great. I am not a baker and I am in the US so not used to baking in grams. I know the conversions are not exact
I just want to make sure that 10g to 1 tablespoon yeast and 10g to 2 teaspoons of salt is correct since baking needs to be precise
A Virtual Vegan says
The ingredients are listed in cups and teaspoons/tablespoons etc as well as grams and I always measure them both ways myself and don't use an online conversion tool like some websites, so they are as accurate as it gets.
Make it as written using those amounts and it will be fine.
I do always recommend using a scale for baking though if you want the very best results.
Melissa says
Sorry for the silly question, but is this temp for fan forced oven? It's proving now and I'm so excited to bake it soon!
A Virtual Vegan says
The temperatures given in my recipes are always based on a regular oven and not a fan oven. A recipe will always say if the temperature given is for a fan oven.
Bread (and cakes etc) don't bake as well in a fan oven, so if possible I recommend turning the fan function off if you have that ability. With most modern ovens you can. If you can't, then lower the temperature by 25 °C and keep an eye on it towards the end in case it's ready a few minutes early.
Melissa says
Ours only has a grill or fan forced option (it's not a great oven) but it still worked! We usually have to bump up the temp and cook things longer anyway so it worked out perfectly in the end. I've made this SO many times since then, it's a brilliant recipe, thank you!