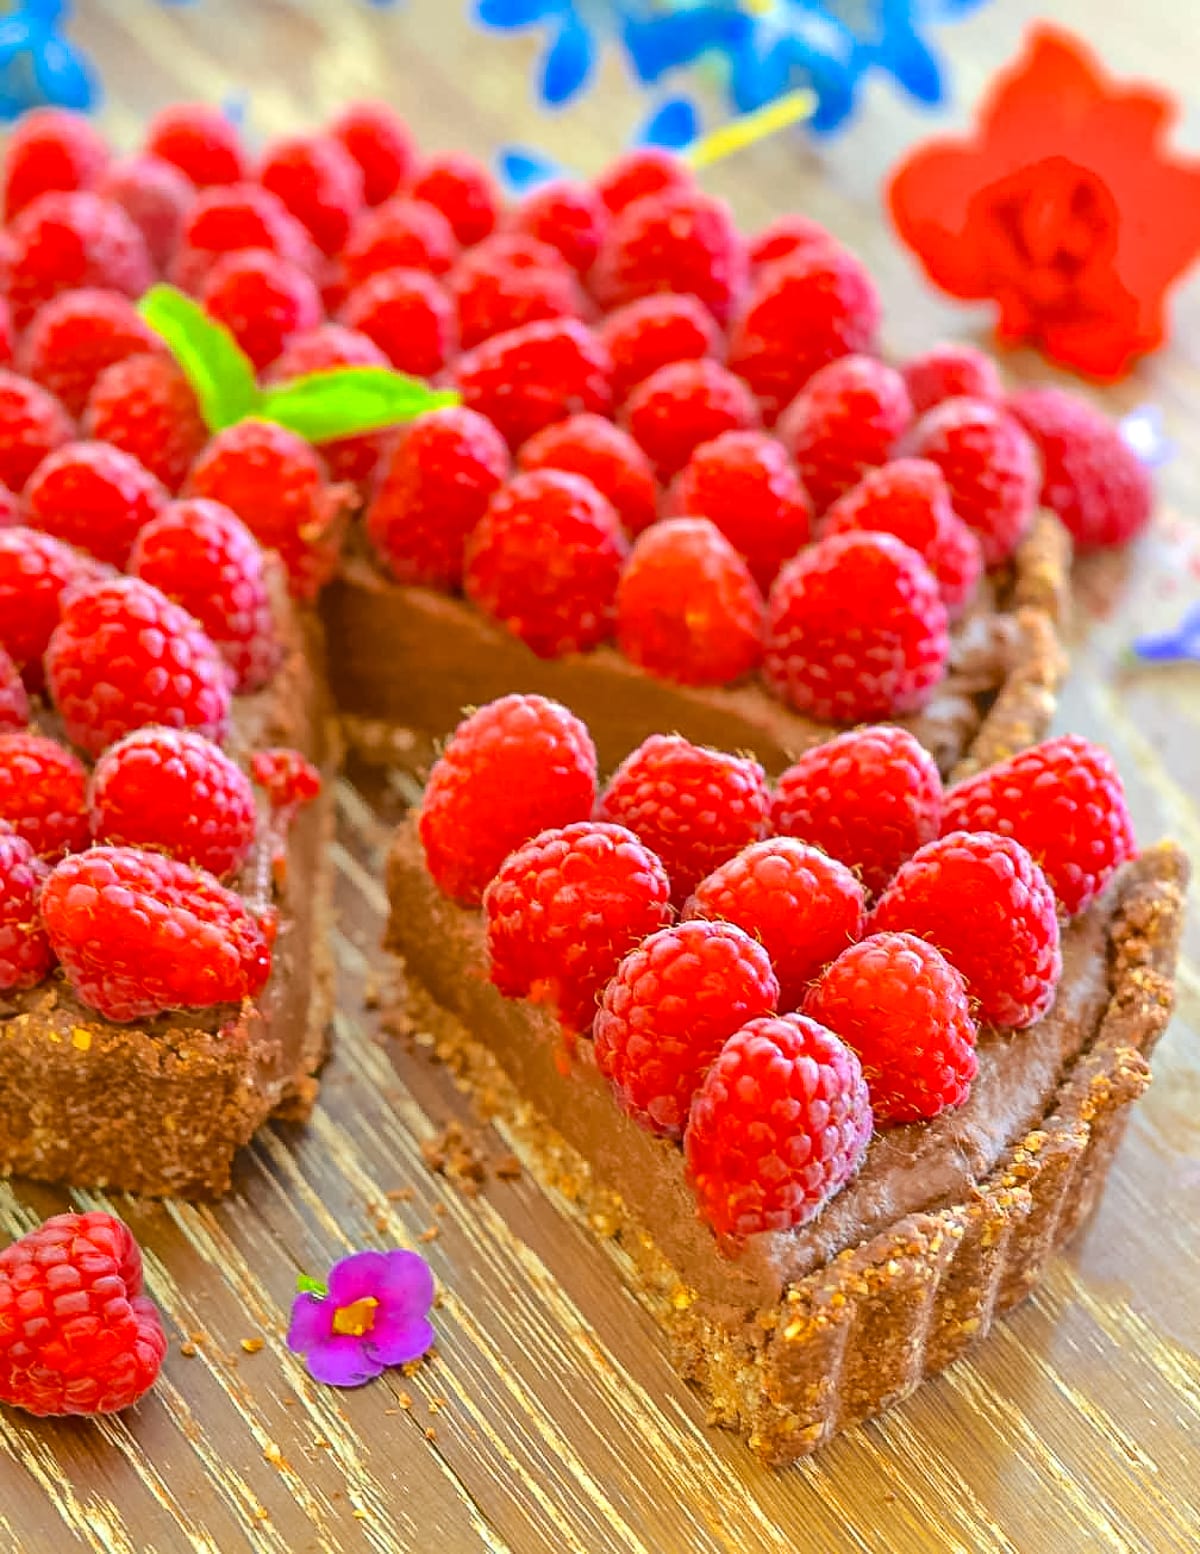
This easy and Healthy Chickpea Chocolate Tart is really quick and simple to make. With a crispy, oaty crust, no-bake creamy chickpea chocolate filling, and fresh fruit topping of choice it's a delicious and healthy vegan dessert!
💌 SAVE THIS RECIPE!
Watch out for more tasty treats coming your way too! Unsubscribe at any time.
This Healthy Chickpea Chocolate Tart is wholesome, hearty, and such a perfect, easy, naturally gluten-free, and healthy vegan dessert.
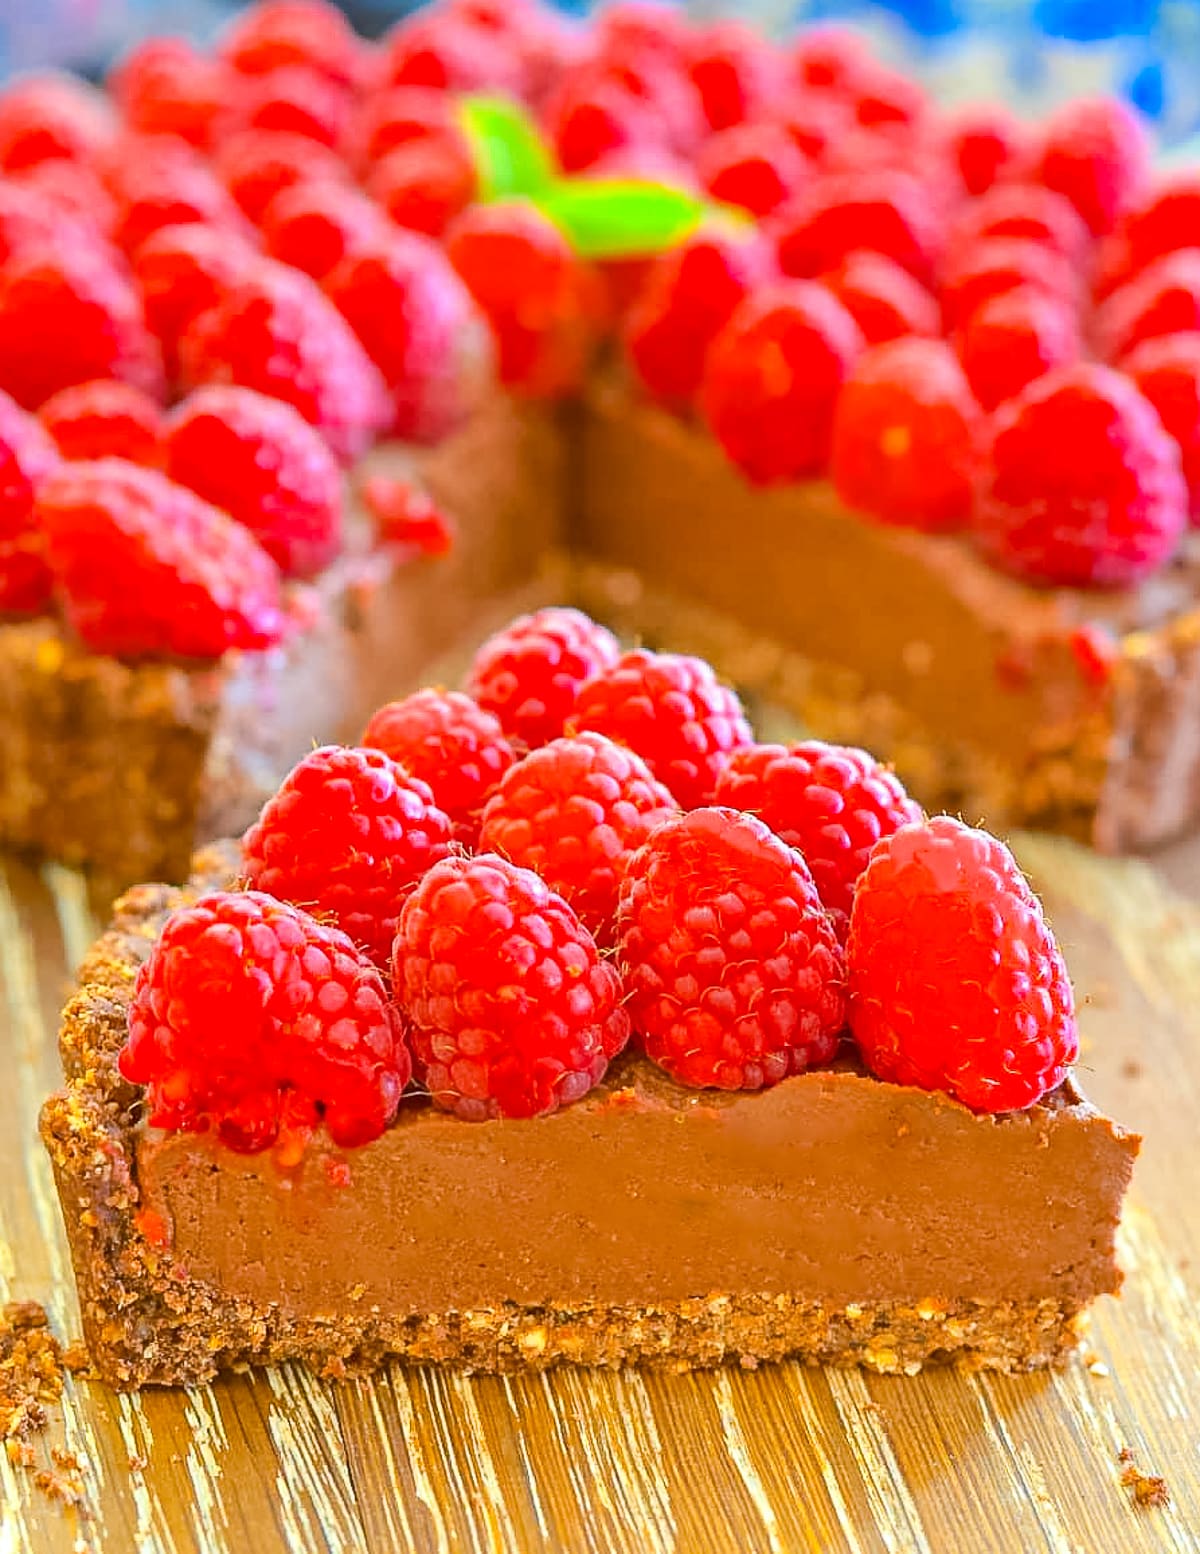
With a crispy cocoa-infused oaty crust, a fudgy, rich, chocolate chickpea filling, and fruit of choice to top it's so delicious. You're going to need to give this one a try!
Ingredients
Here is what you need to make this decadent but healthy Chickpea Chocolate Tart (the full printable recipe is a little further down the page):
- For the crust, you need oats, cocoa, salt, coconut oil, a touch of sugar, and water to bring it all together.
- For the filling, you need dark chocolate chips, cocoa, coconut oil, salt, vanilla, maple syrup, a little dairy-free milk, and the star of the show which may surprise you...Chickpeas! Yes, this recipe was inspired by my Dark Chocolate Hummus recipe and the chickpeas give the filling a wonderful fudgy texture. I promise you wouldn't know they were there if you didn't see them go in! ou can use canned chickpeas or dried chickpeas that you have cooked at home.
- For the topping, I love raspberries but you can use any fruit you like. Blueberries work well, as do sliced strawberries and sliced bananas (if serving right away as it will brown otherwise).
Variations
There is so much fun to be had with this recipe! Try topping with date caramel instead of fruit. Or add a few tablespoons of peanut butter to the filling then top with a scattering of chopped peanuts or sliced banana (or both)! Or Snicker-it-up with date caramel and roasted peanuts!
How To Make Chickpea Chocolate Tart
Can't wait to make it? The full printable recipe is below, but first, let me give you a quick walkthrough:
- THE CRUST - Simply blend everything up in a food processor, press into a small tart pan or pie plate then bake.
- THE FILLING - So simple! Blend everything up until smooth then spoon into the cooled crust.
- DECORATE - Pile on whatever fresh fruit topping you like. If using berries I recommend pressing them in slightly before the filling sets up so they don't roll around all over the place. If using sliced fruit you can top it after the filling sets.
How To Store
Store covered well or in an airtight container in the fridge. The tart itself will keep easily for a week to ten days, but if decorated with fruit it will only last for as long as the fruit is good for.
More Healthy Chocolate Desserts
Recipe FAQs
In the crust, you could use some vegan butter instead of the coconut oil. For an oil-free option, I think nut or seed butter would work instead but I haven't yet tried it. In the filling, the coconut oil and milk create a creamier, more luxurious mouth-feel. If you're ok with losing a bit of that then you can omit the coconut oil. This will mean you need to omit the milk too so the tart is sliceable.
Recipe

Healthy Chickpea Chocolate Tart
Author:Ingredients
For the crust
- 2 cups (200 grams) rolled/old fashioned oats , or quick oats (certified GF if necessary)
- 4 tablespoons cocoa powder
- ¼ teaspoon fine sea salt
- 4 tablespoons coconut oil
- 1 tablespoon sugar
- 5 to 7 tablespoons water
For the filling
- 2 cups (330 grams) canned chickpeas , drained & rinsed
- 5 tablespoons cocoa
- ¾ cup (126 grams) semi sweet dark chocolate chips
- 2 tablespoons coconut oil
- ¼ teaspoon fine sea salt
- 1 tablespoon vanilla extract
- 6 tablespoons maple syrup
- 6 tablespoons dairy-free milk
Decoration
- berries/fruit of choice , or date caramel
INSTRUCTIONS
For the crust
- Preheat oven to 350°F (175°C).
- Place the oats into the bowl of a food processor and blend until they are a coarse flour-like consistency.
- Add the cocoa powder, salt, coconut oil, and sugar and process until well combined, then gradually add the water. Start with 4 tablespoons, process well, then add more drop by drop until it comes together. You should be able to squeeze the mixture together into a ball without it crumbling.
- Tip the mixture into a 7 or 8-inch tart pan or shallow pie dish (one with a loose bottom makes serving easier) and press down tightly and evenly all over with your hands across the bottom and up the sides. You can use an 8-inch tart pan but your crust and filling will be thinner.
- Bake in the oven for 20 minutes then allow to cool completely.
For the filling
- Add all of the filling ingredients to the food processor (no need to clean it as it was only used for the crust) and process until completely smooth, stopping to scrape down the sides as needed. Keep the processor running for a good few minutes to get it smooth.
- Spoon the chocolate filling into the crust and level the top with a spatula.
- If topping with berries add them now before the filling sets so they don't roll around. Press them very gently in to embed them. If using sliced fruit I recommend leaving it until shortly before serving. Banana immediately before serving as it browns.
- Refrigerate for at least one hour before serving to allow the filling to set.
💌 SAVE THIS RECIPE!
Watch out for more tasty treats coming your way too! Unsubscribe at any time.


Colleen Allen says
Would silken tofu or avocado be acceptable substitutes for chickpeas if I don’t have any on hand? Thank you!
Melanie McDonald says
I've never tried it so don't know. They both have a much softer texture though so I would imagine they would make the filling much softer.
Colleen Allen says
We used a firm tofu and it was a perfect texture! The taste of the crust with the chocolate filling and raspberries made for a delicious end to our Christmas meal. Thank you!