Learn how to make a sourdough starter the easy way. You will learn all about what a sourdough starter is, what you need to make one, how to make it without endless feedings and wasteful discard, and why the whole process doesn't have to be as difficult and time-consuming as you think!
💌 SAVE THIS RECIPE!
Watch out for more tasty treats coming your way too! Unsubscribe at any time.
FEATURED COMMENT:
"All my attempts at making my own starter have failed, including a gifted starter from a famous local baker making super delicious breads and pastries. Here you come to the rescue! Just wow! Only 3 weeks into it … all my bakes have been texturally wonderful and delicious! I have to say the rye flour is the key to this superstar starter. Thank you for sharing and teaching us your knowledge and experience!!!" - Lea ⭐️⭐️⭐️⭐️⭐️ More reviews →
Question for you? Are you ready to learn how to make a sourdough starter? Or let me rephrase...
Are you ready to unlearn everything that you think you know about making sourdough starters and re-learn that it doesn't have to be as difficult as everyone in every cookbook and recipe on the internet makes out?
Yes!!! I was hoping you would say that. Because actually, a sourdough starter is pretty easy to make and look after.
Mel x
This post is long, detailed and contains lots of essential information. I recommend you read the entire thing before making a start, but when you come back to it again, feel free to jump to where you want to be via the table of contents below:
Jump to:
- What Is A Sourdough Starter?
- What Is Wild Yeast?
- What Do You Need To Make A Sourdough Starter?
- The Best Container For Sourdough Starter
- The Best Flour For Sourdough Starter
- Can I Mix Flours In My Sourdough Starter?
- Feeding Sourdough Starter
- Do You Have To Discard Sourdough Starter Every Time You Feed It?
- How Do I Know When I Can Bake Bread With It?
- How To Make A Sourdough Starter From Scratch With No Discard
- Sourdough Starter Names
- How To Keep A Sourdough Starter Warm
- Sourdough Starter Success Tips
- My Starter Is Bubbly & Consistently Rising & Falling, Now What?
- How Soon After Feeding Can I Use Sourdough Starter?
- What Do I Do If I Want To Make Something Other Than Bread With My Starter?
- How Much Sourdough Starter To Use
- How Much Sourdough Starter To Keep
- What Can I Make With Sourdough Starter?
- A Sourdough Starter Insurance Policy
- What Equipment Should I Gather In Preparation For Making My 1st Loaf Of Bread?
- Why Measure In Grams and not ounces or cups?
- Important To Bear In Mind
- Sourdough starter FAQ
- Recipe
- More Easy Bread Recipes
- Reviews & Questions
Most recipes online are just plain mind-boggling with lots of complicated steps and unfamiliar terms and math ... I mean, I hated math at school, and I sure don't want to be calculating complicated percentages when all I want to do is make a loaf of bread.
So I am here to demystify it. This is my simple, no-fuss guide to making a sourdough starter. I want to make the whole process accessible and approachable.
I want anyone, whether a natural baker or not, to be able to come along and learn to make a sourdough starter and a basic loaf of sourdough bread without getting confused over a million different complicated steps and without having to negotiate unfamiliar baker's terminology.
Of course, there is a time and a place for the proper terminology, baker's percentages and dough hydration, etc, but the average person isn't bothered with all that. They just want to come along and make an uncomplicated, easy starter, then knock out a pretty decent loaf of bread once it's ready. That's it.
So if you are that average person who just wants to learn to make a sourdough starter with no fuss and no complicated instructions, then you are in the right place.
And if you don't want to be making massive jars of starter that grow and grow, take over your entire kitchen and need feeding twice a day without fail for the rest of your life, while you try to figure out what to do with the massive amounts that you are told to discard, you have also come to the right place.
I am going to teach you what you need to know to make a happy and thriving starter, without any of the superfluous details that you don't need to know, and it's all going to be done waste-free! Yep, you heard me right. No discard.
What Is A Sourdough Starter?
A sourdough starter is a live culture which you can use to leaven (rise) baked goods by adding a small amount to the dough. It's the oldest form of leavening bread, and is thought to originate from ancient Egyptian times.
A sourdough starter is created by mixing flour and water and then allowing the mixture to sit for some time. During that time, it begins to ferment, and wild yeast, which are already present in the flour and the air around us, will start to grow and thrive as long as conditions are right.
The yeast eats the natural sugars in the flour and converts it into lactic (and other) acids, which is what gives sourdough its characteristic tang. Carbon dioxide is produced by the yeast during this process, and this is what makes the starter, and the bread you bake with it rise.
When you make bread with a sourdough starter, you do not need to use commercial yeast.
What Is Wild Yeast?
Wild yeast is all around us, in the air, in our grains/flour and on the surface of fruit, and it was used in baking long before commercial yeast became available.
Commercial yeast is reliable and fast, whereas wild yeast is slow, a little temperamental and needs looking after. Having a starter is almost like having a real, live Tamagotchi or pet to look after.
So you might be wondering why you'd even bother. Why not just use commercial yeast if it's quicker and easier?
Well, for starters (excuse the pun!), it's fermented and, for many people, is easier to digest than bread made with commercial yeast. Secondly, you know I'm all about flavour in my recipes and everything I eat. Well, sourdough bread is FULL of complex flavour and amazing texture in a way that bread made with commercial yeast can't even get close to. And lastly, making it is an art. It's challenging, fun, rewarding, and so worth the extra time and effort it takes to make!
What Do You Need To Make A Sourdough Starter?
The ingredients list is pretty basic:
- Flour
- Water
That's it.
And the equipment you need is also pretty basic:
- A jar/container to keep the starter in and a lid for it (see just below for advice on style/size).
- A digital kitchen scale. Please don't use cups to measure when making bread or starter. Baking is a science, and cup measurements are not accurate enough if you want excellent results. In my sourdough recipes, I will be asking you to weigh all of your ingredients, including the water. You can pick up a digital kitchen scale for under $20.
- A spoon or spatula that can easily reach into the bottom of the container/jar. I like these jar spatulas because they are long and thin and make stirring and scraping the jar easy.
- An elastic band to use to mark the level your starter is at after feeding. This isn't essential, but it makes it really easy to see how much your starter has grown and when it is ready to use.
The Best Container For Sourdough Starter
A wide-mouthed, clear glass jar of between 750 ml (25 oz) and 1 litre (34 oz) is perfect. Something like a mason jar, a Weck jar, or a cleaned-up store-bought peanut butter/marinara sauce jar.
It should be clear so you can see inside easily, wide so it's easy to spoon the flour into and the starter out of, and a decent size so that when the starter rises, there is no risk of it spilling over.
I started out with recycled glass jars from the pantry and have now upgraded to Weck jars. They really are perfect. Wide, smooth sides for easy stirring, and the glass lids without the rubber seals and clips are ideal for covering the starter without making it airtight.
The Best Flour For Sourdough Starter
Technically, you can use any good-quality unbleached flour to make a sourdough starter, but some flours create more demanding or vigorous starters than others.
Common flours to use when making starters are all-purpose flour, bread flour, or whole wheat flour, but for this easy starter recipe, you need to use rye flour.
Using rye flour makes the process almost foolproof. Your starter will come to life a lot quicker than starters made with other flours, and it will get more nutrients, so it will be able to cope well with the small feeds required in this recipe. Other flours will not work in this recipe.
The rye flour you use must be fresh. Don't use a bag of flour that has been sitting open in your pantry for the last 6 months. If you want your starter to be healthy and happy, you need to feed it fresh food.
We might start the process all full of enthusiasm and excitement, but there will come a time when you forget to feed your starter for a few weeks or leave it in the back of the fridge for 3 months ... Yes, I did that to my starter .... Sorry, Percy. A rye flour starter will be much more forgiving and willing to spring back to life after that than any other.
In fact, if you already have a starter made with another flour that doesn't appear to be flourishing or that you think is dead, feed it some rye flour and watch it come back to life again. They just love it!
And don't worry, just because you use rye flour to make your starter, it doesn't mean you can only make rye bread. You can use your rye starter to make white or whole-wheat bread.
Can I Mix Flours In My Sourdough Starter?
You can use a mix of different flours, like all-purpose flour mixed with rye flour or whole wheat flour, in your starter once it is established, but you might find you need to feed it more, which will mean it's harder to keep discard-free. When starting out, though, I recommend using 100% rye flour because you are going to get it up and running faster, and it will be much more resilient.
Try not to chop and change the brand of flour you use to feed your starter when you are getting it established. Be consistent and use the same for every feeding if at all possible. It will make things a lot more predictable and progress easier to track.
Once you are up and running, you can use a bit of your established starter to start new and different starters. If you have a rye starter, use a little bit of it to "seed" a new whole wheat or white flour starter. You'll have a new and happy, thriving starter almost immediately, although bear in mind that using different flours will change the feeding requirements and could mean you have to discard.
Feeding Sourdough Starter
When you make a starter, you are cultivating wild yeast. To keep it happy and make it thrive, you have to feed the wild yeast living in your starter.
Feeding is as simple as adding more flour and water. You open the jar, put it on a scale, add equal parts flour and water, stir it all up, pop the lid back on loosely and put the container back wherever you keep it.
Then, within a few hours, the wild yeast will have a party, go crazy, and your starter will begin to bubble and rise to about double its size. When the wild yeast has consumed all of the natural sugars in the flour, they will calm down, go to sleep, and the starter will slowly fall back down as carbon dioxide stops being produced.
Do You Have To Discard Sourdough Starter Every Time You Feed It?
Most recipes will have you feeding your starter every day. Sometimes twice a day. They will also have you discard half of it each time. This is so wasteful and unnecessary.
With my recipe, you do not have to discard the sourdough starter every time you feed it. Instead, you feed the starter every day with equal amounts of flour and water without discarding any while you are getting it established, then once it is established (after a week or two) you only need to feed it the day before you want to make bread.
Then you will use all but a teeny tiny amount of the starter in your baking and leave the rest (which amounts to just the scrapings in the jar ) in your fridge until the next time you bake. When that time comes around, you will feed the starter the day before you need it, using only as much flour and water as you need to make the amount of starter required by your recipe.
There really is no good reason to keep masses and masses of starter bubbling away, and there's even less of a good reason to be wasting flour every day when you don't need to.
How Do I Know When I Can Bake Bread With It?
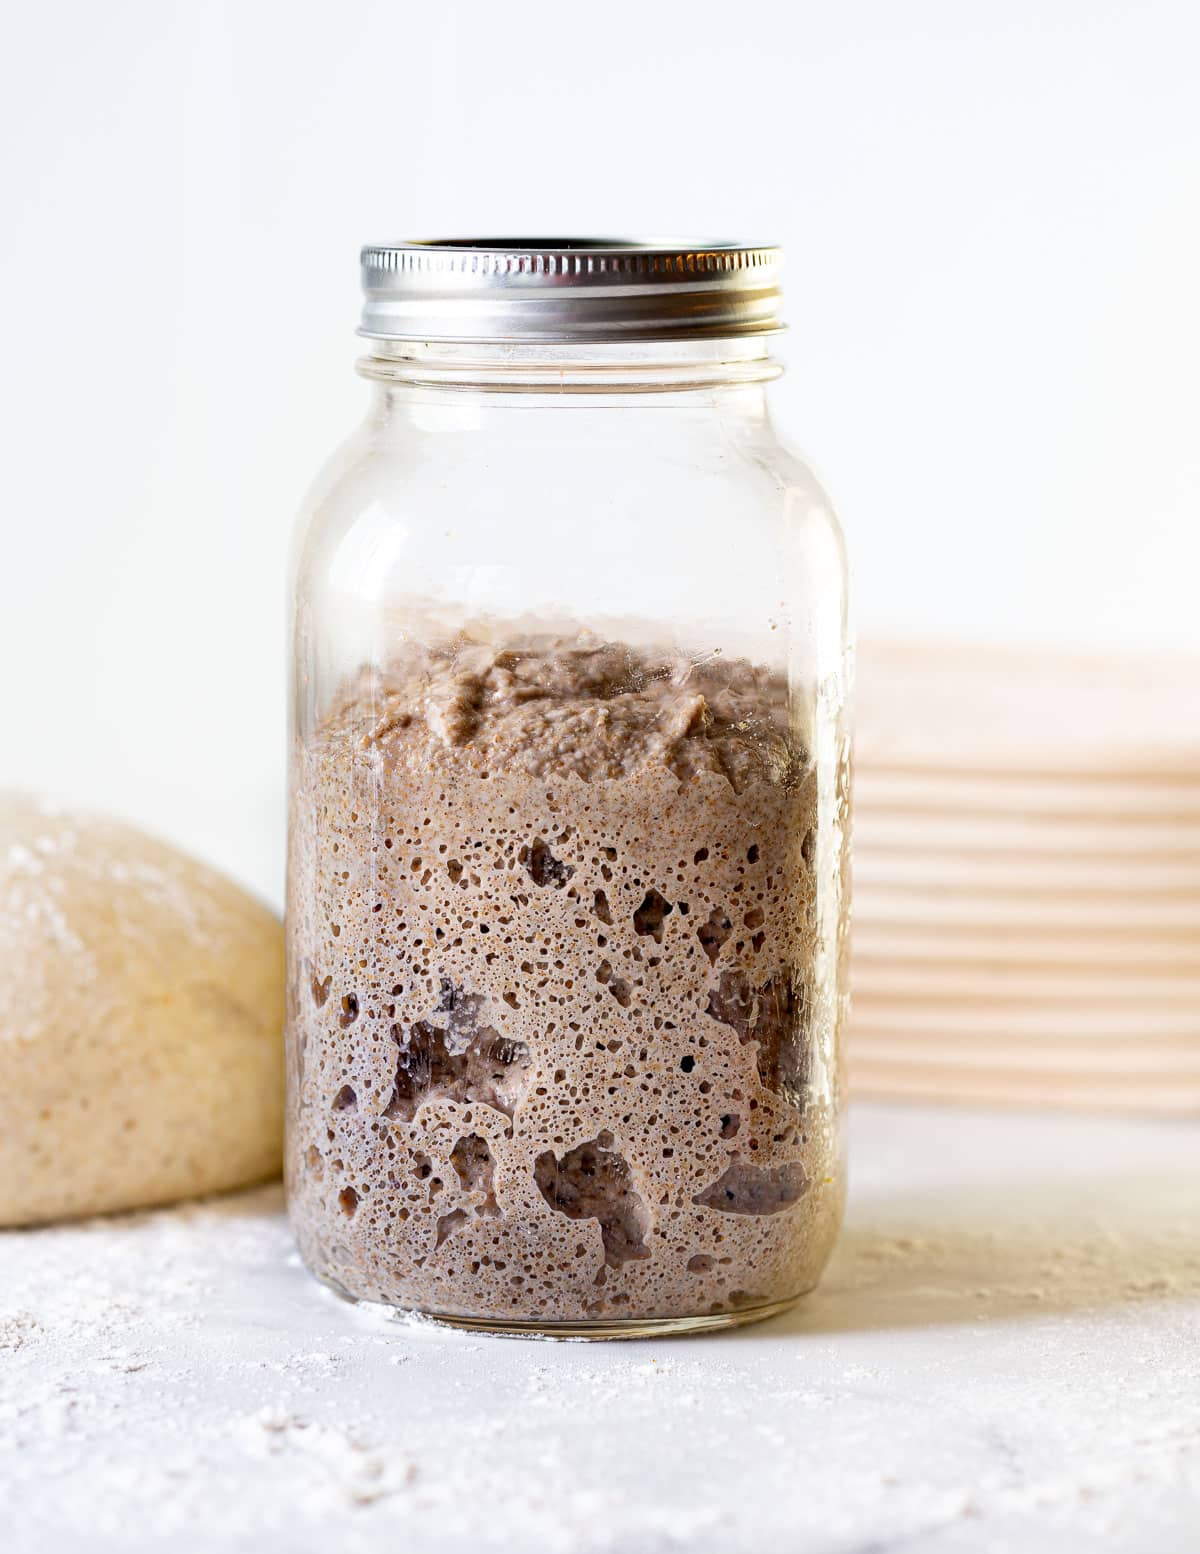
Once your newborn starter looks really bubbly, like the inside of an Aero bar or chocolate mousse, and doubles after you feed it, it is ready to start baking with, and it will continue to get stronger as it gets more mature.
The optimum time to prepare bread dough with your starter is when the starter has reached its peak after feeding. You will get to know what this looks like once your starter is established and you have seen it rise and fall.
Then, when you mix the starter with the fresh flour, water and salt needed to make your loaf, it is provided with more food. It eats the natural sugars in the flour, and carbon dioxide is produced, which causes the dough/bread to rise.
How To Make A Sourdough Starter From Scratch With No Discard
(For detailed measurements and instructions, see the printable recipe card).
It is really easy to cultivate your own sourdough starter. There are lots of different recipes out there, but they tend to be complicated and very wasteful. My recipe is as simple as it gets. Flour, water, and time. That's it. And you won't have any excess starter to discard!
Here's how:
Day 1 - Get a clean jar. Add to it 25 grams of flour and 25 grams of room-temperature water. Mix well so you can't see any dry flour, level it as best you can and cover loosely with a lid. Don't screw the lid on tightly. If you have an elastic band, put it over the jar, and level with the top of the starter (to measure progress). Leave the jar in a sheltered, draft-free spot for about 24 hours. It doesn't have to be exact. An hour less or a few hours more is fine. If your room is cooler than 20°C (68°F), you will speed things up greatly if you can increase the temperature a bit. See my tips under the heading "How to keep a sourdough starter warm" below for how to keep your starter nice and cozy.
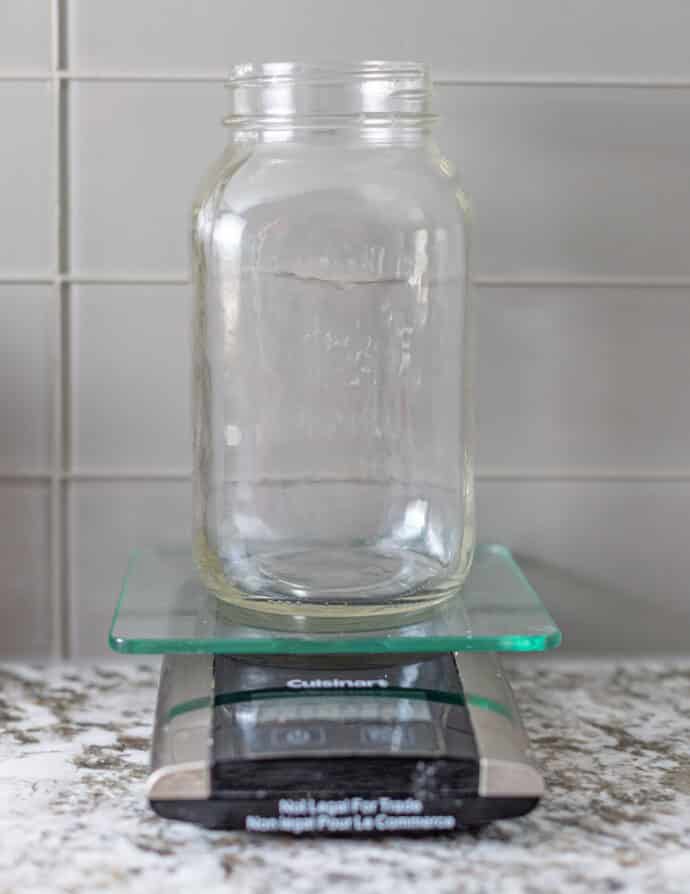
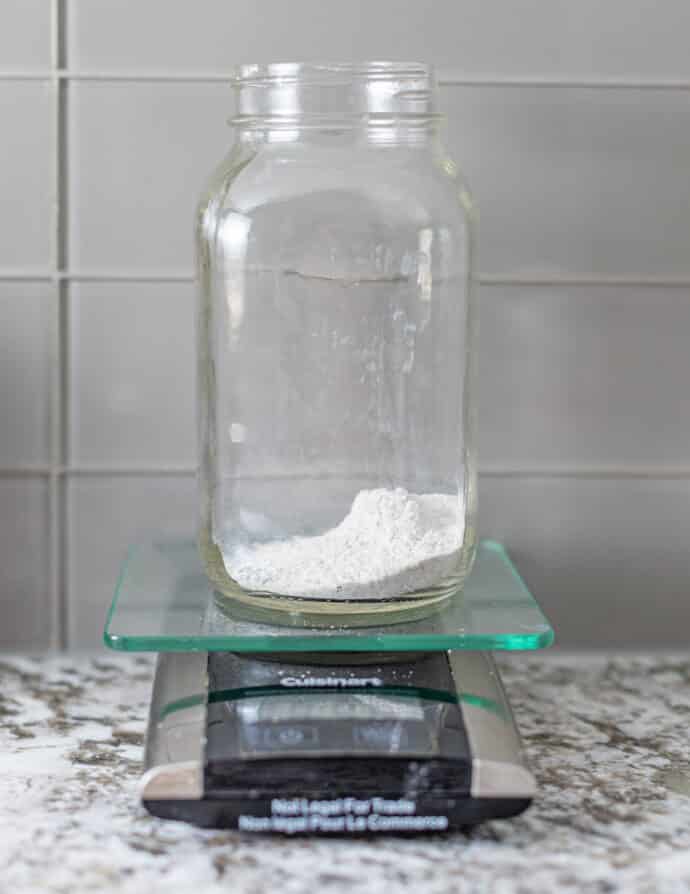
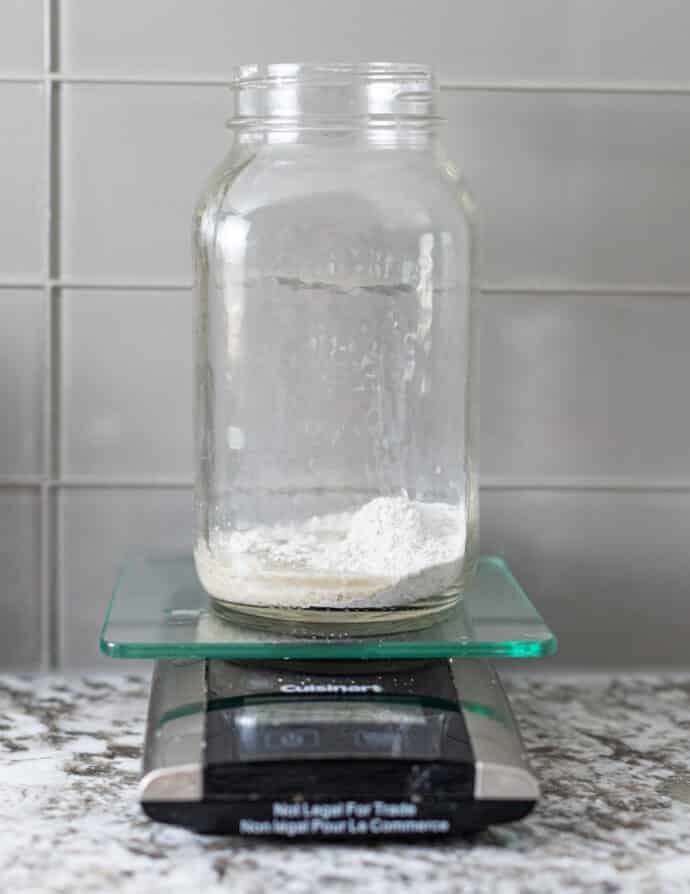
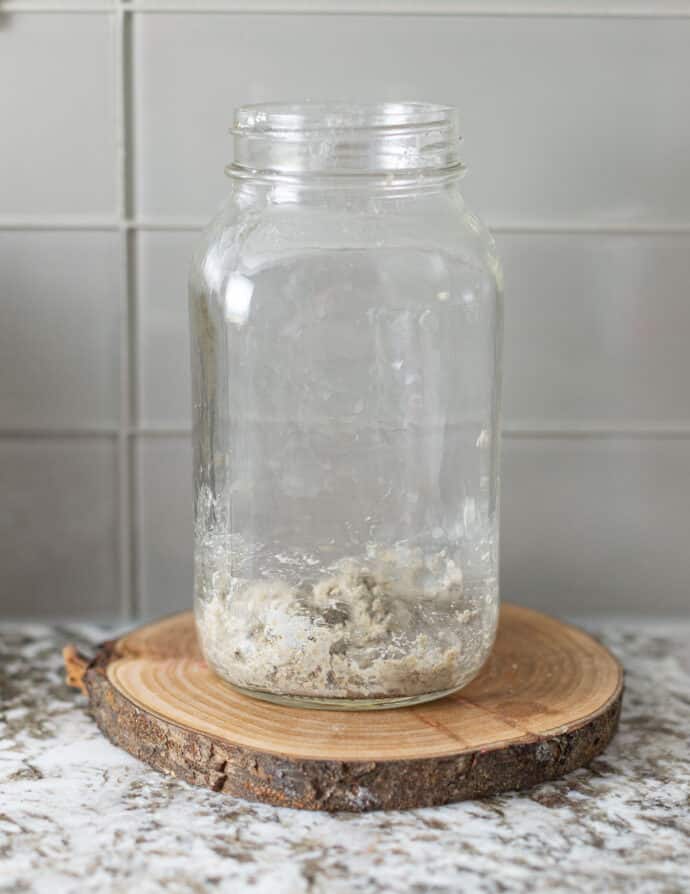
Day 2 - It probably won't look any different today but may smell a little milky or fruity. It might have a bubble or two or it might not. Uncover the jar and add another 25 grams of flour and 25 grams of water. Stir, level again as best you can and leave loosely covered again for about 24 hours.
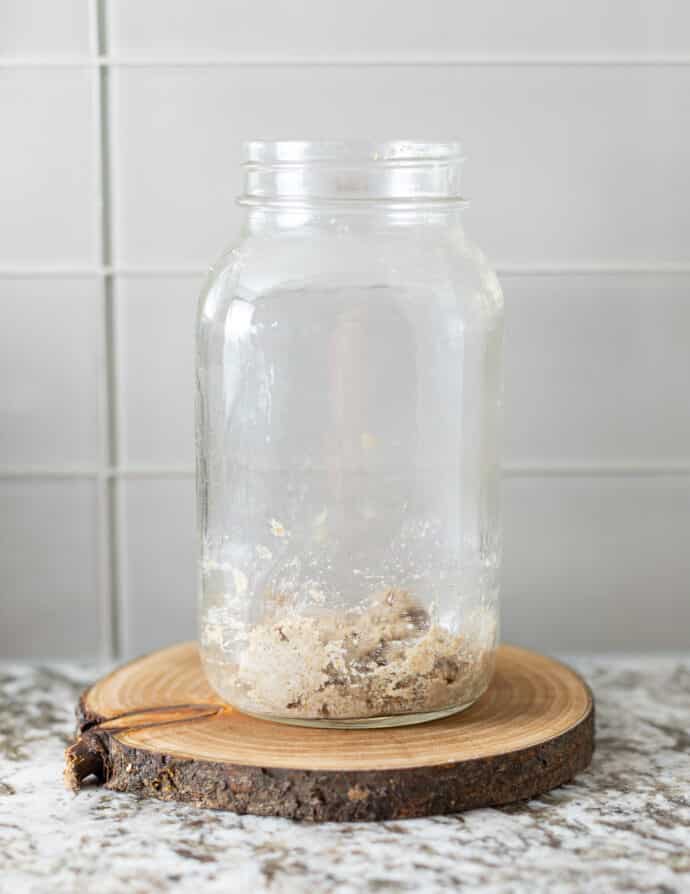
Days 3 to 7 - Repeat this process daily for the next 5 days. DO NOT discard any of the starter.
After day 2 or 3 - You will probably start to see a few bubbles forming and notice a slightly milky or fruity smell when you sniff it. You could also get a sudden burst of bubbly/rising activity. This sometimes fools people into thinking it's ready, then the activity suddenly stops again and they are left thinking their starter died. Just keep going if this happens. It's common (but doesn't happen to everyone) and is due to different bacteria in the flour which will die off as the starter ferments and the PH changes. It will all go quiet then the good guys will take over and things will start happening for real. Progress is different for everyone though so don't worry if nothing appears to be happening. Just keep going with the daily feedings.
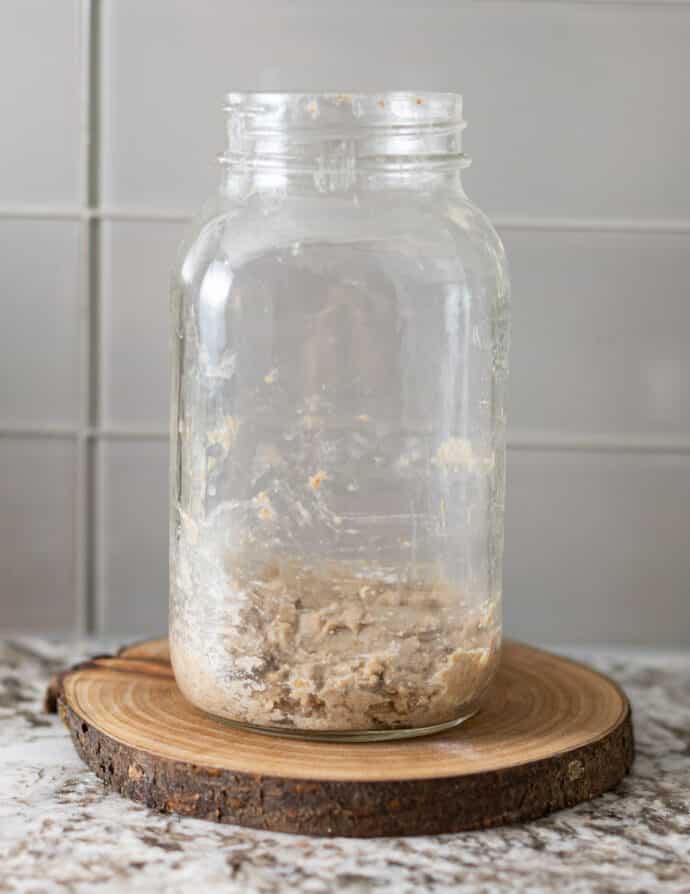
From days 4 to 6 changes to the appearance and smell should be very noticeable. You should be seeing bubbles and it should be rising a little between feedings. Again though, don't worry if yours is a little slow. Just carry on regardless, feeding it every day with 25 grams of flour and 25 grams of water.
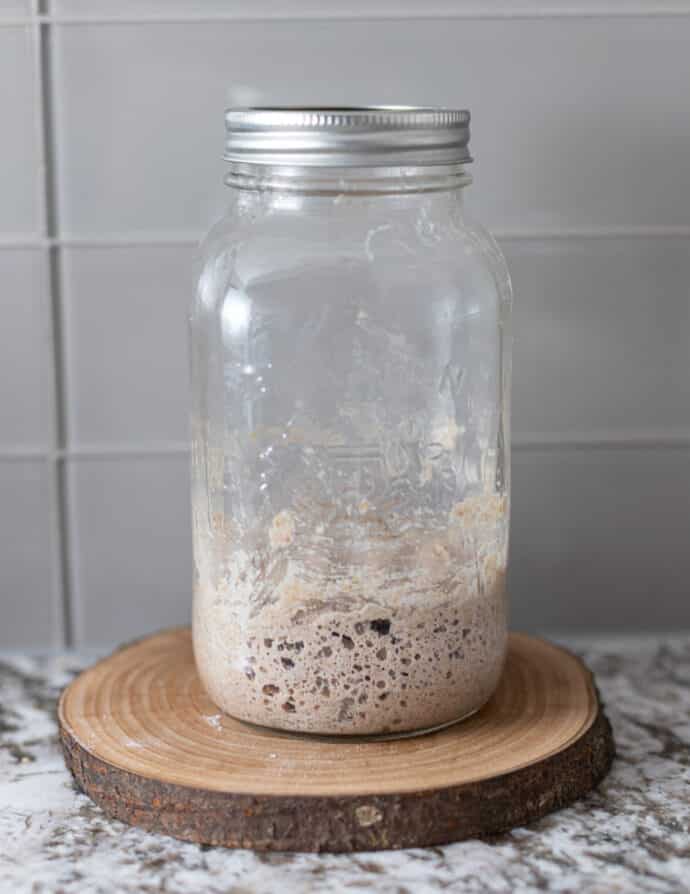
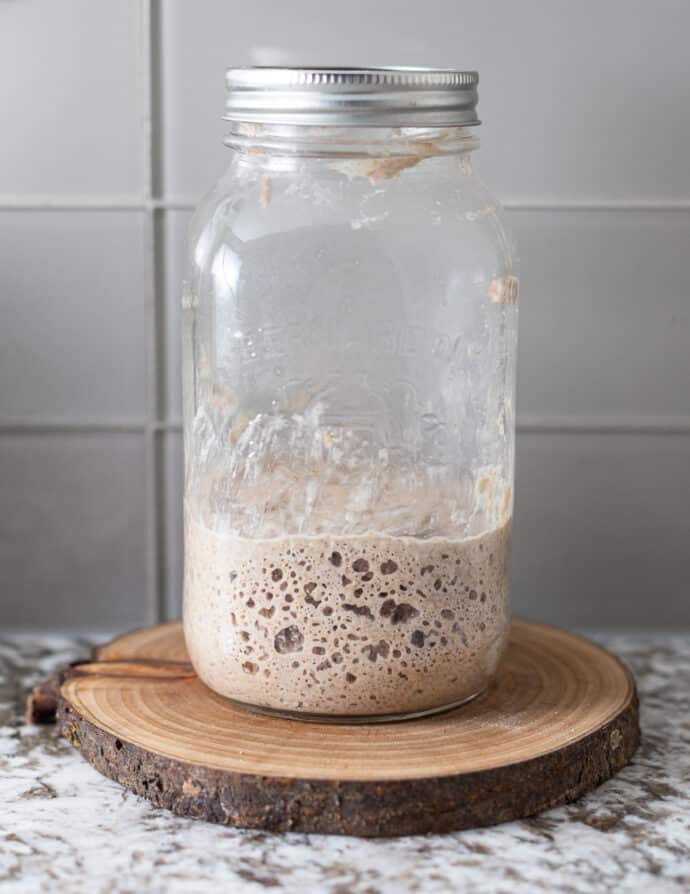
From days 7 to 8 your starter should be getting really bubbly after feeding and it should be starting to rise and then fall reliably and predictably after each feed. Again though don't worry if yours isn't. This process can be unpredictable. Just keep going but try to keep it somewhere a little warmer as that will help. See my tips under the heading "How to keep a sourdough starter warm" below for how to keep your starter nice and cozy.
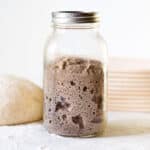
Here is mine on Day 7:
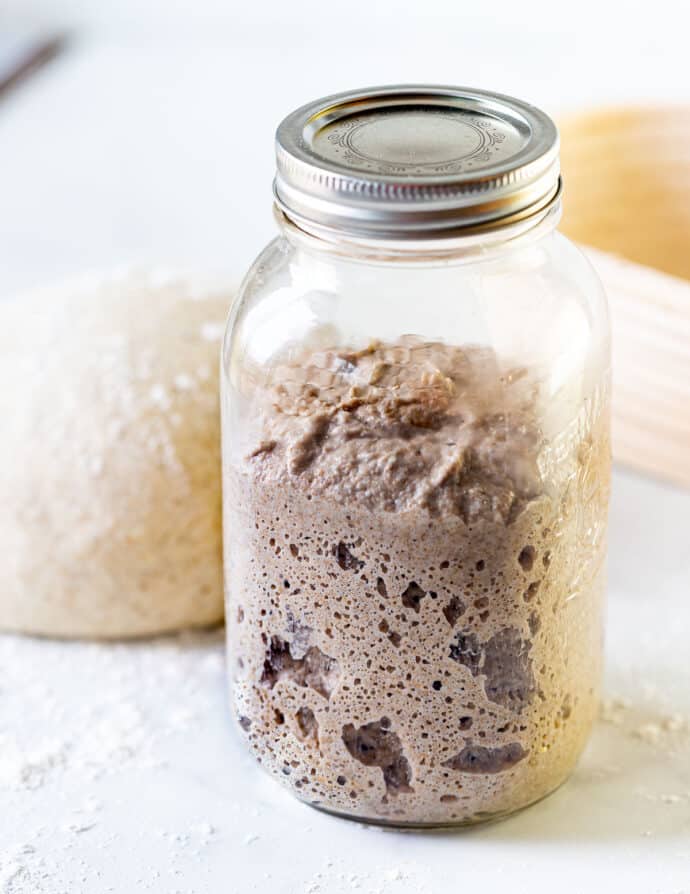
Once your sourdough starter is reliably doubling in size after feeding and looks really spongy, fluffy and bubbly like mine in the picture above, it is ready to make bread with.
Well done! You made a sourdough starter!
Sourdough Starter Names
Now that you have your own living and breathing sourdough starter, you need to hold a naming ceremony and make it part of the family. It's an essential right of passage into the sourdough bread baking world ;O)
Here are some fun sourdough starter names for inspiration:
- Doughreen
- Bread Pitt
- Jane Dough
- Gloopy
- Little Bread Rising Hood
- Clint Yeastwood
- Bubbles
- Frankendough
I currently have two. Percy and Michael Bubbly!
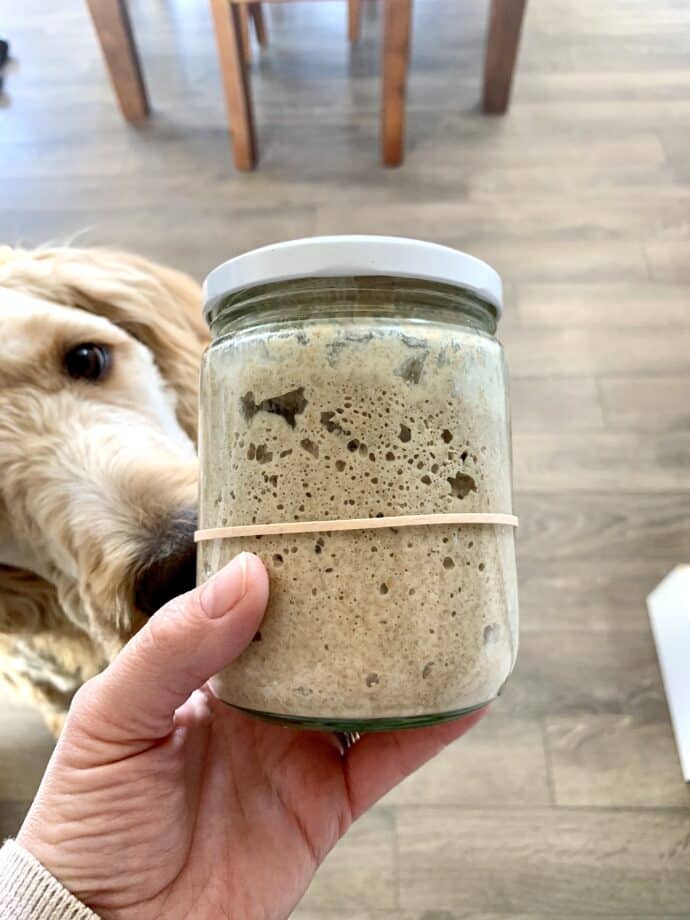
Here is Percy, my old sourdough starter. I think he's about 20 years old. He was born and bred in England, then got rudely dehydrated on a piece of paper and flown to Canada, where he started a new life. Charlie (the dog) loves the smell of him and is there by my side for every feeding and bake session, especially if it involves some Sourdough Dog Biscuits!
How To Keep A Sourdough Starter Warm
To get things moving along quickly, a temperature between 20°C (72°F) to 26 °C (80°F) is perfect. Some of us are lucky and have an environment naturally at that temperature, but if the room you keep your starter in is cooler then things will move along quite slowly. To be clear, it will still happen if it's cooler, it will just take much longer.
Here are some ideas to provide your starter with a warmer environment to help speed it up:
- Move it to another room - You might have one room in your house that gets warmer than others. Try leaving it in there.
- Use the light in your oven - Simply place the jar of starter in a cold oven and turn the light on. The heat from the bulb will keep your starter warm. Just make sure no one comes along and turns the oven on while it's in there!
- Use your home heating - Place the jar of starter near (but not too near) the furnace, radiator, fireplace, or stove.
- Use an Instant Pot - If your Instant Pot has a yogurt setting, set it to low and place the jar of starter on the trivet inside. It's important to leave the lid off the Instant Pot as otherwise it will get too hot for your starter.
- On top of your fridge/fridge freezer - This is usually a nice warm spot and works well if you don't have built-in appliances.
- A sunny windowsill - Don't put it in direct contact with the sun, as it could damage your starter, but put it in indirect sunlight or in a dark box on the windowsill to protect it.
- In the airing cupboard - If you are in the UK in an older-style house, you might well have one of these.
- A warm closet - I have forced air heating in my house, and the closets have vents in them and get really warm. My starter loves it in there!
Sourdough Starter Success Tips
- Read this entire post before you begin. Everything here is useful and will set you up for success.
- Always weigh your ingredients. That means the flour and the water. When baking (which is what you will ultimately do with this starter), it is really important to be precise and cups are not precise enough. You can pick up a digital kitchen scale for under $15.
- Use rye flour for the easiest and hardiest starter.
- Do not use old flour. You wouldn't feed a baby old milk. Your starter needs fresh food that's full of nutrients, just like a baby does. If you use old flour, your starter will likely be harder to get goin,g and there's a strong chance it will end up getting mouldy.
- Do not use bleached flour.
- Don't be tempted to deviate from the recipe.
- Don't rush it. It takes as long as it takes, and patience is important.
- Don't store your starter in a metal container.
- Once established, only make as much starter as you need for your recipe and keep the scrapings in the jar for next time. If you accidentally end up with too much, use it up in a recipe that calls for sourdough starter discard.
- Read through my FAQ if you run into any problems. I've tried to think of all the possible situations you could run into along the way and provide an answer. However, if you get stuck, feel free to reach out, and I will do my best to help.
My Starter Is Bubbly & Consistently Rising & Falling, Now What?
You have a happy and thriving sourdough starter, and you are ready to make bread.
Let's say your starter took 7 days to establish. That means that you now have 350g of sourdough starter in your jar.
25g of rye flour + 25g of water = 50 g
50 g x 7 days = 350g
.... I promise that's the extent of the math involved.
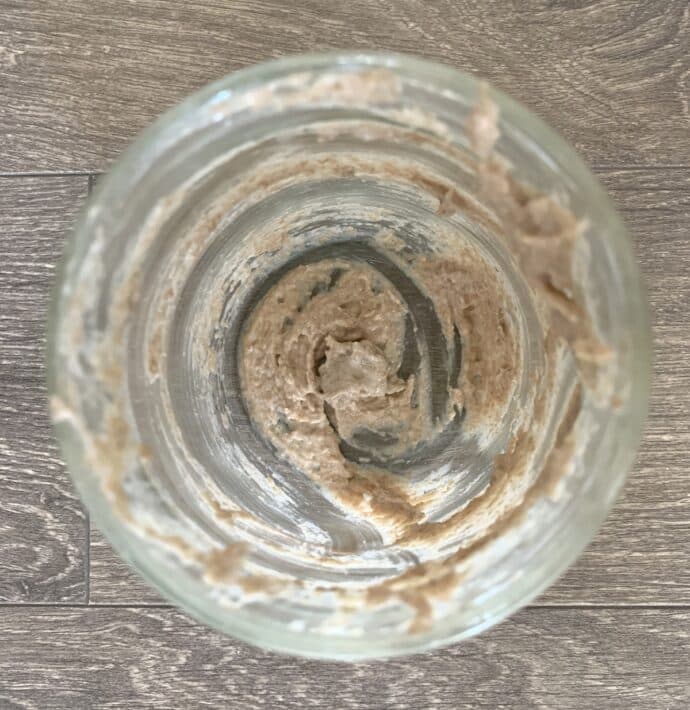
You can now remove all of that starter from the jar and use it for baking bread, or any other recipe that uses starter. You just need to leave the scrapings behind (the clingy bits that are left on the bottom and sides). These clingy bits are all you need to keep your starter going.
Put the (almost) empty jar with clingy bits in the fridge and leave it there until a day or two before you want to make bread again.
Here is my jar of sourdough starter scrapings:
Then next time you want to bake:
- If a week or less has passed since you put the jar in the fridge - the night before you want to bake, read your recipe and see how much starter it calls for.
If it says you need 100 g of starter, put 50g of flour and 50g of water into your starter jar and stir it up really well. 50 g + 50 g = 100 g, which is what you need for the recipe.
If the recipe says you need 300g of starter, put 150g of flour and 150g of water in your jar. 150g + 150g = 300g.
Get it? Then cover the jar and leave it wherever you keep it, until the next morning, when it should be at its peak and ready to bake with. Take out all of the starter to use in your recipe, leaving the scrapings in the jar and pop it back into the fridge for next time, then follow these directions again the next time you want to bake. - If 2 weeks have passed since you put the jar in the fridge - 2 nights before you want to bake, read your recipe and see how much starter it calls for. You are going to feed the starter over 2 nights to get it excited again.
If your recipe says you need 100 g of starter, put 25g of flour and 25g of water into your starter jar and stir it up really well. Then, the following night, add another 25g of flour and 25g of water. That brings you up to 100g of starter. Leave it until the next morning, and it should be nice and bubbly, and ready to bake with.
If the recipe says you need 300g of starter, put 75g of flour and 75g of water in your jar and stir it up, then the following night add another 75g of flour and 75g of water, stir it up and leave it 'til morning when it should be ready to bake with. - If more than 2 weeks have passed since you put the jar in the fridge - Don't worry. If it's only a few days over 2 weeks, follow my directions above, and you should be fine. If it's much longer, then you might need to feed it over 3 or 4 nights to get it raring to go again. The good news is that it's pretty hard to kill it so no matter how long you've left it, it should be salvageable (unless it's mouldy - see my FAQ below for more info on that).
Don't let the amount of starter you have build up in the jar. Too much and it can get sluggish and struggle to double in size. Just feed it as much flour and water as you need for your bake and no more. If you accidentally end up with too much, use it up by making any recipe that calls for sourdough discard.
How Soon After Feeding Can I Use Sourdough Starter?
After feeding your starter, you need to wait for it to reach its peak before you can bake with it. This time varies from starter to starter and is also dependent on temperature. For me it's about 6 to 8 hours. If it's particularly warm where you are, it could happen more quickly. You will get to know how long yours takes once you've been feeding it for a while.
I feed my starter the evening before I plan to bake with it because I tend to mix my dough in the morning. If you are going to mix your dough in the evening, feed your starter when you wake up in the morning.
What Do I Do If I Want To Make Something Other Than Bread With My Starter?
By making a waste-free sourdough starter, you lose the problem of having to figure out what to do with all of the discard. But sometimes having some extra starter available to make pancakes, crumpets, or waffles is a good thing.
If you want some extra starter available to do this, feed your starter as normal the night before you are baking, but use some extra flour and water so you have more than just the scrapings left in the jar after making the bread. Then you can use it right away or leave it in the fridge until you need it.
If you aren't making bread but want to make something else that calls for discard, simply feed your starter enough to make the amount of discard called for in the recipe a day or two before you want to make it. Take out what you need for your recipe and pop the scrapings back in the fridge for next time.
How Much Sourdough Starter To Use
You might be wondering what the ratio of sourdough starter to flour is when you make bread.
The amount of starter you need to use will be listed in the recipe you are following. It varies from recipe to recipe, but the general rule of thumb is that you use about 1/5th of the amount of flour. So for every 500g of flour, that's about 100g of starter.
The more starter you use, the quicker the progress will be and the less sour your bread will be. If you use less starter, things will take much longer to happen, but you will get more complex flavours and more sourness.
I suggest following recipes as they are written to start with, until you get the hang of things, then you can experiment with amounts to get the balance of sourness and time that you need once you are more experienced.
I don't like my sourdough bread to be too sour, so I never use less than 100g of starter to 500g of flour. That's a perfect balance for me.
How Much Sourdough Starter To Keep
When you use your sourdough starter for baking, all you need to save are the scrapings that are left in the jar. You will feed the scrapings in the jar with more flour and water the night before you want to bake again, and in the meantime, the jar will stay in the fridge. There is no need to keep more starter than that.
What Can I Make With Sourdough Starter?
You aren't just limited to bread when using sourdough starter. Here are some other ideas for using it:
- pancakes or crepes
- waffles
- crumpets
- cake
- muffins
- banana bread
- pizza
- American-style biscuits
- crackers
- pretzels
- bagels
- dog treats
- cookies
- cinnamon rolls
A Sourdough Starter Insurance Policy
Just in case the very worst happens and your starter gets mouldy or dies or put in the dishwasher accidentally (yes, that happened to me once!), you could stash a little bit away as insurance. Keep a tiny bit in a pot or bag in the freezer and change it every 3 or 4 months for a fresh piece, or scrape some wet starter in a thin layer onto some parchment paper and allow it to dry out completely until hard and moisture-free. Then scrape it off and keep it in an airtight jar in the back of the pantry. It will keep just about forever like that.
Hopefully, you'll never need it, but if you do, it will be there ready and waiting to help you get up snd running again quickly.
What Equipment Should I Gather In Preparation For Making My 1st Loaf Of Bread?
While your starter comes to life over the next week or two, you might want to prepare for when you make your first sourdough bread recipe.
For that, you will need:
- a large mixing bowl for mixing the dough
- a Dutch oven or a baking/pizza stone, but a baking tray will do if that's all you have
- a metal roasting pan or baking tray with sides and some boiling water (if you aren't using a Dutch oven)
- rice flour, coarse cornmeal or polenta - This isn't for actually making the bread. It's to ensure your dough doesn't stick to anything. Regular flour does not work well because it just absorbs the moisture from the dough and then sticks. If you've got rice (white or brown) in your pantry, and you have a blender, you can make your own rice flour in 2 minutes. Just pour the rice into the blender and blend until a fine powder. Store in an airtight container.
- a banneton (proofing basket) or a mixing bowl lined with a clean dish towel
- a very sharp serrated knife or a razor blade (or a lame/grignette if you want to get all posh) for scoring the bread.
- a spray bottle filled with water
Amazon sell handy little sourdough starter kits that contain a banneton (proofing basket), a lame and a dough scraper. I bought myself one when I was starting out. The rest of the things you probably have at home anyway.
Why Measure In Grams and not ounces or cups?
(This section has been added post-publication after getting lots of messages about why I recommend measuring in grams and not ounces or cups)
The amounts of flour and water that you use MUST be absolutely exact and the only way to make them exact is to weigh them. Ounces don't go small enough. Grams are the only accurate way to measure very small amounts.
We need to use really small amounts of flour in this recipe so that we don't have to discard anything. If we were using larger amounts that you could potentially measure in ounces it would all build up too quickly in the jar and then we'd have to discard which is something this recipe avoids so that we aren't wasting precious food. That's what makes this recipe different to every other one out there. With every other recipe I have seen, you litreally have to throw away half of your starter every single day. That is something I cannot get behind when it is completely unnecessary.
I absolutely do not recommend the use of cups to measure because they aren't accurate enough for measuring a recipe like this. The measurements need to be absolutely exact so that you end up with a 100% hydration starter (50% water 50% flour). If the amounts of water or flour are even slightly off then the hydration won't be correct and then you will run into all sorts of problems when you come to make a sourdough bread recipe with the starter because they all rely on you having a 100% hydration starter. If it's not you'll end up with your dough being either too dry or way too wet and you won't get a good result.
Sourdough is a science. If it's going to work well you have to weigh. All digital kitchen scales measure in grams and you can pick one up for less than $15. Even the big grocery stores sell them (like Walmart etc). The amount you spend on a scale will be offset very quickly by the amount of flour that you don't have to buy and then throw away every day like you would have to do with any other recipe.
A scale is such a good investment because all of your baking recipes will turn out better if you weigh the ingredients. It might seem like a cup is a cup, but 1 cup of every single type/brand of flour weighs a different amount, and even the way you fill a cup changes how much flour ends up in it. Scooping flour results in about 25% more than spooning it in gently and levelling it with a knife. Because of that, you can never be absolutely accurate when using them and that's why I always bang on about using a scale in my baking recipes and why professional bakers don't use cups to measure. They all weigh because it's the only way to be accurate and consistent.
I have added cup/tablespoon/teaspoon measurements in this recipe (under duress ;O) for those people without a scale, but if you want a good result (in this and more importantly your future bread) then you must use a scale.
Sourdough bread is not easy to make at the best of times until you've got some experience behind you. If you don't have all of the measurements correct you'll just be making the whole process even more difficult for yourself and will likely end up failing.
And that's why I recommend measuring in grams!
Important To Bear In Mind
When your starter is just a few weeks old, it isn't yet fully mature. Although it can bake bread, it won't have the power and strength of a mature starter. It will be quite weak and slow.
It's also important to realize that if you are new to the world of baking sourdough, your technique won't be perfect. That comes with time too.
Sourdough is as much an art as it is a science. For the first little while your bread might not be 100% perfect. Keep using your starter and practicing your technique, and you and your starter will get better and better.
Remember too that no two sourdough starters are the same and everyone's will behave differently. You will get used to your starter's unique characteristics once it's been in the family for a while.
Sourdough starter FAQ
No. Cover it with the lid loosely but don't do it up tightly. We want to cover it to stop anything accidentally falling (or crawling) into the jar, but we don't want to seal it. This is because as the carbon dioxide builds up in the jar, it will create pressure. If you screw the lid on tightly, you could end up with a mini sourdough explosion, which I can tell you from experience is not pretty!
Yes, for most people, tap water is fine to use when making a sourdough starter. If it's heavily chlorinated, though, you might find that filtered water works better. If your tap water is treated with chloramine, some filters, such as Brita, don't filter them out effectively. In that case, you will need to use store-bought spring water. I recommend trying with your tap water, then if you have no luck after 7 to 10 days, switch to filtered or spring water for the second attempt.
Did you use rye as recommended? If so, then this is more than likely temperature-related. Is your house or the room your starter in quite cool (below 20 °C (68 °F) ? Cooler temperatures really slow things down, so although something probably is happening, it's happening so slowly that you can't notice it yet. Try moving the jar somewhere warmer. A warmer room, maybe on top of the fridge, or even in the oven with just the light on.
If the temperature is in range and your rye flour is fresh, then there is a chance your tap water is to blame. Try using filtered or spring water instead.
This liquid is commonly known as "hooch". It basically means that your starter is hungry or lacking nutrients, and you often see it if you miss a feeding or are late to feed. You can pour it off or stir it in. You are more likely to see this if you use white flour because it doesn't contain as many nutrients. That's why I recommend rye flour.
This means your starter is hungry. The strong smell will go away when you feed it.
It's always wise to never have your jar more than half full of unfed starter because it needs room to grow after feeding, and you don't want it to overflow. In most instances with this recipe, and as long as you used a 1 litre or larger jar, this shouldn't happen, but in the rare event it does, simply remove most of the starter from the jar, just leaving a little bit at the bottom (even as little as a teaspoon is fine) and start feeding that small portion. Or transfer a small bit to a new, clean jar and start feeding it there. The excess starter that you removed can be composted, added to the dough of a regular yeasted loaf, pizza dough or used to make pancakes or waffles.
When your starter is fluffy and bubbly and is reliably and consistently rising to about double its height and then falling back after each feed, it is ready to make bread. For most, this will be around the 7 or 8 day mark. Again, though, it is different for everyone. Don't worry if yours takes longer.
No, just because you use rye flour to make your starter, it doesn't mean you can only make rye bread. You can use your rye starter to make any sourdough bread, including white or whole wheat.
This is common with new starters until they mature. Try taking it out of the fridge two days before you bake. Read your recipe and see how much starter it calls for.
If it says you need 100 g of starter, put 25g of flour and 25g of water into your starter jar and stir it up really well. Then, the following night, add another 25g of flour and 25g of water. That brings you up to 100g of starter. Leave it until the next morning, and it should be nice and bubbly and ready to bake with.
If the recipe says you need 300g of starter, put 75g of flour and 75g of water in your jar and stir it up, then the following night add another 75g of flour and 75g of water, stir it up and leave it 'til morning, when it should be ready to bake with and more vigorous. Also, check the temperature of the area where you are leaving your bread to rise. If it's too cool things will take a very long time. Move it somewhere over 21°C (70°F) and you will hopefully see a difference.
This is more than likely temperature/season-related. Keep it somewhere warmer, and things will speed up a bit.
If this happens, then you will need to feed it again and wait for it to reach its peak before you can bake.
Some people never clean the jar. I like to give my starter a new, clean jar about once every couple of weeks. Have the new jar ready when you are about to feed your starter. Scrape the starter out of the old jar and put it into the new jar. Feed as per usual and wash up the old jar.
A healthy starter should smell fruity, yeasty and sour in a pleasant way. If it is hungry, it will smell like alcohol or nail polish remover. If it smells cheesy or foul, then I would recommend composting it and starting afresh.
If this happens a few days after making your first starter, then just keep going with your feeding schedule. It's normal to get a burst of sudden activity and for it to calm down for a while before things really take off.
If this happens to an established starter, though, dispose of all but a really small amount ( just keep a teaspoon or two of it) and start daily feeding with rye flour as per my instructions for making a new starter. It should soon perk up!
You can make your bread less sour by using more starter in your recipe. This might sound counterintuitive, but by using mor,e you are going to make things happen a lot faster. This cuts down the time the flavour has to develop and will make your bread less sour.
Use less starter to make your bread sourer. This might sound counterintuitive, but by using less starter, you will slow things down and give more time for flavour to develop. Try cutting it down by 10% and see what a difference that makes. Decrease it a little more next time if that isn't enough.
Often, if a starter is weak, it's because there is too much of it. Discard all but a tablespoon and begin feeding it daily. You should see a difference quite quickly.
You might have heard that a sourdough starter should pass a float test before you use it. This isn't an accurate enough way to check, though, so I don't recommend you do it. Some starters will float even if they are not ready to bake with, and some will sink when they are ok to bake with. All you need to know is that it is rising to twice its height after feeding and is really bubbly. As long as that happens consistently, then it's ready to bake with and there is no need to perform a float test.
Mould is not good and is often caused by using old flour. Your flour should be fresh to make a starter. The bacteria need the nutrients. You wouldn't feed a baby old milk.
Or it could be that something that shouldn't have been introduced to the jar got in there at some point. Maybe a bit of dirt on a spatula or in the jar. It can also become mouldy if it's left for ages and ages in the fridge without being used. If this happens, there's only one place for your starter to go. That's in the compost bin. R.I.P. I guess you'll be starting all over again. Take note of the tips about having a sourdough starter insurance policy a few paragraphs below.
We've all been there, and yes, it's frustrating. In my recip,e I recommend using room temperature water when feeding your starter. But if you forget to feed it the night before, get up early on your baking day and feed your starter with warm water (not hot) (we're talking about 29 °C (85°F). That should speed things up and hopefully enable you to bake the same day.
If you are reading this after making a starter with another recipe, you can easily switch to this method. Just use up your starter in your baking, saving the scrapings, keep them in the fridge until the night before you are due to bake again, and then follow my instructions for how to feed it up with rye flour the night before you need it.
Phew! I think that's it. This is officially my longest post ever, but I thought it was important to add as much information as I possibly can so that you have the best possible chance of success. I hope it enables you to feel confident in starting out and helps you foresee and tackle with ease any challenges that you may or may not face along the way.
Let me know in the comments: Have you made sourdough before? If not, are you ready to take a chance on my easy, waste-free and fuss-free method for making sourdough? If you have already started the process, how are you getting on? Any questions? Ask away in the comments and I'll get back to you as soon as I can!
Recipe
Sourdough Starter Recipe
Author:WATCH HOW TO MAKE IT
Ingredients
- about 175 grams (1¾ cup) rye flour * (plus more as necessary) - please measure in grams if at all possible - see under heading "Why measure in grams and not ounces or cups?" in post above for more info.
- 175 grams (½ cup + 3 tablespoons + 2 teaspoons) room temperature water , (plus more as necessary) (please measure in grams if at all possible).
RECOMMENDED EQUIPMENT
INSTRUCTIONS
- Please start by reading my post above. It's long, but it includes lots of important and useful information that will help you succeed.
- IMPORTANT - I do not recommend using cups/tablespoons to make this starter because they are not accurate enough.
- ALSO IMPORTANT - At no point in this process should you discard any of the starter.
- Day 1 - To a clean jar/container that's between 750 ml (25 oz) and 1 litre (34 oz) in size, add 25 grams (3 tablespoons + 2¾ teaspoons) of rye flour and 25 grams (1 tablespoon + 2 teaspoons) of room temperature water. Mix well so you can't see any dry flour, level it as best you can and cover with the jar lid. Screw it on loosely but don't fully tighten it up. Don't screw the lid on tightly. If you have an elastic band, put it over the jar so it is level with the top of the flour/water mixture. That way you can see easily if there is any increase in volume. Leave the jar in a sheltered spot for about 24 hours, ideally at a temperature of between 20°C (72°F) to 26 °C (80°F) If your kitchen is very cool see my tips in the post above for how to keep your starter warm.
- Day 2 - There probably won't be any changes yet but you might see a few bubbles and/or notice a milky smell. Open the jar of starter and add another 25 grams (3 tablespoons + 2¾ teaspoons) of rye flour and 25 grams (1 tablespoon + 2 teaspoons) water. Mix well so you can't see any dry flour, level it as best you can and cover loosely with a lid, adjust the elastic band so it's level with the top of the mixture and put the jar back in it's spot.
- Day 3 - You might see and smell some changes now. Maybe a few bubbles and a fruity smell. Open the jar of starter and add another 25 grams (3 tablespoons + 2¾ teaspoons) of rye flour and 25 grams (1 tablespoon + 2 teaspoons) water. Mix well so you can't see any dry flour, level it as best you can and cover loosely with a lid, adjust the elastic band so it's level with the top of the mixture and put the jar back in it's spot.
- Day 4 - You will likely see more bubbles today and it could be increasing in volume. Don't get excited and think it's ready to use yet though. Sometimes this happens, then the activity will stop again for a few days, so keep going for now. Open the jar of starter and add another 25 grams (3 tablespoons + 2¾ teaspoons) of rye flour and 25 grams (1 tablespoon + 2 teaspoons) water. Mix well so you can't see any dry flour, level it as best you can and cover loosely with a lid, adjust the elastic band so it's level with the top of the mixture and put the jar back in it's spot.
- Days 5 to 7 - Keep feeding it 25 grams (3 tablespoons + 2¾ teaspoons) of rye flour and 25 grams (1 tablespoon + 2 teaspoons) on days 5, 6 and 7. It should be pretty active and smell pleasantly sour and fruity by now. If by day 7 it has been rising to twice its volume then falling again after each feeding for a few days in a row then it is ready to use for baking bread. If it hasn't been rising to twice its volume consistently after feeding, just keep feeding it 25 grams (3 tablespoons + 2¾ teaspoons) of rye flour and 25 grams (1 tablespoon + 2 teaspoons) daily until it does. Ensure the area it is kept is between 20°C (72°F) to 26 °C (80°F) and no less to give it a boost. See the recipe notes for what to do if your jar starts to become more than half way full after feeding.
- Once your starter has been rising and falling consistently after feeding for a few days it is ready to bake with. Now you must name it and make it part of your family ;O)
- You can use the starter to bake bread when it is at its peak (doubled in size) after feeding. Use what is in the jar for baking with and just leave behind a tiny bit of starter. A few teaspoons is sufficient, or what amounts to the scrapings in the jar. Pop the jar of scrapings in the fridge where it can stay until the day before you bake again. It does not need to be fed in between. The next time you want to bake, remove it from the fridge the evening before and feed it so it's ready and at its peak for you the next day.
NOTES
If it says you need 100 g of starter, put 50g (½ cup) of rye flour and 50g (3 tablespoons + 1 teaspoon) of water into your starter jar and stir it up really well. 50 g + 50 g = 100 g which is what you need for the recipe.
If the recipe says you need 300g of starter, put 150g (1½ cup)of rye flour and 150g (½ cup + 2 tablespoons) of water in your jar. 150g + 150g = 300g.
Get it? Then cover the jar and leave it wherever you keep it, until the next morning when it should be at its peak and ready to bake with. Take out all of the starter to use in your recipe leaving the scrapings in the jar and pop it back into the fridge for next time, then follow these directions again next time you want to bake. If 2 weeks have passed since you put the jar in the fridge – 2 nights before you want to bake, read your recipe and see how much starter it calls for. You are going to feed the starter over 2 nights to get it excited again.
If your recipe says you need 100 g of starter, put 25g ( ¼ cup) of rye flour and 25g (1 tablespoon and 2 teaspoons) of water into your starter jar and stir it up really well. Then the following night add another 25g of flour (¼ cup) and 25g (1 tablespoon and 2 teaspoons) of water. That brings you up to 100g of starter. Leave it until the next morning and it should be nice and bubbly ready to bake with.
If the recipe says you need 300g of starter, put 75g (¾ cup) of rye flour and 75g (5 tablespoons) of water in your jar and stir it up, then the following night add another 75g (¾ cup) of flour and 75g ( 5 tablespoons) of water, stir it up and leave it ’til morning when it should be ready to bake with. If more than 2 weeks have passed since you put the jar in the fridge – Don’t worry. If it’s only a few days over 2 weeks follow my directions above and you should be fine. If it’s much longer then you might need to feed it over 3 or 4 nights to get it raring to go again. The good news is that it’s pretty hard to kill it so no matter how long you’ve left it it should be salvageable (unless it’s moldy – see my FAQ below for more info on that). *FLOUR The flour you use must be rye flour and it must be fresh. Don't use a bag that's been sitting around in your pantry for 6 months or you'll be setting yourself up for trouble. The bacteria need nutrients to grow so you'll have a hard time getting it going and a strong chance of mold appearing at some point if you use old flour.
I recommend using rye flour because it produces a hardier and more resilient starter that will be ready to use a lot quicker than other flours and that will be easier for a beginner to get going and maintain. It also copes really well with the unique maintenance regime of this recipe. Other flours will not. And don't worry, if you make a rye starter you aren't stuck with just having to make rye bread forever. It works fine for making any kind of sourdough bread with flour such as white or whole wheat. IMPORTANT NOTE Make sure that your starter never fills more than half of the jar when you have just fed it because otherwise, it could overflow when it increases in volume. That's why I suggest using a large jar. If it does though, simply remove most of the starter from the jar, just leaving a little bit at the bottom (about a tablespoon is fine), or transfer a tablespoon of it to a new clean jar and start feeding it daily with 25 grams (3 tablespoons + 2¾ teaspoons) of rye flour and 25 grams (1 tablespoon + 2 teaspoons) of water as before. The excess starter that you removed can be used in any sourdough discard recipe. I like to add it to the dough of regular yeasted loaves or pizza dough or I use it to make pancakes or waffles. You can also compost it.
💌 SAVE THIS RECIPE!
Watch out for more tasty treats coming your way too! Unsubscribe at any time.



Alison says
Does this work with Unbleached Einkorn flour?
A Virtual Vegan says
I've never tried it.
T. Small says
I wanted to use rye but we use einkorn flour and let me tell you, I’m excited about this starter! I’ve never started a starter??and this first time with whole wheat einkorn flour. Wish I could show the picture because this is my second attempt for the week because after day three of the first attempt, the smell I was unsure of and the hooch; nonetheless this second attempt it has doubled or maybe more than doubled. Prayerfully this is the last attempt to greatness!!! But so far einkorn is looking up:whole wheat that is.
Jo H says
Hi, thanks for the detailed information, I have made 3 decent loaves so far. Can I share my starter or use it to start another starter to give as a gift?
A Virtual Vegan says
I'm glad you're enjoying the starter! Yes, it's great for gifting. Just feed it a little extra when you're baking and give away the excess, keeping the scrapings in your jar for yourself. They only need a tiny bit to get going. Even as little as a teaspoon. It will be more or less ready for them to use right away as long as they feed it enough to build it up with enough for baking a loaf.
If you want to make extra starters just put a teaspoon of it in a new jar and start feeding it. You get a new starter immediately! I have 3 on the go. One rye, one white and one wholewheat. All started from the same original one.
Velma McManis says
I live in a RV, where the overall temp is generally 60-63F. Can I leave my instant pot on 24 hrs/day for 7 days to create this? I tried the original method and I guess its just too cold in its environment that I either saw very little activity or it ended up molding! Please advise.
A Virtual Vegan says
That is pretty cold. Much under 68 and it really slows the process. If you have a yogurt setting in your Instant Pot you could use it for sure. If you don't it would be too hot for your starter. You could try just wrapping the jar up really well in dishtowels or a towel to help keep it cozy or keep the jar under the duvet.
The only issue you'll have is that if you're struggling to get the starter going because it's chilly, your subsequent loaves of bread will take a very long time to proof. You're probably looking at at least a few days and the longer they take to proof the sourer they will be.
Hope that helps a bit!
T. Small says
In love with this starter. For four years I’ve wanted to start a sourdough starter but was too intimidated...until you that is. I would like to know if I have to keep it refrigerated after the starter is ready? Is there any other way to store it as I don’t want to use the fridge?
A Virtual Vegan says
If you don't keep it refrigerated you won't be able to keep it waste-free (unless you bake very frequently) because it will need to be fed more. The reason you can get away with feeding it less is that it lives in the fridge.
Josephine Leow says
My sourdough starter was really active on day 2. But thereafter, there was hardly any activities for day 3-5.
Help.
A Virtual Vegan says
It's normal for it to go quiet after some initial activity. Just keep at it!
Carol says
Hi,
Thank you for the detailed instruction. I am on day 7 of my starter and it does not look active at all. I used 25 g organic rye flour and 25 g of luke warm water. The 1st 2 days was great with lots of bubbles but starting day 3 no activity and it is now day 7. What a m I doing wrong here? Any tip would be much aporeciated
A Virtual Vegan says
Just keep going. As long as your water isn't too warm (and isn't highly chlorinated), your flour is good quality and you're not keeping it somewhere unsuitable like a sunny windowsill which could kill it, it will happen eventually. The time it takes is different for everyone. As I mention in the post, it's normal to have some initial activity and then for it go quiet. To speed things up you could move it somewhere slightly warmer (not too warm though and out of direct sunshine)or wrap a dishtowel around the jar to keep it insulated.
Vannie says
My starter also have the same experience. My starter really active in 1st 2nd day, but in day 3rd until it is now day 6th no activity and why does my sourdough starter have hooch? Is this dead?
I really appreciate your tip
A Virtual Vegan says
Are you using rye flour as per the recipe? And is it a good quality flour with no additives?
Does your tap water have chlorine added? If it does that could be a factor.
As I mentioned in the reply above, starters take a different amount of time for everyone and it's normal for it to go quiet at around day 3. As long as your flour and water is of good quality, just keep at it and it will happen eventually.
Jamie says
Hi,
I am reviving my 1 week old starter which I kept in the fridge. And I realised it was not very matured before I kept it in the fridge. I added 25g of rye and 25g of water today(Sunday). Should I continue feeding 25g of rye and water everyday till the day I want to bake?
Also, if the recipe calls for 100g of starter, I would have 500g of starter by then (the whole week accumulate (100g from fridge + ((25g+25g)*8)).
I would just need to keep the 400g back to the fridge?
Thanks.
A Virtual Vegan says
That really depends on how it is after you fed it today. I would say that if it doubles after today's feed then it should be ok to bake with. If it doesn't keep feeding it daily until it does. It likely won't take a week if it was pretty active before you refrigerated initially.
As for how much to keep. If using my method, once the starter is established and regularly doubling, you should only be keeping the scrapings in the jar in the fridge. Otherwise, the method won't work so well and the starter won't be as vigorous and to bring it back to excited mode before you bake you'll need to feed it way more flour and water and it will end up not a waste-free starter. If you just have the scrapings in the jar you only need to feed it as much flour and water as you need to make whatever bread recipe you're making so you are never wasting anything. The exception to that is the first time you make it when you've been feeding it for a week and end up with a jar full. I either make multiple loaves of bread and freeze them, or use recipes that call for starter discard to use it up. Once you've used that initial amount you just have the scrapings left to store in the fridge and only feed enough flour and water to make your recipe. Then once that's used you're back to the scrapings again so you never have any excess. Hope that helps!
Jamie says
Thank you for the quick reply!
My starter is doubling and lots of bubbles at the side of the jar :) However, I realised I might have cover the lid overnight(not airtight) and this morning it had nail polish kind of smell. Will try to fix it before I put it to the fridge or bake a loaf of bread!
A Virtual Vegan says
A nail polish smell is normal between feeedings. As long as it's doubling reliably it's fine to use.
Drew458 says
My starter is a week old now and it's been doubling or more since day 4.
I started with a small amount of KA whole wheat, then found your site and started feeding with KA pumpernickel (organic whole rye). The results are amazing. It's living in my bread rising machine at a steady 78F, with hydration at or slightly above 100%.
I have to bake with it today; the aromas are so intoxicating that I can't wait any longer. Ok, I am getting some alcohol aroma even though I'm feeding it twice a day since day 4, but no hooch on top. I'll extend my favorite 4 flour recipe to a 5 flour recipe due to all the pumpernickel and see what happens. I use a rising bucket to judge doubling, so I don't rely on the time; this starter is very fast compared to my old one, which bit the dust after 6 years. I'm very curious to see how it tastes, which to me is the most important factor.
A Virtual Vegan says
I'm really pleased your starter is healthy and vigorous! Good luck with your bread baking!
Marina says
Looks like my starter is doing well but it makes a skin like on the top every day. I mix it with the starter every time. before I add the flour (rye) and the water. It's just like the flour dried up on top. Should I remove it? Why does it make that skin?
Thank you
Melanie McDonald says
It does get a bit dry on top. That's fine. Don't remove it. It's full of valuable bateria. Be sure to put the top on the jar though to stop it drying out too much. Just don't screw it on really tight. Hope that helps!
Drew458 says
After more than 6 years my old starter looks like it gave up. So I looked around at the How To sites, and started a small one Wednesday with 40gm of King Arthur Whole Wheat and 40gm of water, with the idea to go small to not waste flour. Put it on the kitchen counter. It just sat there for a day. Found this site, had an Ah Ha moment, got out the King Arthur Organic Pumpernickel flour, which is whole rye. Added 1/3c to the jar, and an equal volume of warm water, and put it in my bread proofer set at 78F. And it took off in less than a day. Yes, I know, equal volume of water is more than 100% hydration, but the 100% whole wheat mix was more like a biscuit than a soup. And together they're gangbusters. By the 2nd rye feeding I was getting a 50% rise, and this is with a watery mix. 3rd feeding was whole wheat with no extra water, which got the hydration back to only a bit on the extra wet side. And away it goes again. Thanks for the rubber band tip on the jar to judge rise. 4th feed will be more rye, and if it keeps going like this I'll transfer some to my old starter which is languishing in the fridge, having been warmed up and fed 3 times this past week with no reaction at all. Maybe I can revive that one too, which always had an excellent snappy flavor but was a bit slow to rise the dough. Either way, I should be able to make up my favorite 4 flour sourdough by Monday.
Stuart says
I wanted to say thank you for this starter recipe. Really clear instructions, even I couldn't go wrong. By the seventh day I had a really strong and healthy rye-based starter. I made my first loaves a couple of days ago - simple tin loaves with an overnight rise using 50-50 white and malted granary flour. It resulted in the tastiest bread I've ever made! I do have one question that I'd welcome your advise on. When I fridge the scrapings of the starter, can i put the lid on fully or is there still a risk of an explosion even when the jar is almost empty? If it's relevant, I'm using a kilner jar without the rubber seal.
A Virtual Vegan says
That's so good to hear Stuart. I'm really pleased you found it helpful and reared yourself a successful starter! As for storing the scrapings, put the lid on tight or it will dry out and become hard and really difficult to stir up when you feed it. It won't explode because it's a small amount and it's unfed so no gases are being produced. Hope that helps and enjoy your baking!
Anne Gomes says
Hi there,
My starter stopped rising after day 4 and 5, do you think I should keep feeding it?
Thank you in advance for your advice!
A Virtual Vegan says
Just keep at it. It's normal for it to have a quiet spell for a few days after it's first burst of activity and it takes a different amount of time for everyone for it to become ready.
Sarah says
Hi!
My starter was doing great. Rising to more than double from day 2! I was so excited. Then, day 5 came along and the alcohol smell started. I tried feeding it more (@12 hour intervals) bit smell was still there and it wouldn't rise anymore. For 4 days there was absolutely no activity, just stronger alcohol smell. I finally gave up when the hooch no longer had a brown tinge but was greyish. I was using whole wheat...any suggestions?? Also, if it is doubling in volume from early on and it does so for 4 days, can I start using it on day 4??
Thank you!
A Virtual Vegan says
Hooch is normal for a hungry starter. It's hungry because you're not using rye flour as per the recipe. If you use rye flour you won't have that problem because it's chock full of nutrients that will keep it happy. Hope that helps!
Peggy says
Hello Mel
My starter does not have big holes like yours.
Its on the 8 day & not bubbling much tho I could see tiny holes.
I could feel that the jar is warm.
Can this batch be used to bake a bread or discard all and redo it again.
If I am using a starter to bake a bread, do I still need to use instant yeast?
Please advise. Thank you.
A Virtual Vegan says
Starters take a different time to be ready for everyone. It can take a week or it could take a month. If you are using rye flour as per the recipe though it shouldn't take too much longer.
It's only ready to bake bread when it's reliably doubling (or more) after feeding. If you try before it won't work properly.
You just need to keep feeding yours daily and wait. Never discard and redo it or you've just wasted your time and will be throwing out all of the beneficial bacteria you've built up. If you've got too much in your jar just follow my directions to put a tablespoon in a new jar and start feeding that daily instead. Use the large amount to make something like pancakes. I go into more detail about that in my post/recipe.
And no you don't need yeast when making bread with a sourdough starter. The starter is all you need. That's why it needs to be reliably doubling after feeding before you can attempt to make bread.
Sourdough takes patience and time. If you're following my method 100% it can't fail. Just keep at it!
Hope that helps!
Peggy says
Thank you Mel for the details explanation & help.
Will used 1 tbsp of it to feed.
Blessings !
Peggy says
Is it normal that the inner side of cover if jar sweats during fermentation?
Which of your pancake recipe would you suggest for me to use the larger amount of starter as mentioned earlier?
Thank you.
A Virtual Vegan says
Yes it's normal. The jar is full of moisture so there will be condensation. I don't have a sourdough pancake recipe on my website as yet. I hope to soon though. I just wing it when I make them! I'm sure there will be some recipes you can use online though!
Shwetha says
Thank you ! Thank you! Thank you! for this amazing, detailed post! I just started my starter yesterday. Having read somewhere else about not discarding, I fed it today without discarding any. Day 2 of my first time trying to prepare a starter, i stumble across this post and couldn't be happier! I read every word of the post, always appreciate the details, especially when the topic of discussion is sourdough :)
One question, if i had to prepare a pancake (or anything other than a bread ) would i be able to get a starter back to its peak, prepare the batter at night, store pancake batter in the refrigerator to ferment and prepare pancakes the next morning? Does the batter ferment in the refrigerator ?
A Virtual Vegan says
Yes the batter will ferment in the fridge, unless it's really, really cold in there. Mix it up before bed, then check in the morning. If it's looking happy and bubbly use it right away, if not just leave it to warm up at room temperature for an hour. By then it should be good to go.
Pancakes actually work well with unfed starter too if you end up with some left. Mix the batter up with it, then leave it to sit. In the summer it's usually getting bubbly and good enough to go within 30 minutes to an hour.
I'm glad you've found my post helpful!
Shwetha says
Hi! In summer temperature in my kitchen is over 80 and somehow the first starter didn't do well in that temperature. I have my second batch in a room which is at about 78F. My question is would i have to feed the starter twice a day in warmer temperatures? Is there a way for me to instinctively decide? Thanks a lot. Your post is proving to be very helpful.
A Virtual Vegan says
If you're using a good quality rye flour it should be ok at once a day because it's so full of nutrients and will keep the bacteria nicely satisfied.
But, if you find it starts developing hooch every day (obvious liquid on top of the starter), then up it to twice. It's currently a bit hotter than 80 °F here and I only need to feed my new rye starters once a day. Hope that helps!
Liz says
Thanks for your very ear instructions! I'm trying the "scraping" method as in lockdown I've ended up with tip loads of starter discard. My starter is bubbling and making great bread. So I made an olive bread, put whatever was left in the fridge, then my friend says he doesn't like olives. So a great excuse to practice! I've taken the starter out of the fridge and added warm water and flour. So hopefully I can prep the dough in about 5 to 6 hours. So exciting!
Liz says
That should say of course "clear" instructions!
Liz
Jessie says
Hi Mel,
Can I use wholewheat flour instead?
A Virtual Vegan says
You can technically use any flour to make a starter but rye is a lot easier to get going and also easier to look after. Wholewheat won't be as forgiving if you neglect it or don't use it frequently. That's why I recommend using rye flour. It will survive just about anything!
Alison says
I started my starter on Sunday night. By Tuesday morning, it doubled and was bubbly, but fell during the day. I fed it that night, but on Wednesday morning there was no activity and it looked watery. Came here and read this is signs of hunger, so fed it again. I'm using unbleached whole wheat flour. Temperature here has been warm. Should I continue the 2 feedings/day at equal weights? With or without discard? And do I continue this until 7 days has passed or will it be ok to bake earlier if I see activity?
A Virtual Vegan says
It's totally normal for there to be a burst of activity and then for it to go quiet on the 3rd or 4th day. I mention that in my post. It's because there are other bacteria present causing the activity in the beginning then they start dying off as the good bacteria we want present take over.
It's also normal for it to rise and fall back down. That's what you want to happen. It rises while the bacteria are eating ad excited then falls when they've finished and settle back down.
As per my method you shouldn't be discarding.
You shouldn't need to feed it twice a day unless you're using poor quality flour (have you checked the ingredients? Are there weird additives in it like azodicarbonamide, benzoyl peroxide? - A lot of common store bought flours have all sorts of things added that aren't great), or it's super hot. Even when it's the high twenties here (celcius) I only feed mine once a day.
In answer to your last question, you need to continue for as long as it takes. It's different for everyone. It could be a week. It could take a month. There's no way of knowing because it's so dependent on flour/water/environment. You know it's ready to bake with once it is consistently doubling after feeds. For at least 3 or 4 days. Then you can bake with it. Even if the whole process happens quickly it won't be before day 7.
I do highly recommend using rye flour if you can as per the recipe. It is much easier and won't give you any problems. You cna easily switch to it if you get some. Just feed it that instead of the flour you're using. You will notice a difference in it's response very quickly.
I also recommend you read the FAQ'a in my post. I think I've covered just about anything that can come up or go wrong. Hope that helps!
jane says
hi Mel!
i just started on your sourdough starter recipe on Saturday morning, using AP flour. it was going really well for the first two days, bubbly and doubled!
today (the third day), i did my usual feeding of 25g flour/water and about 2hours later a layer (i believe its called hooch) formed, possibly due to the lack of food?
i live in a very hot and humid climate! and i'm wondering if I am supposed to double the amount of flour and water added daily? i.e. day 3 add 50g flour/water day4 add 100g flour/water
since the amount in the jar is increasing daily but i'm only keeping to 25g flour/water?
Thank you!
A Virtual Vegan says
Hi there Jane. I do recommend rye flour for this recipe. All purpose flour is much harder to get going and maintain. Using rye flour makes it really easy because it's so nutrient rich and the bacteria love it. White flour is pretty void of nutrients hence the reason it's so much ore difficult. Also white flour often has additives added to it. Is yours definitely unbleached? It's not always obvious from the label unless it specifically says "unbleached" on the packet. If it's bleached/and or full of additives it's unlikely to get going.
With this recipe you don't need to double the flour/water every day. You just feed 25g of each daily as per the instructions. That's all that's necessary to get it started.
But, as you aren't using a wholegrain flour and it's very hot where you are, your bacteria are working extra fast and are starving as a consequence, hence the hooch which never appears when you use rye flour.
I would recommend using rye flour to feed going forward. If you absolutely have to continue with white then in your circumstance I would recommend feeding 25g flour and 25g of water morning and night to give it more of a chance of success.
Hope that helps!
Paula says
Hi! I made the started about 5 days ago, and it was going well, but the jar was a little too small, so I transferred it to a bigger hat this morning. Now it doesn’t have any bubbles. What should I do? Thank you!
A Virtual Vegan says
Just keep feeding it daily. It will have lost the aeration when you moved it but that's fine. Once it's fed again it will all come back.
MSD says
Hello, I hope you’re doing well! I made this starter yesterday with half-bread flour and half-whole wheat, and to my surprise it had already doubled and bubbled up when I checked it today after 24 hours. I fed it again and mixed it, then it ended up overflowing past the lid just a few hours later so I placed it in the freezer to slow it’s growth. The jar is definitely big enough; 1000g. Do you know why this happened?
Other than that, thank you so much for this recipe! I absolutely hated the idea of throwing away the discard, and felt that using it to cook/bake everyday would get overwhelming quick. Really appreciate this guide
A Virtual Vegan says
Oh wow, sounds like you've got a vigorous one on your hands! It's so funny because every one is so very different. Are you are sure though that you're only feeding it 25g of flour and 25g of water each day? It's such a tiny amount and even if it increases in size 10 fold there's no way it could overflow a 1000ml/1 litre.
One tip I've learned with starters is it's always a good idea to keep the jar on a tray or plate so that if it does overflow it's easy to clear up. I wouldn't advise putting it in the freezer to slow it down. The fridge will do. Going in and out of the freezer might end up harming it long term.
If it continues to be so vigorous you'll be making some great bread in no time, but don't be surprised if it goes a bit quiet for a few days. That's normal on day 3 or 4 then it will come back.
Amra says
Hello! I have a question—after I’ve used the starter to make bread, what do I do with the rest? What upkeep is required? Thanks!
A Virtual Vegan says
Full details are in the recipe, and under the heading "My starter is bubbly and is consistently rising and falling, now what?", but basically you use what is in the jar for baking with and just leave behind a tiny bit of starter (what amounts to the scrapings in the jar). Pop the jar of scrapings in the fridge where it can stay until the day before you bake again. It does not need to be fed in between. The next time you want to bake, remove it from the fridge the evening before and feed it so it's ready and at its peak for you the next day.
Alexandra says
I had the same question - since most recipes call for less than 350 g of starter (usually around 100g for one loaf) - so even if I make two loafs I still have 150g left! Is it OK to just keep those in the fridge until I bake again the following week?
A Virtual Vegan says
It's only an issue after you've made the starter initially. Once you're baking regularly you'll just have the scrapings in the jar leftover. You can keep it in the fridge if you like, you can make multiple loaves to use it up (I always make more than one as they freeze so well and it's such a long drawn out process), or you can always add more starter than a recipe calls for just to use it up. It's just flour and water at 100% hydration so 50/50 flour and water. So all you need to do is deduct the amount of flour and water in the starter from the amount of flour and water in the recipe you are using. For example, if you're using a recipe that uses 500 grams of flour, 300 grams of water and 100 grams of starter and you have 200 grams of starter you want to use up, you can adapt the recipe and use the 100 grams of starter the recipe already calls for plus the extra 100 grams and reduce the flour by 50 grams and the water by 50 grams to allow for it. You will still be using exactly the right amount of flour and water. You'll obviously be using more starter though so things will happen a bit quicker than they usually would so bear that in mind.
You can also use the starter to make other things. You don't just have to use it for bread. You can make pancakes, fritters, cake, crackers, cookies, pizza, biscuits, batter, flatbreads, cornbread, cinnamon rolls, banana bread, waffles etc. There are so many uses for it.
Hope that helps!