Fudgy, thick and chewy Chocolate Oat Bars made without nuts or dairy! These dark chocolate oatmeal dessert bars are hearty, delicious and super easy to make!
💌 SAVE THIS RECIPE!
Watch out for more tasty treats coming your way! Unsubscribe at any time.
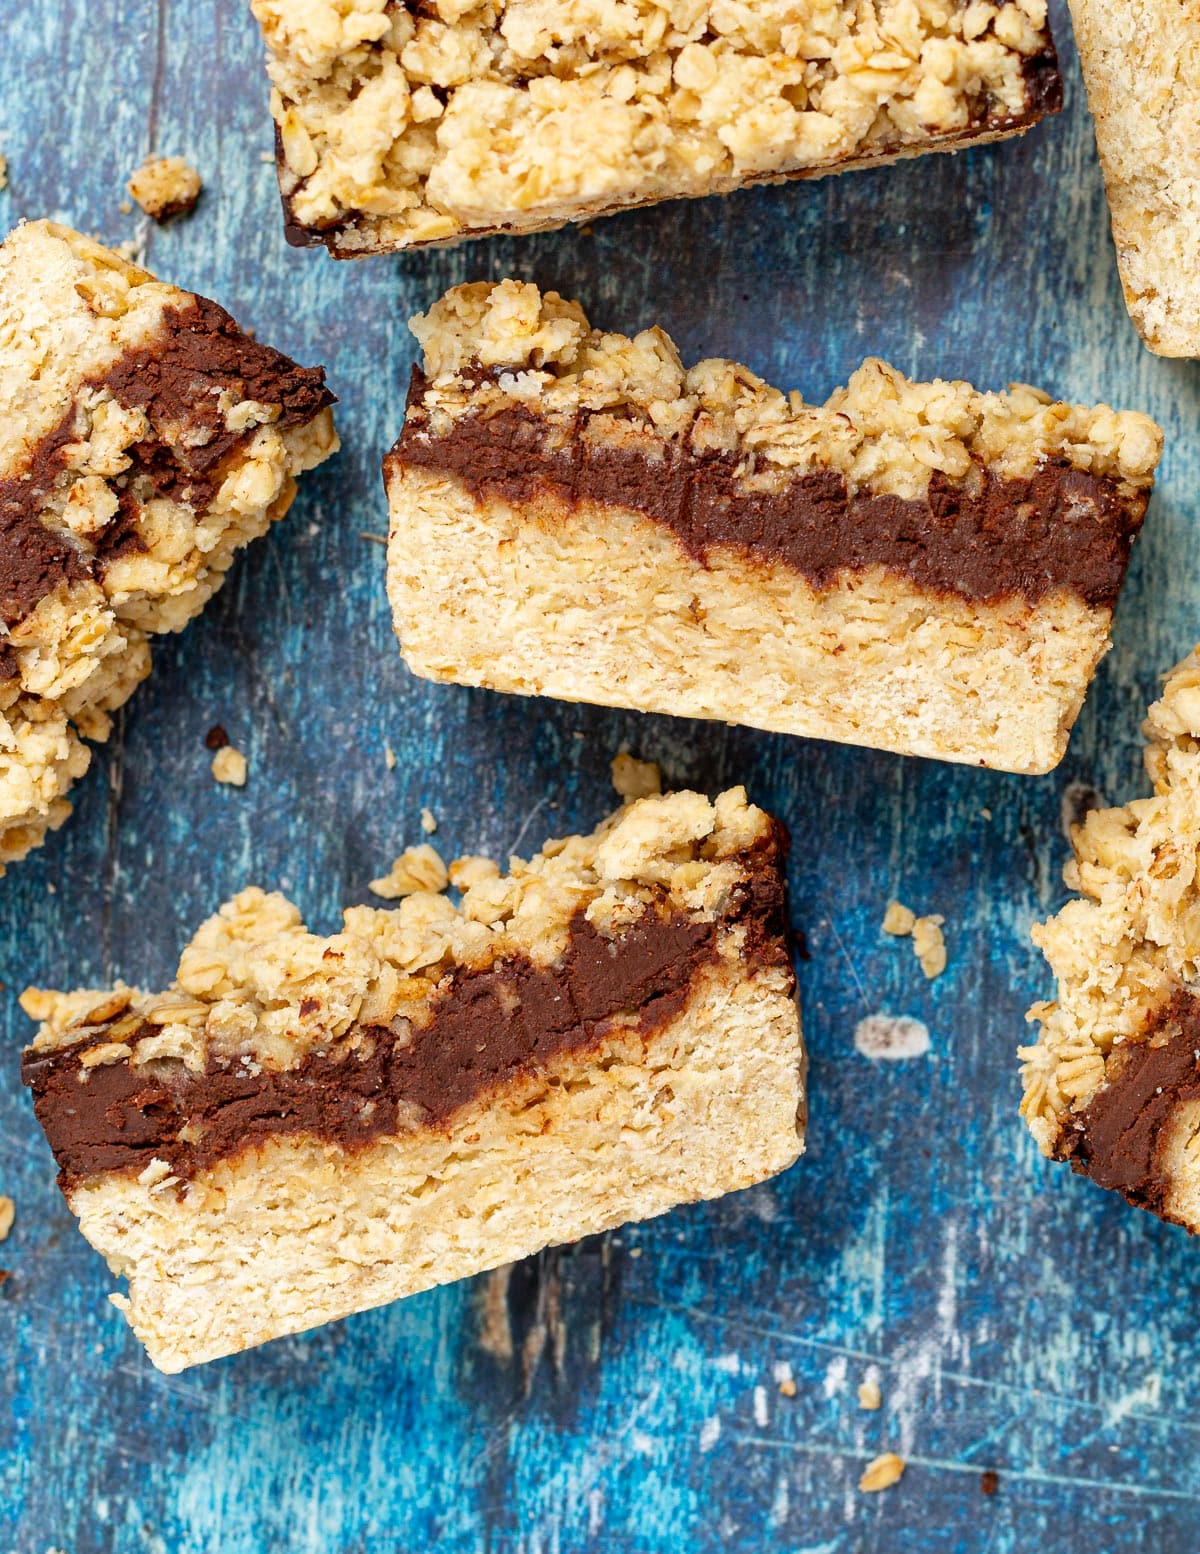
My Chocolate Oat Bars are a quick and easy cookie-like dessert bar that you can make when you don't feel like baking a batch of cookies.
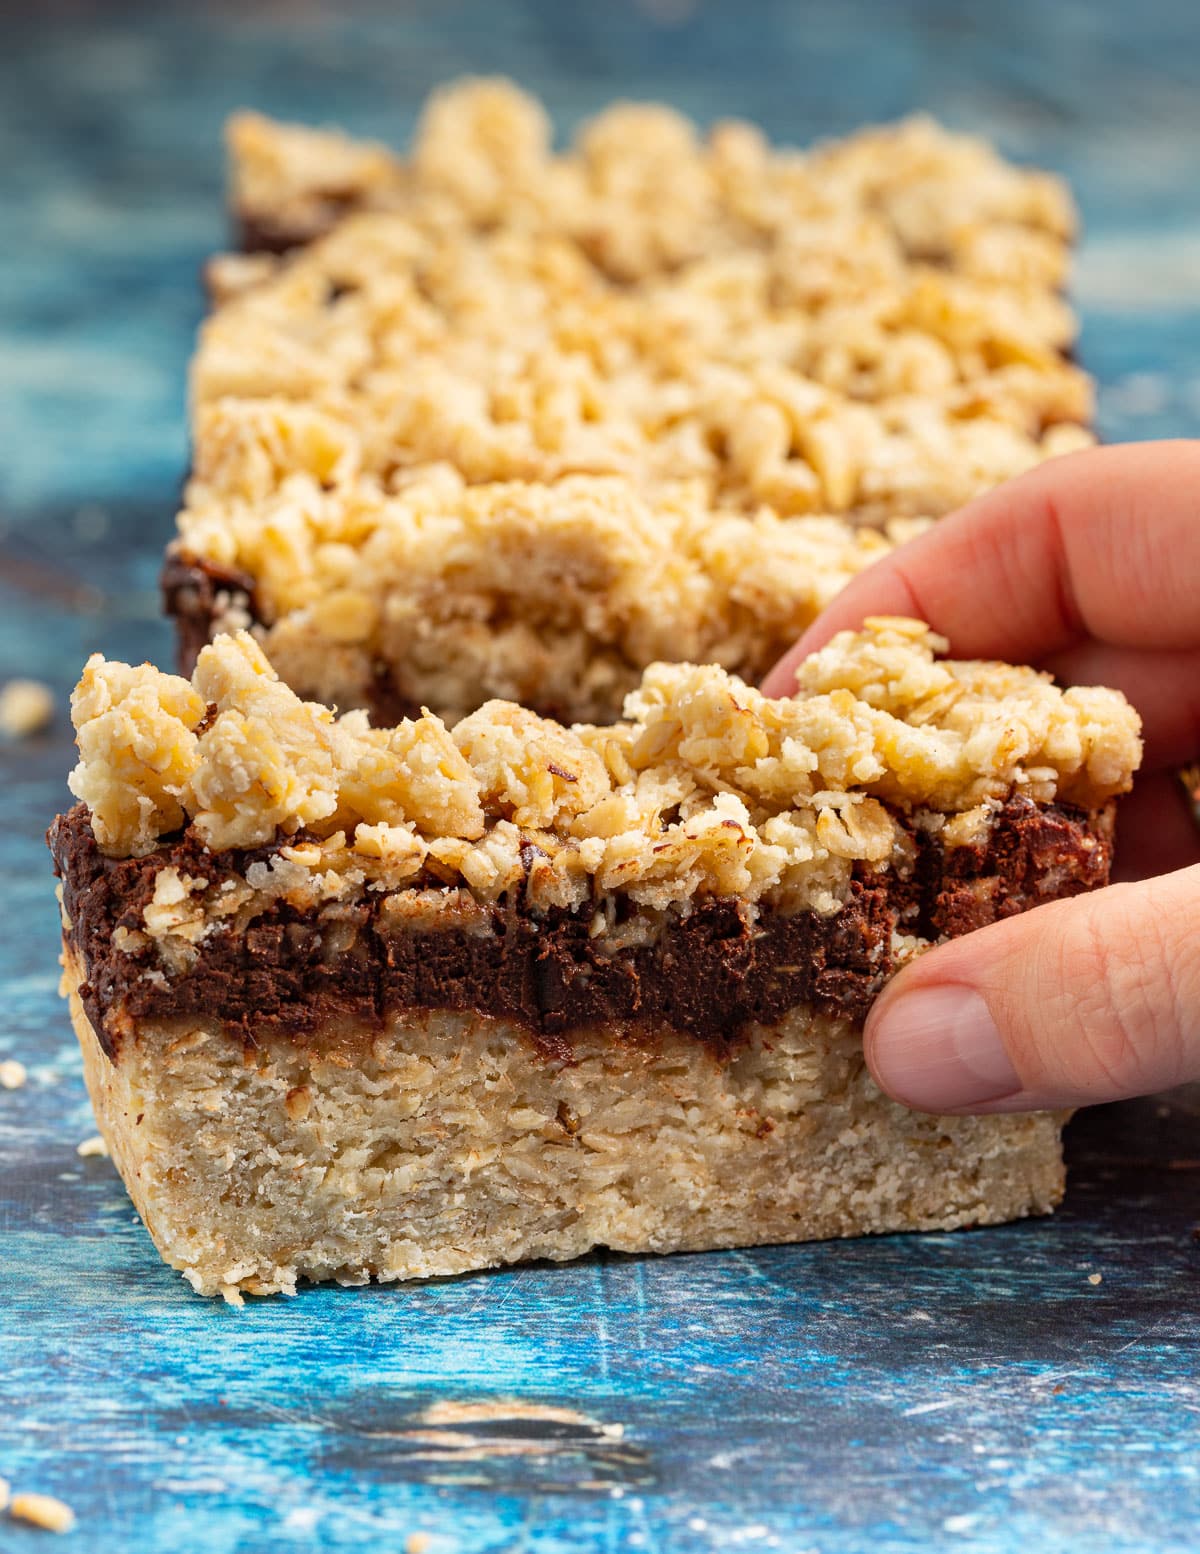
These oatmeal dessert bars have an oaty cookie base, thick fudgy dark chocolate middle, and a crumbly cookie top. They are a sweet treat that you can enjoy after dinner or for snacks at any time of the day.
With just nine simple and flexible ingredients they're ready to eat in less than an hour with very little hands-on time. They can easily be made gluten-free with a few quick adjustments too.
Jump to:

Ingredients & equipment
The simple ingredients in this chocolate oatmeal bars recipe are easy to find, plus you can customize them to fit your cravings.
Here's what you need:
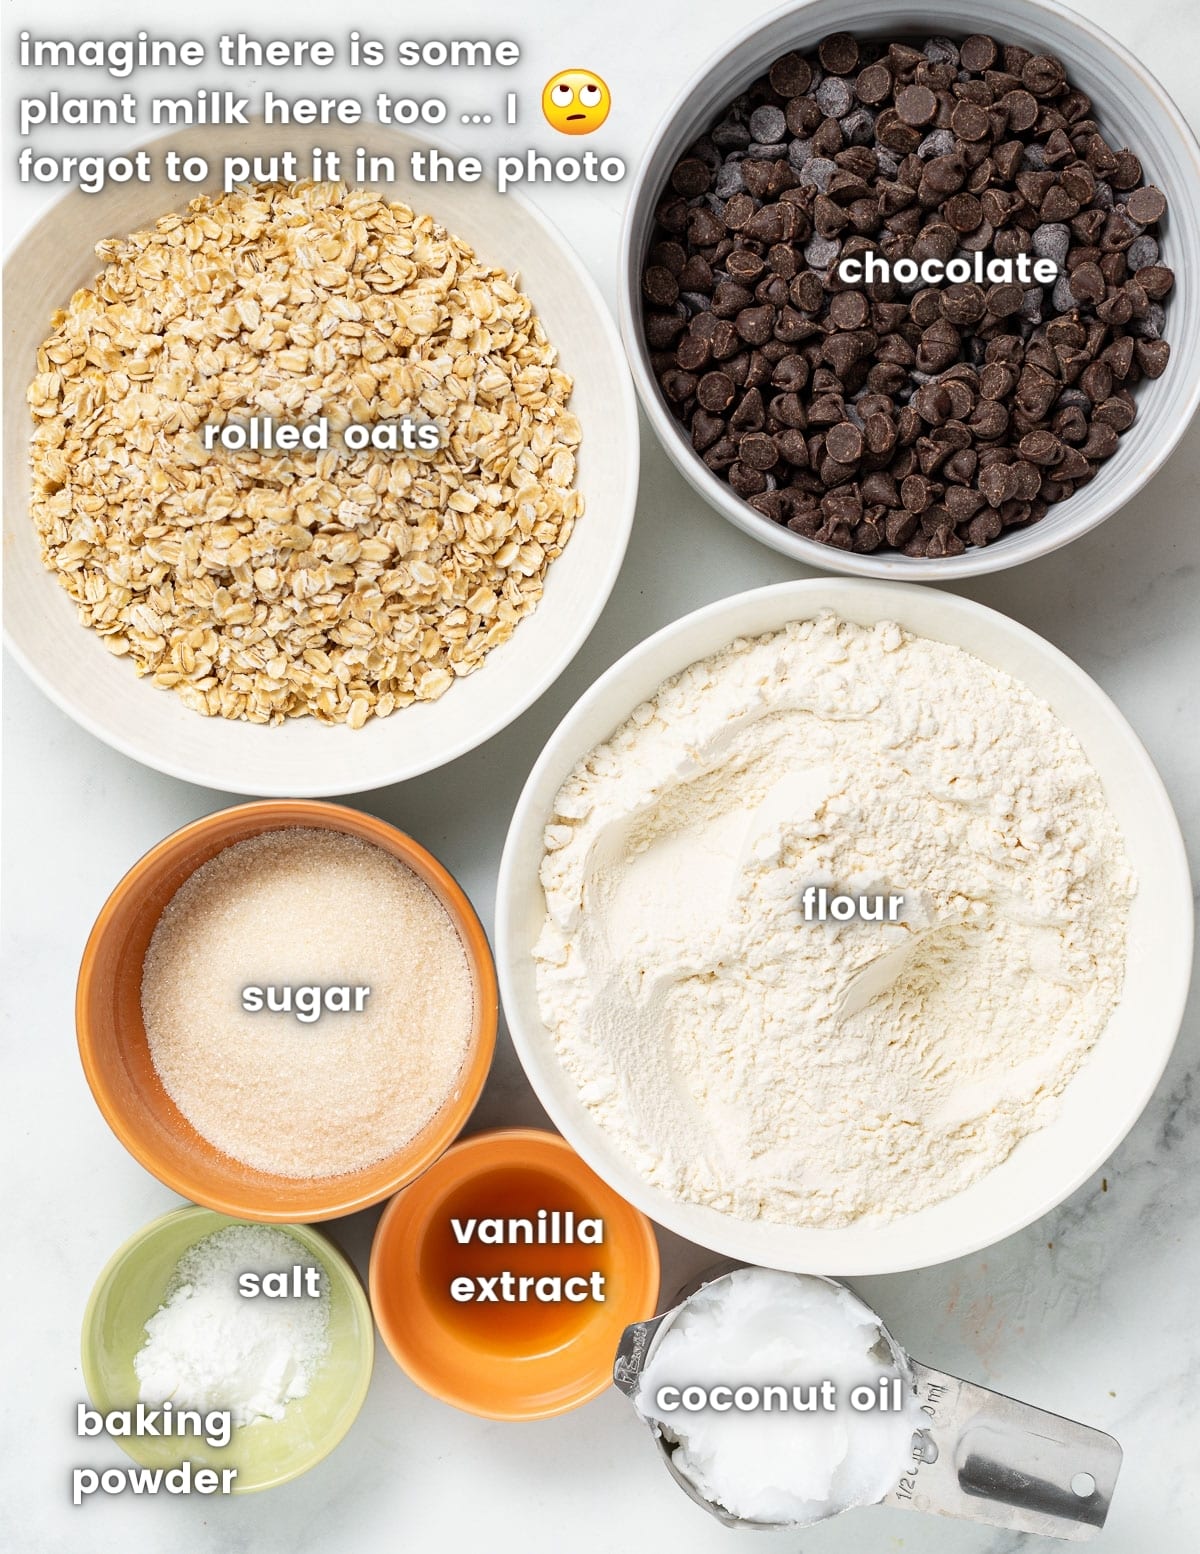
- Dairy-free milk - Any kind will do but unsweetened is recommended.
- Dairy-free chocolate chips - These are going to be melted, so no need to be picky over which brand or size to use. Enjoy Life chocolate chips are vegan and delicious, but you could also use a dairy-free dark chocolate bar instead.
- Flour - You can use all-purpose (plain flour in the UK), spelt or oat flour in this recipe.
- Rolled oats - For hearty texture and oaty flavour.
- Sugar - They are dessert bars after all!
- Baking powder - For a little lightness
- Coconut oil - Some fat is essential for good cookie texture. You could use vegan butter instead though.
- Salt and vanilla - Flavour!
The only equipment you need to make these vegan oatmeal bars are a loaf pan and some parchment paper.
Can these oatmeal dessert bars be made gluten-free?
Of course! Make these gluten-free by using certified gluten-free rolled oats and oat flour.
How to make chocolate oat bars
Make these dark chocolate oatmeal bars in only a few easy steps. Here's how it's done:
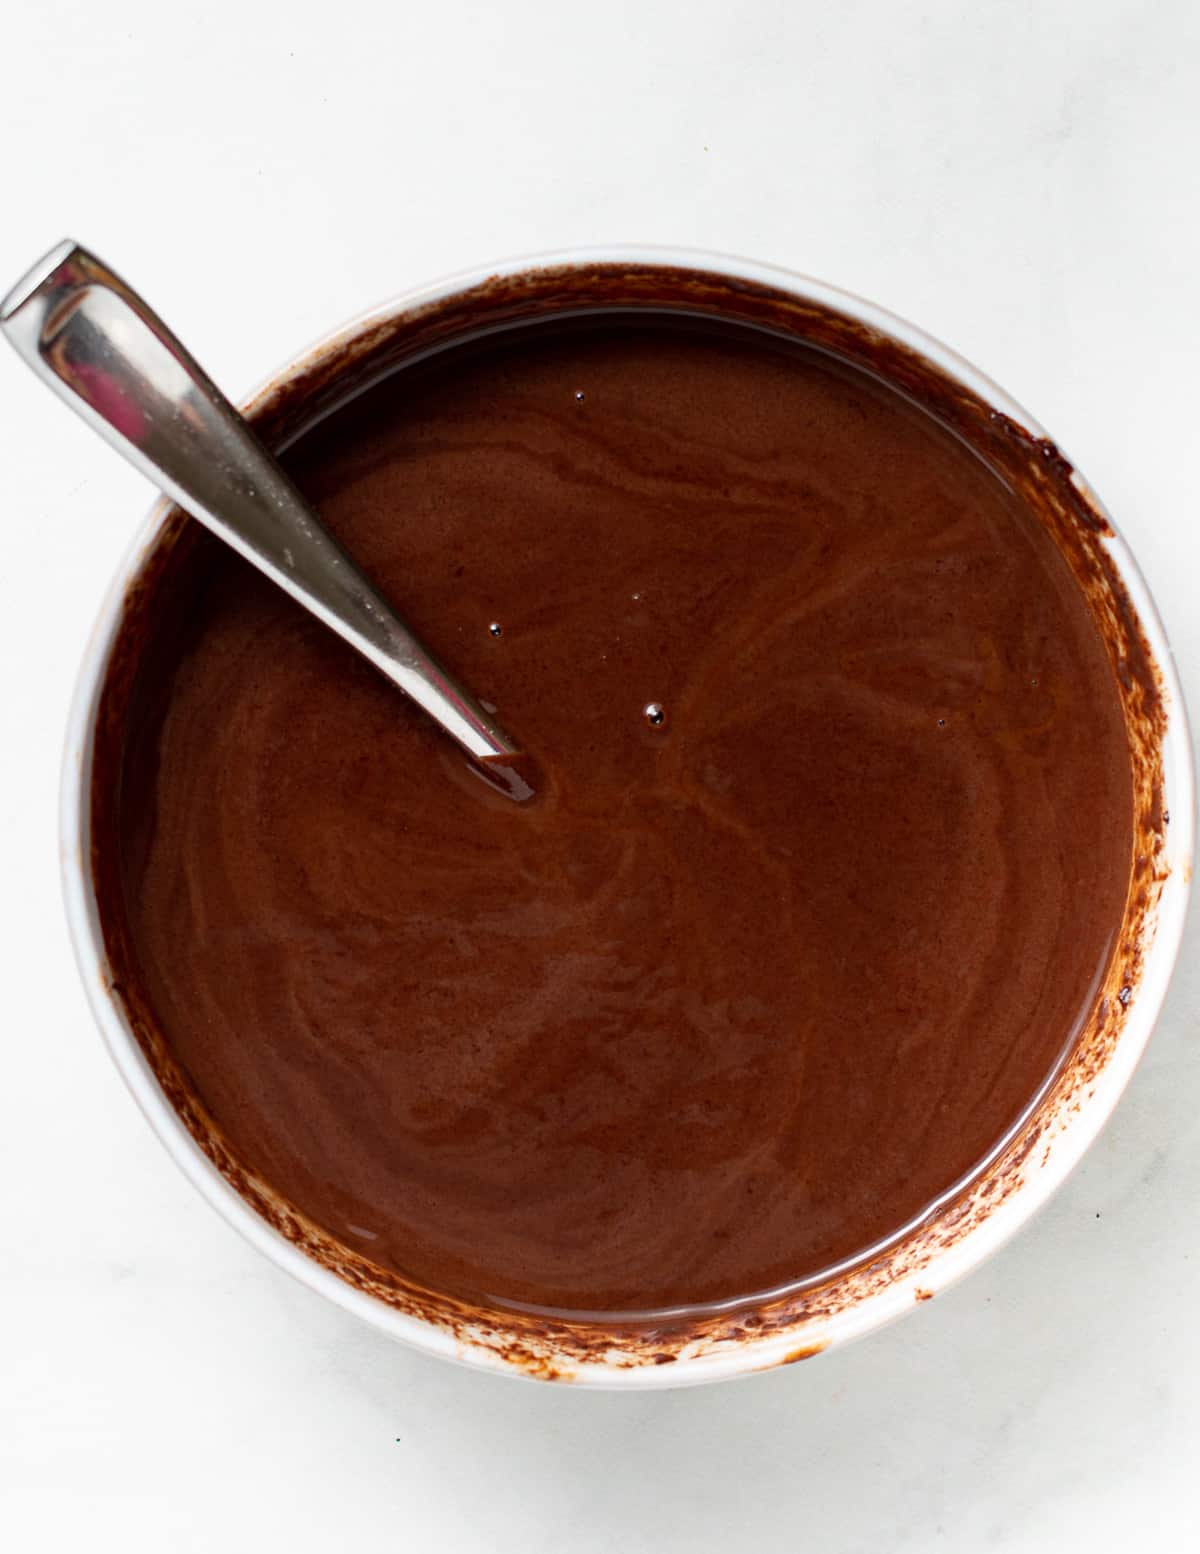
Step 1 - Heat the milk and pour it over the chocolate.
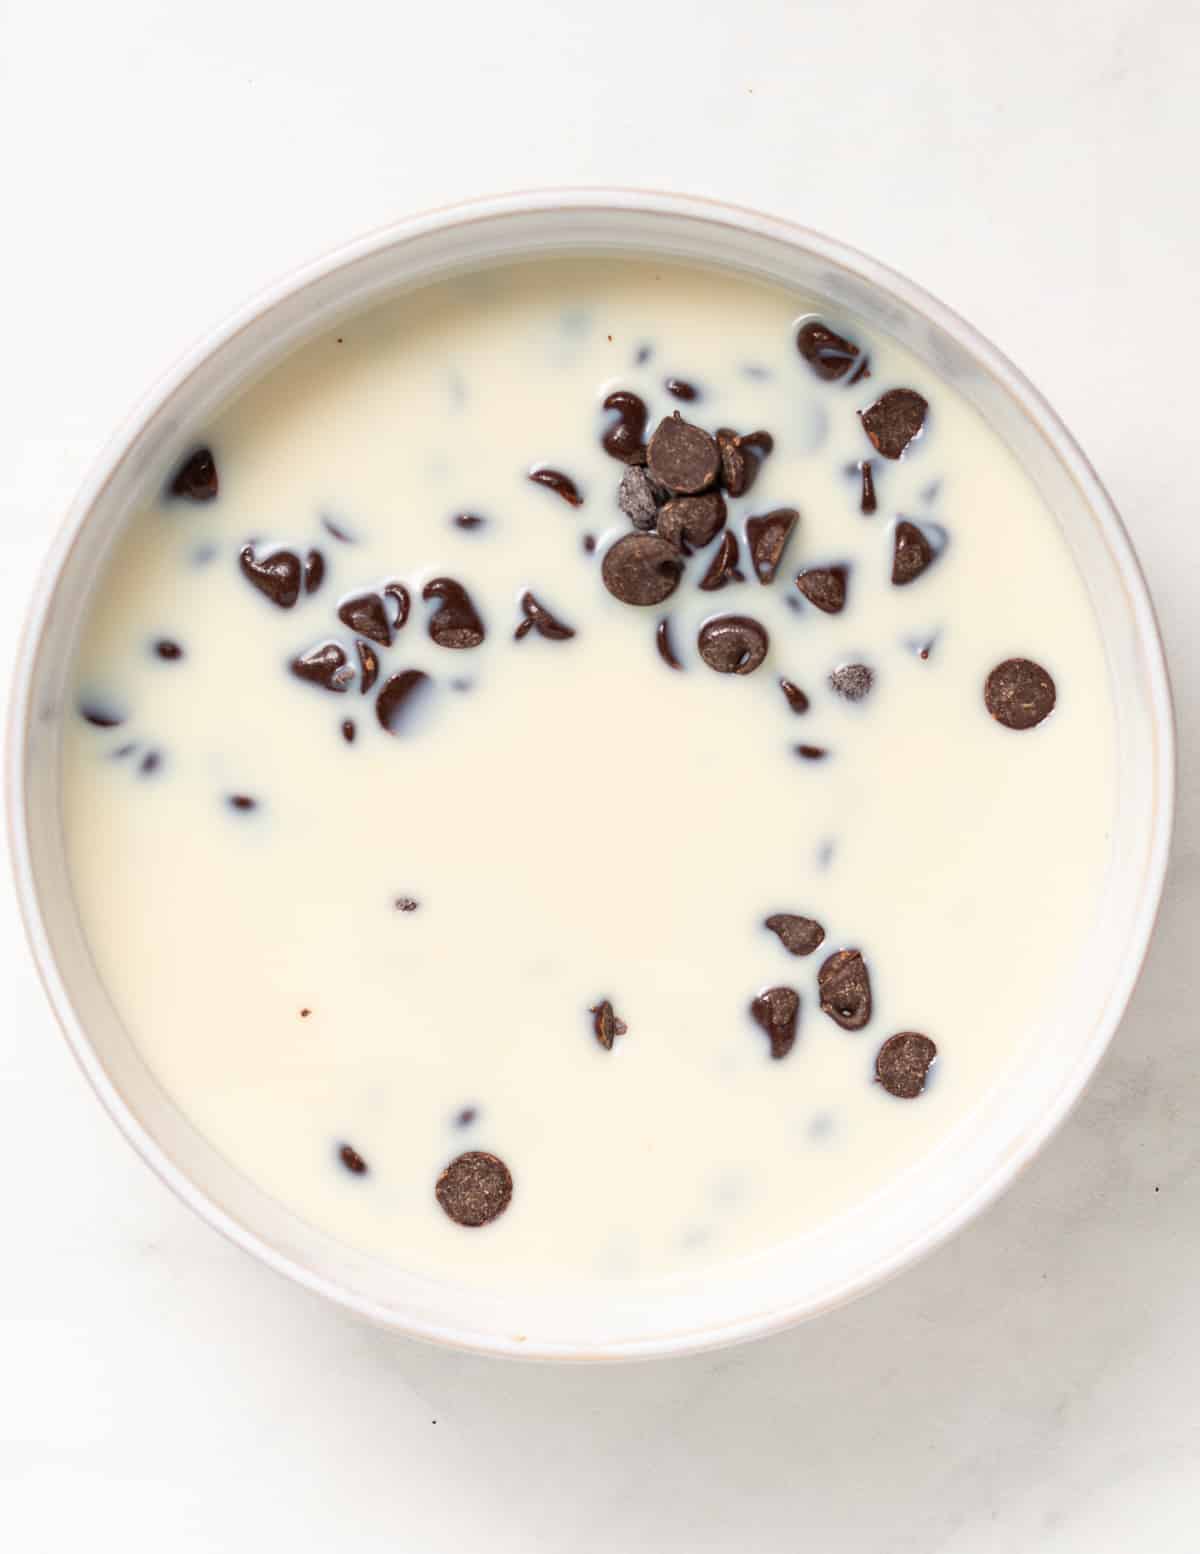
Step 2 - Stir until it melts and creates a thick, smooth, melted chocolate sauce.
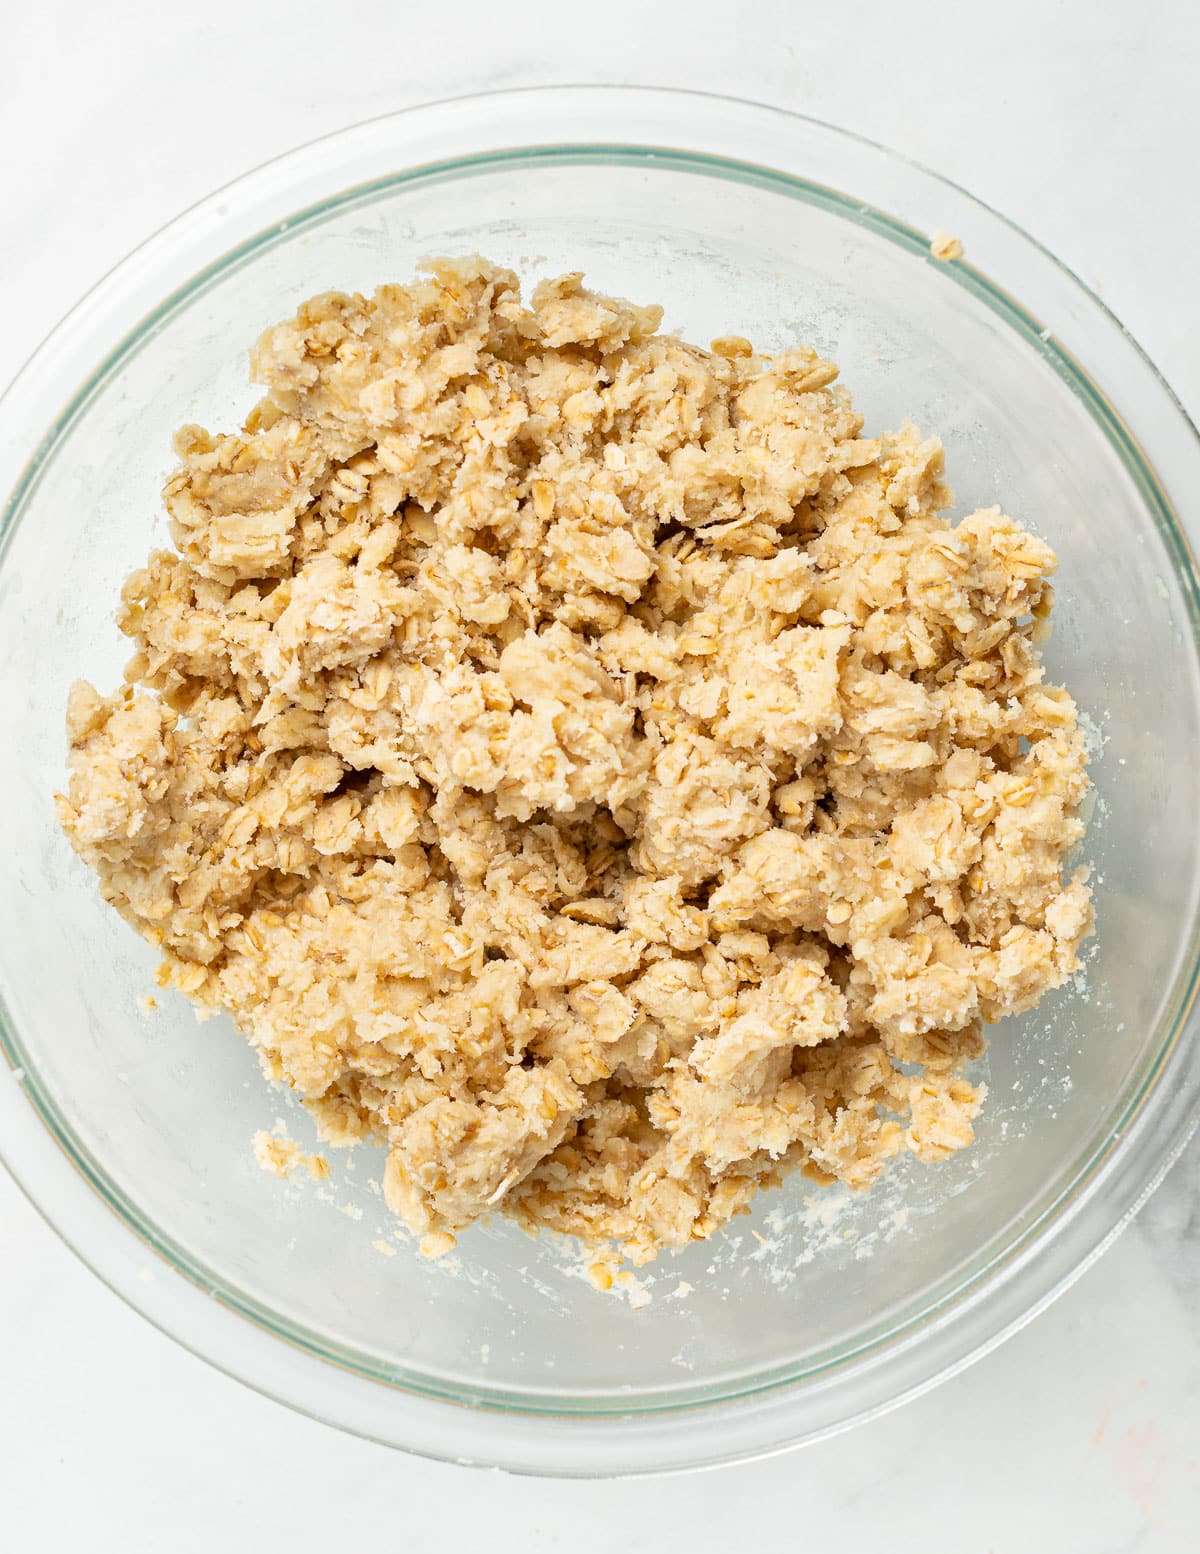
Step 2 - Mix up the oaty cookie dough in a bowl.
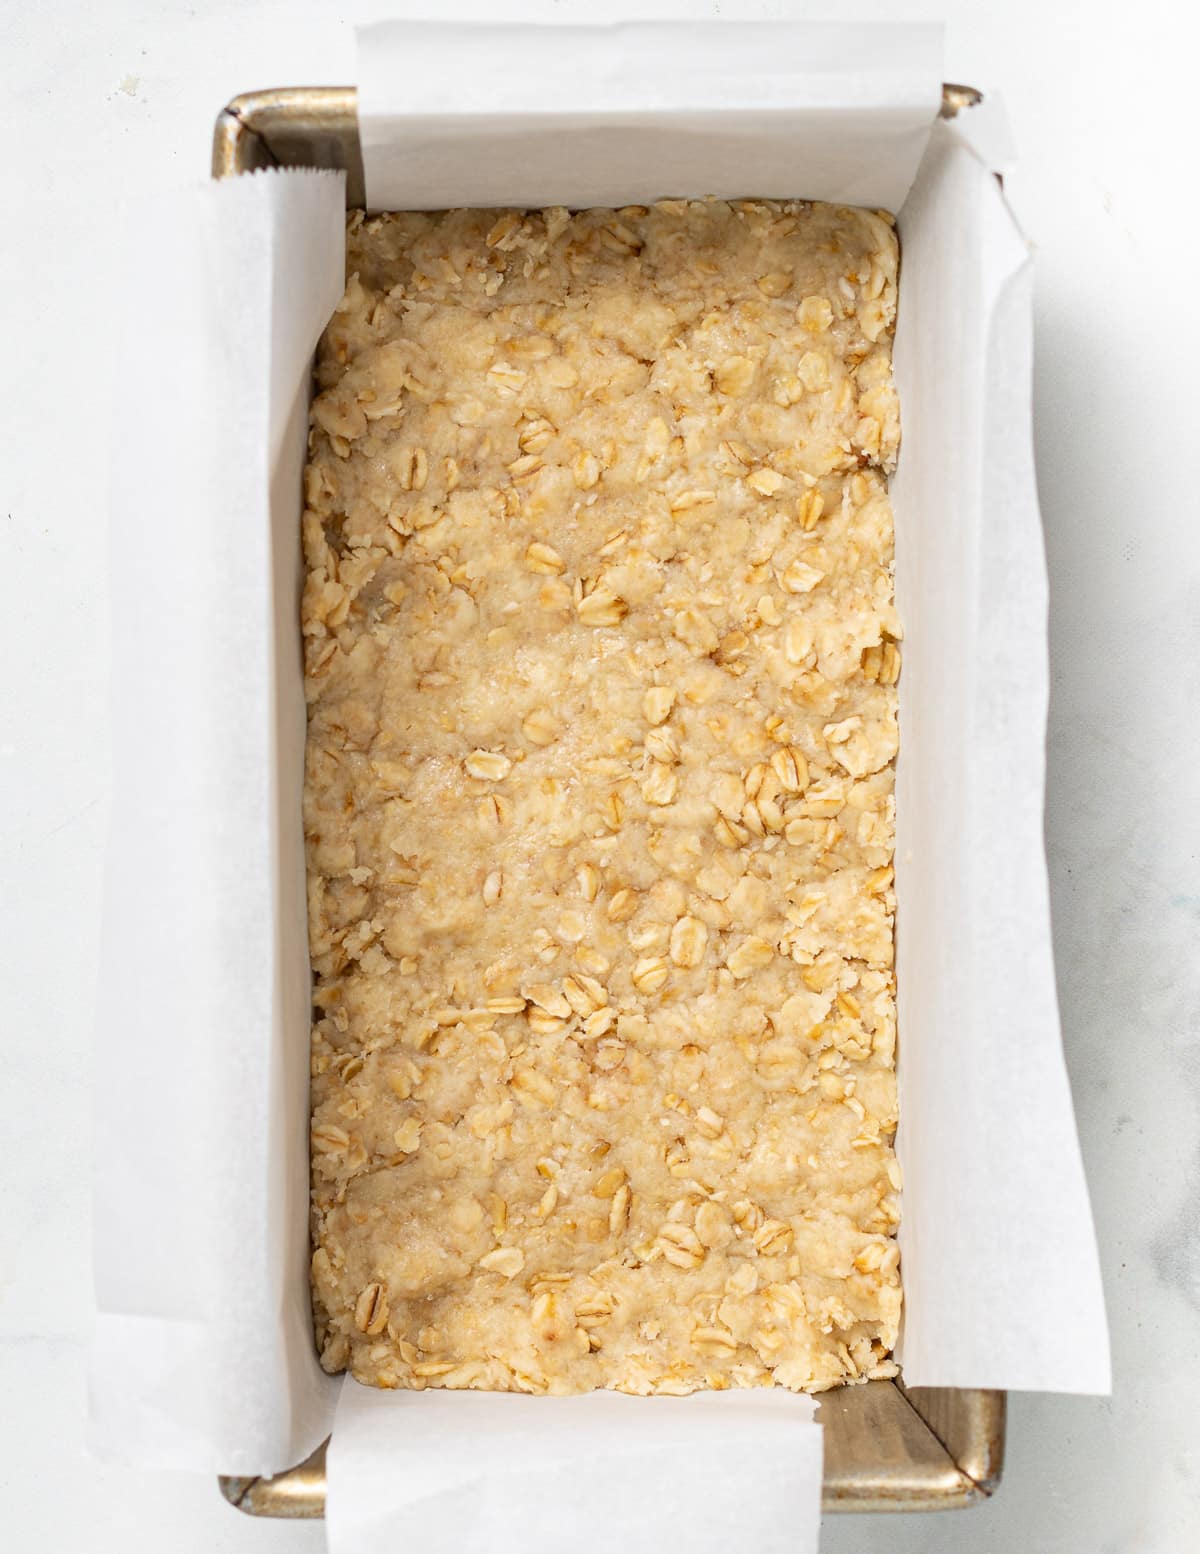
Step 3 - Pack some of the dough into the bottom of a lined loaf pan.
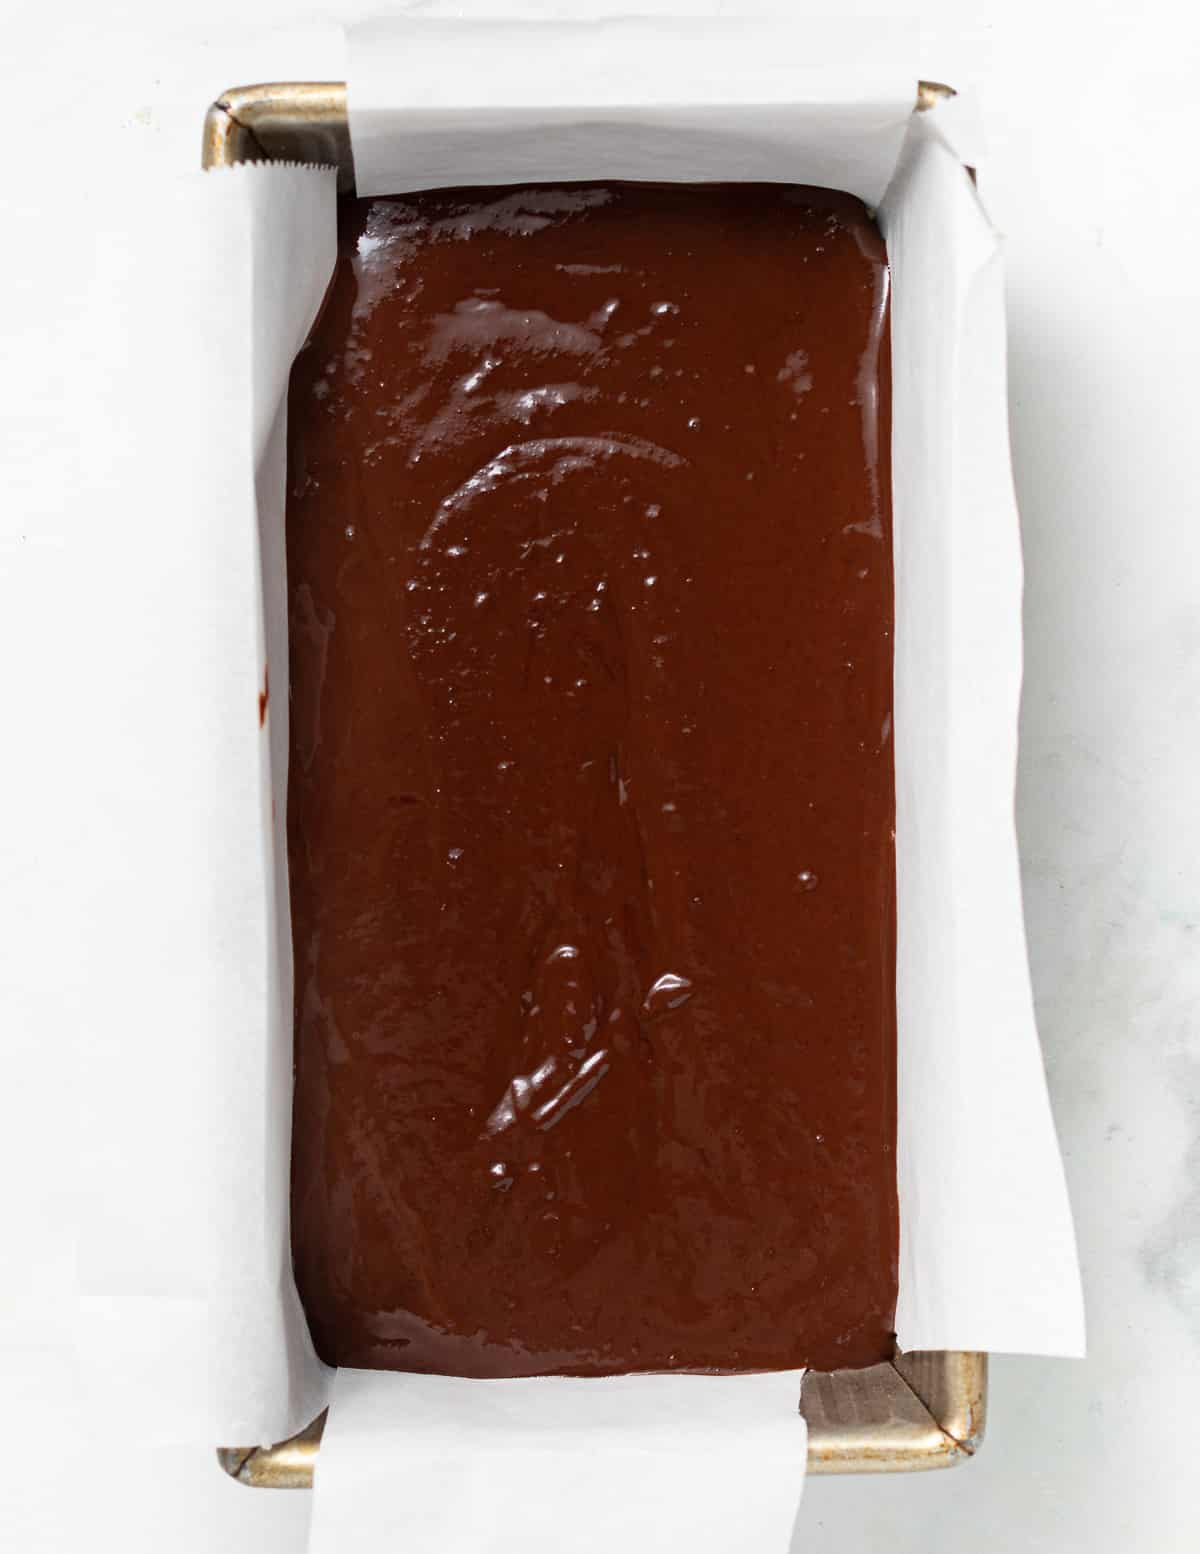
Step 4 - Pour the dark chocolate sauce on top of the dough to form the chocolate layer.
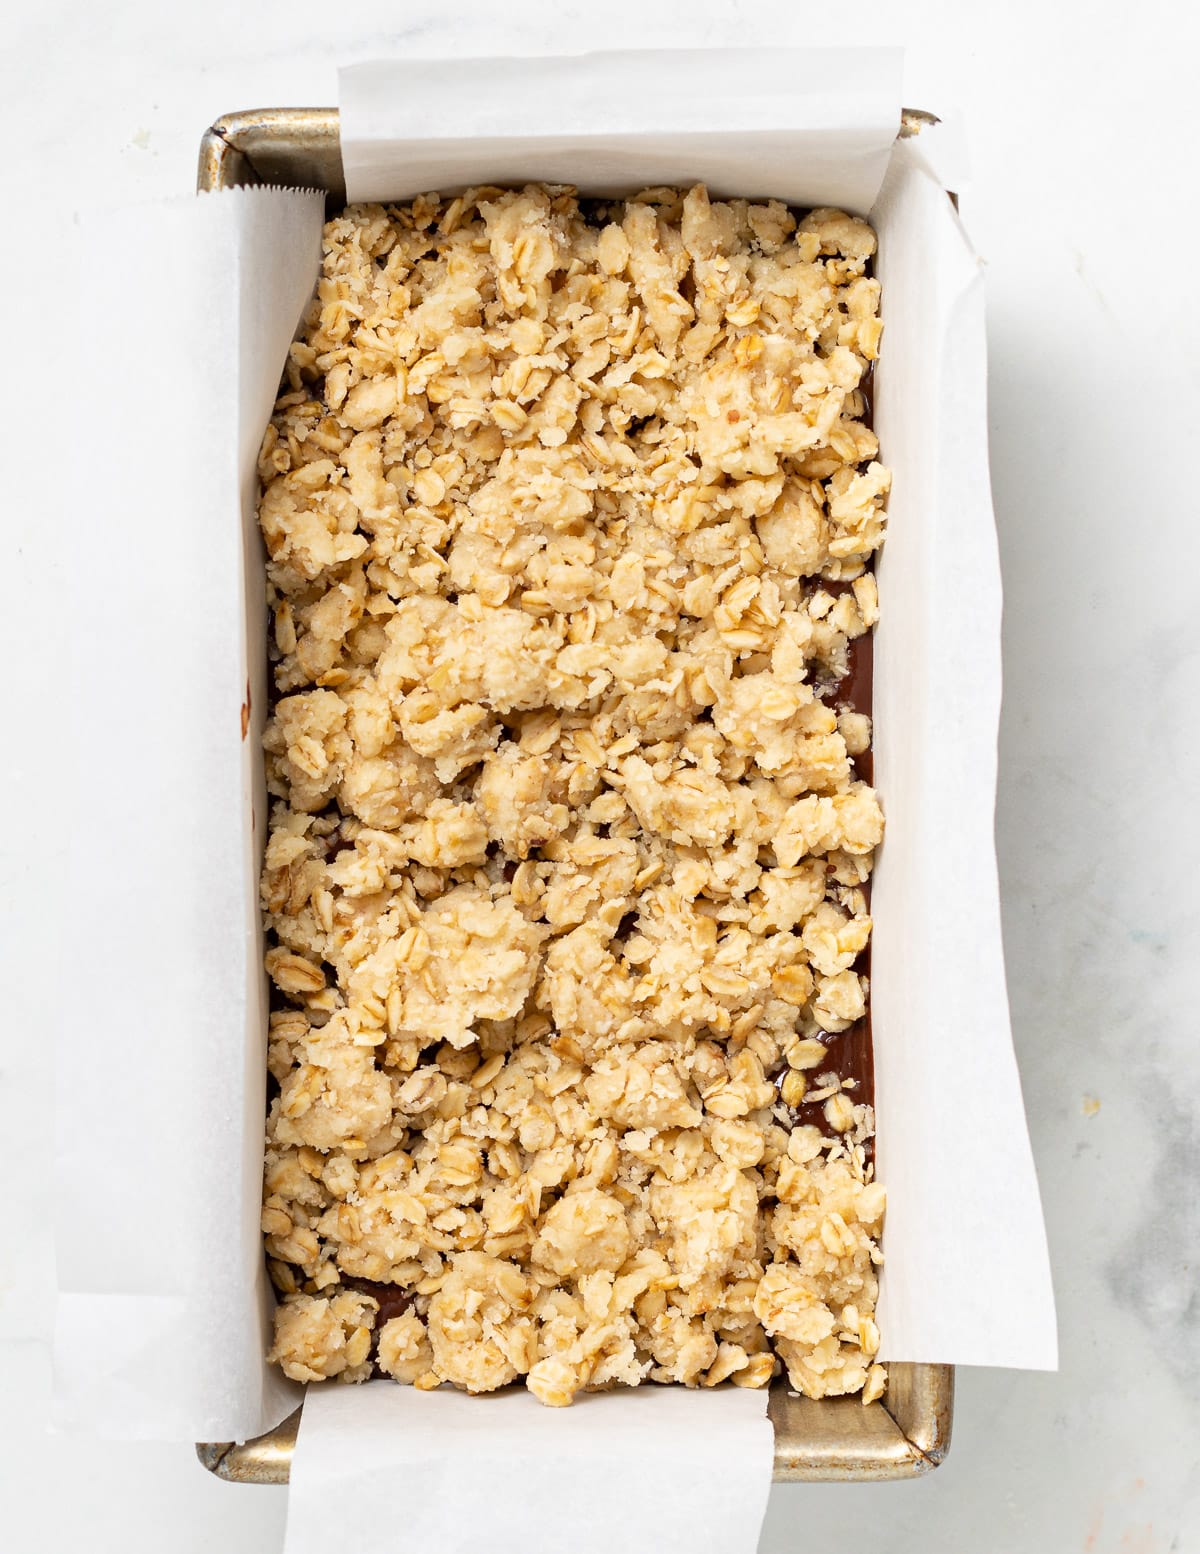
Step 7 - Crumble the rest of the cookie dough over top of the chocolate then bake.
Step 8 - Allow to cool in the pan then carefully remove and slice into bars with a sharp knife.
Success Tips
- Leave the dark chocolate oatmeal bars to cool completely in the loaf pan before cutting them. The chocolate layer needs to set.
- Press the cookie dough to the pan using the bottom of a mug or glass or your hands. The tighter it's packed, the more your bars will hold together.
- Use a sharp knife to safely and easily cut the bars. Run the blade under hot water for a few seconds for a smooth slice.
- This recipe makes big and filling bars. Feel free to cut each slice in half if you want smaller portions.
Ways to adapt this dessert bar recipe
- Use jam, apple butter, or pumpkin butter instead of the chocolate layer.
- Add some shredded coconut, chocolate chips, raisins or chopped nuts to the cookie dough mixture.
Storing chocolate oat bars
Store leftover chocolate oat bars in an airtight container. They keep best in the refrigerator and will last for up to 7 days.
They are also freezer-friendly! Keep them in an airtight container and freeze for up to 2 months.
Hungry for more?
I love bar recipes. They are a quick and easy grab-and-go snack you can eat at any time of day. Here are some more you might like:
Recipe

Chocolate Oat Bars
Author:Ingredients
- 1 cup / 240 mls dairy-free milk , divided
- 1 cup / 170 grams dairy-free chocolate chips , or chocolate from a bar
- 2 cups / 250 grams flour , all purpose, spelt, oat or plain flour
- 1⅓ cup / 120 grams rolled oats , or old fashioned oats (certified gluten-free if necessary)
- 1 cup / 200 grams sugar
- ½ teaspoon fine salt
- 1½ teaspoons baking powder
- 1 teaspoon vanilla extract
- ½ cup / 108 grams melted coconut oil , or vegan butter
RECOMMENDED EQUIPMENT
INSTRUCTIONS
- Heat ½ cup / 120 mls of the milk, either in a pan on the stove or in the microwave until hot but not boiling. Remove from the heat.
- Put the chocolate in a medium bowl and pour over the hot milk. Stir to melt the chocolate and create a thick, smooth chocolatey sauce. Set aside.
- Grease and line a loaf pan with parchment paper and preheat oven to 350°F (175°C)
- To a large bowl add the flour, oats, sugar, salt and baking powder. Mix them together to combine.
- Add the vanilla and melted coconut oil to the oat mixture and stir together.
- Gradually add enough milk to bring the dough together. The amount you need will vary but will likely be about 5 or 6 tablespoons. Keep mixing as you add it and when you can squeeze it together in your hand and it stays together in a lump, stop.
- Pack about ⅔ of the dough into the bottom of the loaf pan really tightly and flatten it out.
- Pour over the chocolate mixture and give the pan a gentle shake to level it out.
- Crumble the rest of the dough evenly over the top of the chocolate layer.
- Bake for 30 minutes then remove from the oven and allow to cool in the pan.
- Once at room temperature, carefully remove from the pan using the parchment paper as handles, and slice into portions with a sharp knife.
NOTES
- Leave the bars to cool completely in the loaf pan before cutting them. The chocolate layer needs to set.
- Press the cookie dough to the pan using the bottom of a mug or glass or your hands. The tighter it's packed, the more your bars will hold together.
- Use a sharp knife to safely and easily cut the bars. Run the blade under hot water for a few seconds for a smooth slice.
Gluten-Free? To make gluten-free use gluten-free certified oats and certified gluten-free oat flour.
This recipe makes big and filling bars. Feel free to cut each slice in half if you want smaller portions.
💌 SAVE THIS RECIPE!
Watch out for more tasty treats coming your way! Unsubscribe at any time.
Diana Morrison says
I love this recipe, I make it for the gluten free and vegan people at our church. The chocolate ones are a favourite but I also use this recipe for dates squares and oatmeal cookies. I create a well in the centre of the cookie with my finger and fill it with jam. When they come out of the oven I immediately sprinkle the tops with dairy free chocolate chips and a few minutes later, swirl the chocolate with a fork.
Melanie McDonald says
I'm so pleased you're enjoying the recipe and I'm loving those adaptations! I hadn't thought to use this for date squares. I need to try it. Thanks for the idea!
Rochelle says
Wow are these ever good! I used weight measurements and they turned out perfectly. The filling is amazing, like a decadent chocolate pudding. I have eaten way too many and only kind of regret it. I'll try making them in an 8x8 pan next time as the crust was pretty thick, and it will allow me to cut smaller pieces more easily. Also thinking peppermint in the chocolate might make a nice Christmas version. Thanks for the great recipe!
A Virtual Vegan says
Peppermint in the chocolate would be a great addition! I'm really pleased you enjoyed them!
Emma says
Turned out great! I made mine in an 8 X 8 tin so that the base was a bit thinner.
Also added a sprinkle of extra oats and flour to the topping to give it a bit of extra crunch. :)